Autumn harvest baskets gain a realistic crochet yellow onion in warm mustard gold, and the finished bulb is small enough to tuck into a kid’s bag. Gifting the amigurumi onion to a home cook makes a playful thank you, and the little veggie sits happily on a spice rack.
Tiny vegetables have a habit of vanishing from my craft table into other people’s pockets. This little bulb works up in joined rounds of single crochet, finished with a ruffled skin texture at the crown and brushed cotton roots at the base.
Crochet Onion
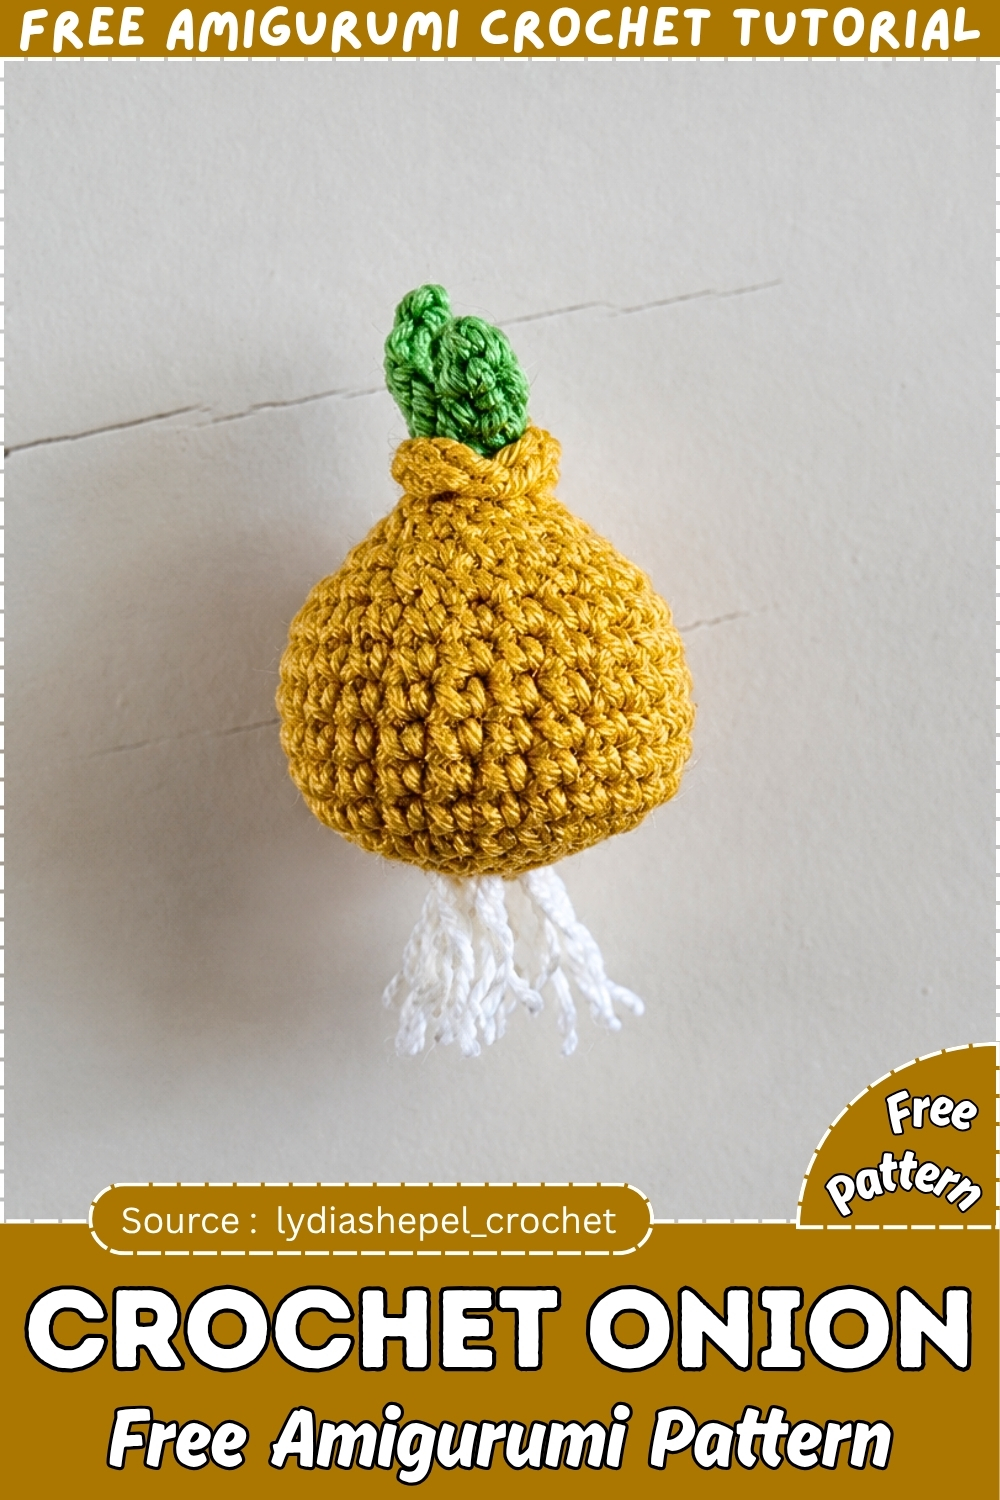
Two green sprouts grow straight out of the closed top, so nothing gets sewn on at the end. Anyone who knows a magic ring and a basic decrease can manage it. It suits a play food basket as easily as a keychain. Expect to finish one in about an hour, roots included, and then to start a second because one onion always looks lonely.
Quick Facts
- Finished size: roughly 3 to 4 cm across and a little taller with sprouts, depending on tension (my estimate, not stated in the pattern)
- Difficulty: easy
- Time: about an hour for one onion, give or take
- Piece count: 3 elements (body, roots and sprouts), with nothing sewn on separately
Colour and Customization Ideas
- Pick the body colour first, since it decides which onion you end up with. A warm golden brown gives the classic yellow onion. Deep plum or burgundy makes a red onion, and it looks even better with pale pink sprouts tucked in beside the green. For a white onion, go with off white and keep the roots a shade darker so they still show.
- Shallots are lovely in a coppery pink. Make three in slightly different colours and pile them into a tiny crocheted basket. You can also give the onion a face for a kawaii version, with embroidered eyes and a little stitched smile sitting just below the skin texture round.
Materials and Tools
- YarnArt Jeans yarn in your chosen onion body colour
- YarnArt Jeans in a light colour for the roots, such as cream, off white or pale beige
- YarnArt Jeans in green for the sprouts
- 1.6 mm crochet hook
- Fiberfill stuffing
- Yarn needle
- Scissors
- A stiff brush for the roots (optional, a yarn needle works too)
No safety eyes or accessories are needed.
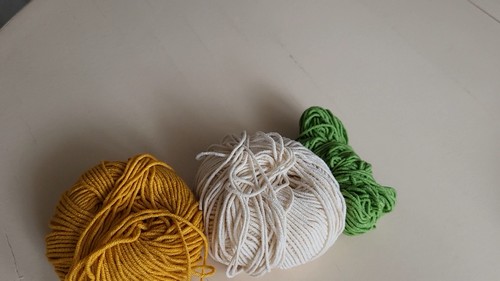
Pieces List
- Onion body: make 1
- Root strands: several lengths, added after round 4 and trimmed at the very end
- Green sprouts: 2, worked as one continuous sequence
Three elements in total. The sprouts are worked straight into the top of the finished body rather than made separately and sewn on. The roots are fringe, not crochet.
Crochet Onion Pattern
Work in joined rounds throughout. Each round ends with a slip stitch into the first stitch of that round, followed by chain 1 before you begin the next round.
Onion Body
- Round 1: Make a magic ring and work 6 single crochet into the ring. Join with a slip stitch, then chain 1. 6 stitches.
- Round 2: Work 1 increase in each stitch around. Join with a slip stitch, then chain 1. 12 stitches.
- Round 3: Work 1 increase, then 1 single crochet. Repeat around. Join with a slip stitch, then chain 1. 18 stitches.
- Round 4: Work 2 single crochet, then 1 increase. Repeat around. Join with a slip stitch, then chain 1. 24 stitches. Shape checkpoint: The piece should lie flat as a smooth, even disc about the size of a large coin. It shouldn’t be bowling yet. If the edges cup upward, your tension is too tight for this hook.
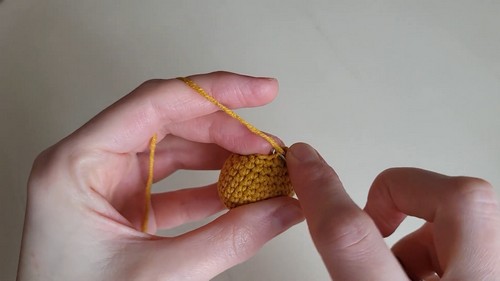
Add the Roots
Do this now, before you start round 5.
- Cut several strands of the light coloured yarn to your preferred root length, leaving extra for fraying and brushing later.
- Fold each strand in half and attach it through the centre stitches of the magic ring with a lark’s head knot or a simple loop and pull.
- Leave all the root strands untrimmed and hanging free. You’ll brush and trim them at the very end.
New to crochet and not sure how to read a pattern yet? The video tutorial below will guide you through it step by step, you’ve got this!
Shape the Body
- Rounds 5 to 10: Work 1 single crochet in each stitch around for 6 rounds. Join with a slip stitch and chain 1 at the end of each round. 24 stitches in each round. Shape checkpoint: By round 8 or 9 the disc should have curved up into a clear bowl, roughly half a sphere, with the roots hanging from what is now the bottom. If the sides are coming up straight instead of curving, check you haven’t slipped in an extra increase.
- Round 11: Work 4 single crochet, then 1 decrease. Repeat around. Join with a slip stitch, then chain 1.
- Round 12: Work 1 decrease, then 3 single crochet. Repeat around. Join with a slip stitch, then chain 1. 16 stitches.
Stuff the Onion
- Fill the body firmly with fiberfill now, while the opening is still large enough to work comfortably.
- Pack the stuffing into the base and sides before adding more to the centre, so the middle doesn’t end up hollow.
- Keep adding stuffing as needed through the closing rounds.
Close the Top
- Round 13: Work 2 single crochet, then 1 decrease. Repeat around. Join with a slip stitch, then chain 1.
- Round 14: Work 1 decrease, then 1 single crochet. Repeat around. Join with a slip stitch, then chain 1. Shape checkpoint: The opening should now be small, about the size of a little coin, and the body should feel firm and keep its round shape when pressed. If it still feels soft, add a bit more stuffing before you go on.
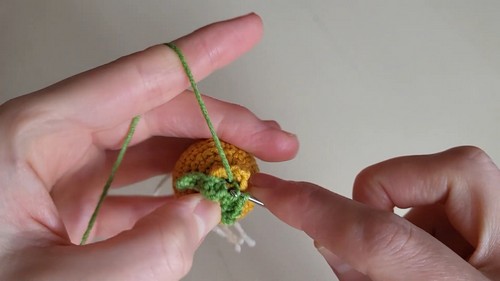
- Round 15 (skin texture): Work in front loops only around. Work 1 single crochet, 1 double crochet, 1 single crochet and 1 slip stitch. Repeat around. Pull the yarn to the back. Chain 1. Leave a long tail for finishing.
Close the Body
- Thread the yarn tail onto a yarn needle.
- Weave the needle through the remaining back loops of round 15.
- Pull tightly to close the opening.
- Secure with a knot and hide the tail inside the onion.
Green Sprouts
Both sprouts are worked in one continuous sequence. Join the green yarn at the centre of the closed top.
First sprout (taller):
- Chain 6.
- Slip stitch into the second chain from the hook.
- Work 1 single crochet in each of the remaining chains.
- Slip stitch back into the centre of the onion.
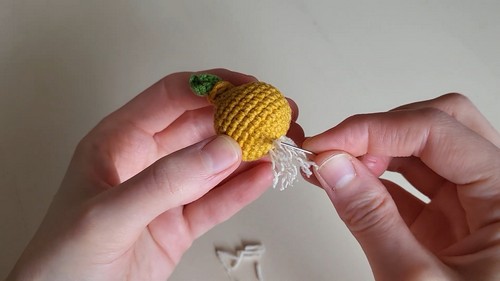
Second sprout (shorter):
- Chain 4.
- Slip stitch into the second chain from the hook.
- Work 1 single crochet in each of the remaining chains.
- Slip stitch into the centre of the onion.
- Secure the yarn, cut it, and hide all the tails inside the body. Shape checkpoint: Both sprouts should stand upright from the same central point. If they lean away from each other, the two anchoring slip stitches landed a stitch or two apart.
Finish the Roots
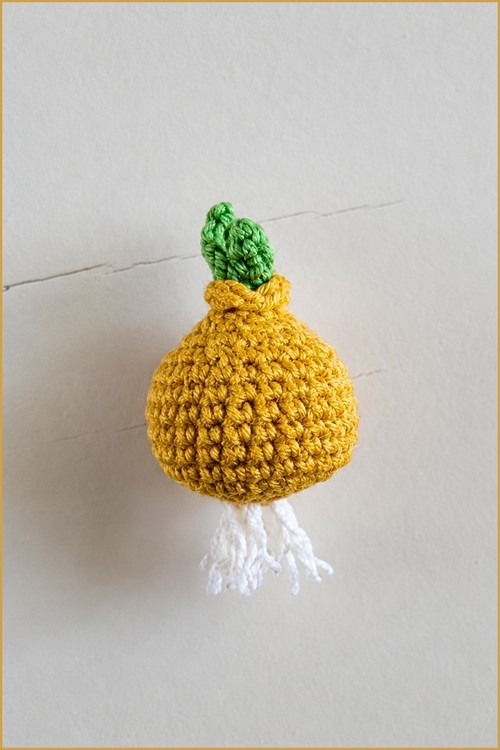
- Trim the root strands to your preferred length. Around 2 to 3 cm looks natural.
- Separate and fray the individual yarn fibres with a yarn needle or a stiff brush.
- Brush gently in one direction to get soft, fluffy strands that look like real onion roots.
Stuffing Guide
- Firm is what you’re after. An underfilled onion loses its round shape within days of handling, and the front loop skin round at the top puckers instead of sitting in neat layers. Work the fiberfill into the curve of the lower half first, then fill the centre. Add the last small pinch during rounds 13 and 14 while you can still reach inside. By round 15 the gap is too small to fit anything through.
- Overfilling shows as stuffing peeking between the stitches, especially in paler body colours like white onion. A 1.6 mm hook makes very dense fabric, so this is less likely than usual. Press the body gently, and if it springs back without the stitches spreading, you’ve got it right.
Assembly
- This onion has no traditional assembly. The roots go in after round 4, the body continues and closes, the sprouts are worked into the top, and the roots get trimmed and brushed last. Nothing needs pinning or sewing.
- The one placement to watch is the sprout anchor. Before joining the green, find the true centre of the closed top and mark it with a pin or a strand of contrast yarn, so both sprouts land in the same spot.
Safety Eyes and Faces
The pattern as written has no eyes. If you’d like a face, add it before the body closes. Safety eyes would go in somewhere around rounds 8 to 10, on the opposite side from where the sprouts will rise, before you stuff at round 12. Once the top is closed you can’t reach the washers. For a child under three, skip safety eyes completely and embroider the eyes in black thread instead.
Toy Safety
The roots are loose fringe, and brushed fibres shed with handling. For a baby or toddler, knot each root strand firmly where it meets the magic ring, or leave the roots off entirely. Give the sprouts a firm tug too, since they’re anchored by slip stitches alone.
Three Tips
- Add the roots before round 5. Real onions grow their roots from a small flat plate at the very base, so crowd the strands into the magic ring rather than spreading them across rounds 2 or 3. That centre is also far easier to reach now than once the body curves in.
- Use invisible decreases throughout. A regular single crochet two together leaves a little bar on the outside, which looks out of place on something meant to read as food. Insert the hook through the front loop of the next stitch, then the front loop of the stitch after, and finish the decrease as usual.
- Trim the roots before you brush them. Cutting after brushing chops the freshly separated fibres and flattens the fluffy look. Get the length right first, then brush from the attachment point out toward the tips.
FAQ
- How big does it come out? Expect something tiny, roughly 3 to 4 cm across on a 1.6 mm hook, though your tension will move that. Going up to a 2 mm hook with the same yarn makes it a bit bigger and a little softer.
- Can I use a different yarn? YarnArt Jeans is a cotton and acrylic blend at around 160 metres per 50 grams, somewhere in the fingering to sport range. Any similar cotton blend on a small hook will behave much the same. Pure acrylic tends to give a slight sheen that reads more like plastic than vegetable.
- Do I need to stuff the sprouts? No. They’re just a few chains with single crochet worked back along them, and the tight tension keeps them standing on their own. Stuffing would only make them thick and awkward.
- Why does my skin texture round look messy? That round mixes short and tall stitches on purpose to build the layered skin. If it looks more like a frilly ruffle, the slip stitches were probably worked loosely, so pull each one snug before moving on.