Beginners get this crochet whale shark without shaping a single fin separately here. The blunt snout is easier than a pointed shark nose, and the white spots work in as you go rather than needing sewing at the end.
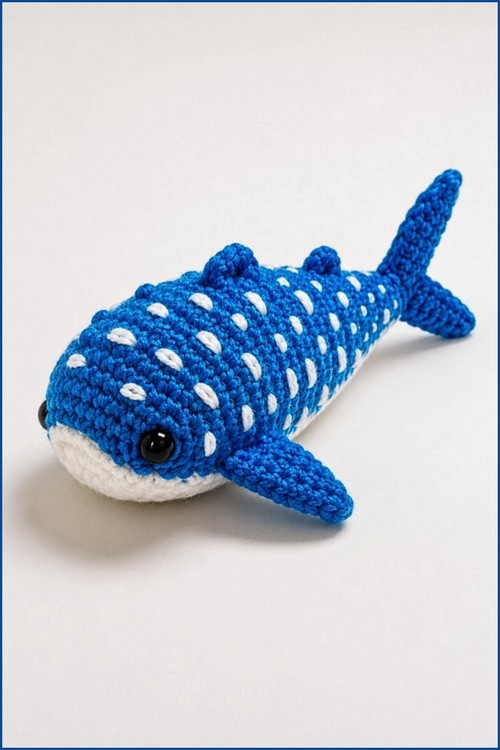
White spots cover the back and sides of this crochet whale shark in staggered rows, each one worked in as a contrast stitch rather than sewn on afterwards. Blue yarn runs from the blunt rounded snout to the tail, a white belly panel curves underneath, and small ridges sit along the spine between the fins. Count your spot placement against the row below as you go, since the pattern reads as random but only holds up if the spacing stays even.
Crochet Whale Shark
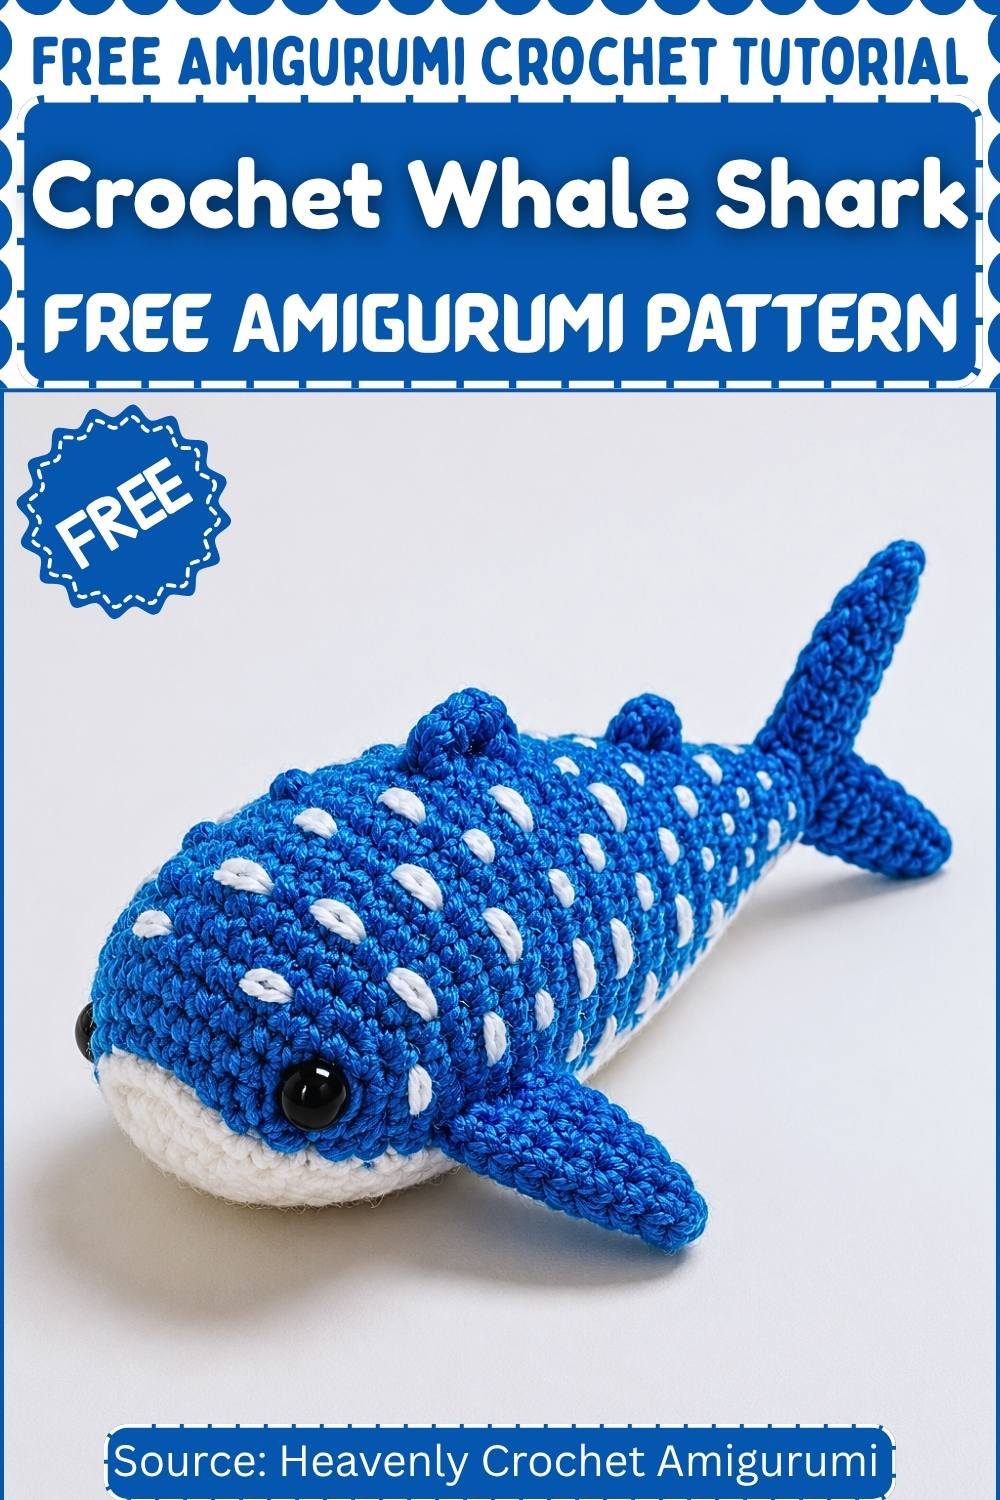
Beautiful ocean textures bring the crochet whale shark pattern free amigurumi pattern to life with charming fins, spotted details, and a soft cuddly shape. This creative crochet design fits perfectly into nursery décor, gift collections, or marine-themed displays while offering an enjoyable crafting experience. Plush yarn and simple shaping techniques help create an adorable sea animal that feels both playful and realistic, making every finished piece wonderfully eye-catching and cozy.
Worked in blue and white yarn with black safety eyes, this free crochet whale shark pattern is suitable for crocheters who are comfortable with basic amigurumi construction. The spot detailing uses surface embroidery rather than color changes mid-round, which keeps the body shaping clean and consistent throughout. All the fins attach separately after the body is complete, so you can adjust placement before committing to sewing them down.
Pieces List
Before starting, here is the full scope of the project. Knowing what you are making helps you plan yarn amounts and decide what to work on first.
- Body × 1
- White Belly Panel × 1
- Top Fin × 1
- Side Fins × 2
- Tail Fins × 2
- Tail Pieces × 2
Total: 9 pieces (5 fins share the same pattern; 2 tail pieces have a separate pattern)
Materials and Tools
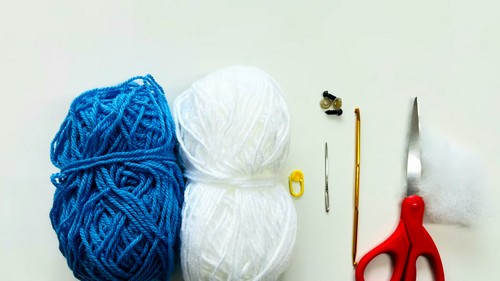
- Blue or grey yarn (worsted weight recommended for beginners)
- White yarn
- Black yarn or safety eyes
- Small amount of white yarn for spot embroidery
- Crochet hook (3.5–4mm for worsted weight)
- Polyester fiberfill
- Yarn needle
- Scissors
- Stitch marker
Abbreviations
- MR — magic ring
- sc — single crochet
- inc — increase (2 sc worked into the same stitch)
- dec — decrease (2 stitches crocheted together into 1)
- st — stitch
- sl st — slip stitch
Beginner Technique Notes
These four techniques come up throughout the pattern. If any of them are new to you, read this section before picking up your hook.
- Magic ring (MR): This is how most amigurumi pieces begin. You make an adjustable loop with your yarn, work the first round of stitches into that loop, then pull the tail to close the hole in the centre. It sounds tricky but becomes fast with practice. If you genuinely cannot get it to work, chain 2 and work your first round of sc into the second chain from the hook — it leaves a small hole but is a perfectly acceptable substitute for beginners.
- Continuous rounds: Amigurumi is crocheted in a spiral, not in joined rounds. You do not slip stitch at the end of each round or chain up. You just keep going. This is why a stitch marker is essential — place it in the first stitch of every round so you know where each new round begins. Move the marker up as you go.
- Invisible decrease (dec): The standard decrease for amigurumi is worked by inserting your hook through the front loops only of two consecutive stitches, then completing the stitch as normal. This creates a flatter, less visible decrease than the standard method. If your decreases look puckered or bumpy, try the front-loop-only version.
Marking the round: Put a stitch marker — a piece of scrap yarn in a contrasting colour works perfectly — into the first stitch every time you start a new round. Remove it, work the round, then replace it in the new first stitch. Without this, it is very easy to lose count of where you are, especially during the long straight rounds.
The Pattern
Fins
All five fins (1 top fin, 2 side fins, 2 tail fins) are made from the same five-round pattern. Make all five before starting the body — this makes it much easier to compare them for size and catch any tension differences while you can still adjust.
- Round 1: MR, 4 sc — 4 sts
- Round 2: inc around — 8 sts
- Round 3: sc around — 8 sts
- Round 4: [1 sc, inc] around — 12 sts
- Round 5: sc around — 12 sts
Shape checkpoint — Round 2: The piece should look like a small flat disc, similar to a button. If it is curling up into a cup shape, your tension is too tight or your hook is too small.
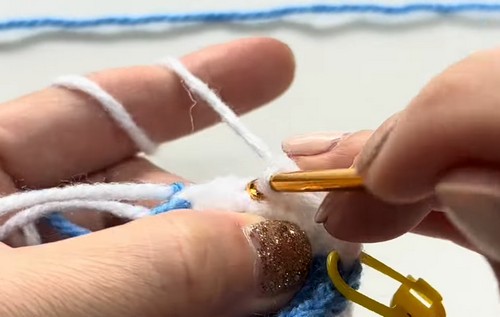
Flatten the fin so the two sides lie flat against each other. Sc across the open edge to close it. Fasten off. Leave longer yarn tails on the fins you plan to sew on — this saves threading the needle separately.
Body
Use blue or grey yarn. Place a stitch marker at the start of every round.
- Round 1: MR, 6 sc — 6 sts
- Round 2: inc around — 12 sts
- Round 3: [1 sc, inc] around — 18 sts
- Round 4: [2 sc, inc] around — 24 sts
- Round 5: [3 sc, inc] around — 30 sts
- Round 6: [4 sc, inc] around — 36 sts
New to crochet and not sure how to read a pattern yet? The video tutorial below will guide you through it step by step, you’ve got this!
Shape checkpoint — Round 6: The piece should be a flat disc, roughly 9–10 cm across. If the edges are turning upward to form a bowl shape, your tension is too tight. If the disc is ruffling outward, your tension is too loose.
- Rounds 7–15: sc around — 36 sts
Shape checkpoint — Round 10: By the middle of the straight rounds, the body should be a tube shape with a clearly domed nose end. The walls should be straight, not flaring outward or pulling inward.
Safety eyes go in between rounds 8 and 9. This is the correct moment — the opening is still wide enough to work comfortably and the body is not yet stuffed. Place one eye on each side of the upper front, slightly wider apart than feels natural. Wider placement gives a softer expression and is more forgiving if one side is slightly off. Once the washer backs are pushed on, they cannot be removed without damage, so check placement carefully before securing. If this toy is for a child under three, do not use safety eyes at all — embroider the eyes instead with black yarn using small satin stitches.
- Round 16: [4 sc, dec] around — 30 sts
- Round 17: sc around — 30 sts
- Round 18: [3 sc, dec] around — 24 sts
Begin stuffing now. Do not wait until the opening is very small. Use pinches of fiberfill and push them toward the nose first, then fill the middle section. See the Stuffing Guide section below.
- Round 19: [2 sc, dec] around — 18 sts
- Round 20: [1 sc, dec] around — 12 sts
- Round 21: dec around — 6 sts
Shape checkpoint — Round 21: The tail end should taper to a blunt close. If the last few rounds look uneven or puckered outward rather than inward, there is too much stuffing near the back end — redistribute it toward the middle before closing.
Fasten off and close the hole.
White Belly Panel
Use white yarn. This piece is worked flat in rows, not in rounds.
- Foundation: Chain 12
- Row 1: sc in 2nd chain from hook, sc across — 11 sts
- Row 2: ch 1, turn, inc, 9 sc, inc — 13 sts
- Rows 3–6: ch 1, turn, sc across — 13 sts
- Row 7: ch 1, turn, dec, 9 sc, dec — 11 sts
- Row 8: dec, 7 sc, dec — 9 sts
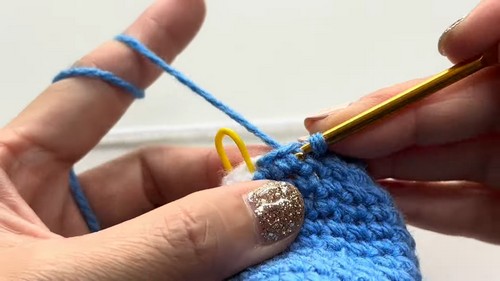
Shape checkpoint — after Row 2: The belly panel should be a slightly wider rectangle than it was after row 1. If it looks identical in width to row 1, recheck the increases.
Fasten off, leaving a long tail for sewing. Pin the belly panel to the lower front of the body before sewing — both ends and the centre. Sew slowly around the edges with your yarn needle, keeping the tension loose enough that the panel lies flat against the curve of the body.
Tail Pieces
Make 2. Use blue or grey yarn.
- Round 1: MR, 4 sc — 4 sts
- Round 2: inc around — 8 sts
- Round 3: [1 sc, inc] around — 12 sts
- Round 4: sc around — 12 sts
Flatten and sc across the opening. Sew both tail pieces to the back end of the body, angling them slightly outward from each other.
Spot Embroidery
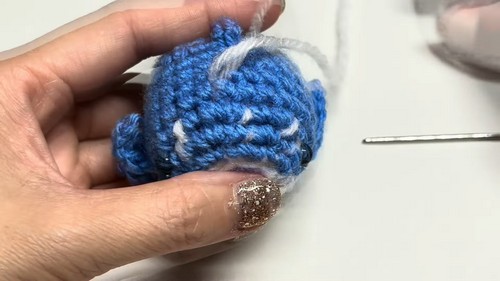
Use white yarn. Embroider small dots and short stitched lines across the top and sides of the body. Real whale sharks have a scattered, uneven spot pattern — the irregularity is the point. Do not space them evenly in rows. Mix small tight dots with a few slightly longer stitches. Keep most of the embroidery on the upper surface, with a few spots trailing down the sides. The belly area stays plain white.
If you want to add a mouth, embroider a short curved line with black yarn across the front lower section of the face.
Assembly Order
- Make sure the body is fully stuffed and closed
- Sew the white belly panel to the lower front — this sets your orientation for all other pieces
- Sew the top fin centred along the upper back of the body
- Sew the side fins at equal heights on both sides, angled slightly backward
- Sew the tail pieces to the back end, angled apart
- Embroider spots last, once everything is attached
Pin every piece before sewing. The most common mistake on this pattern is attaching one side fin higher than the other — view the shark from straight ahead before committing. It takes thirty seconds and saves having to unpick.
Stuffing Guide
Stuff the nose and middle section firmly. This is what gives the whale shark its recognisable wide-bodied shape; underpacking the front makes the head look flat and undefined. Ease off for the final few rounds — decrease stitches are harder to work cleanly when the back end is overpacked, and too much stuffing there creates a lumpy taper rather than a smooth one. The fins and tail pieces are not stuffed. After closing, press the body gently with your hands to redistribute any lumps. Plush or acrylic yarns respond well to light reshaping at this stage.
Toy Safety
Use embroidered eyes for any toy going to a child under three. Weave all ends in thoroughly and trim short. Reinforce fin stitching with an extra pass, especially the side fins and tail pieces, which get handled more than the top fin. Check finished toys periodically for loose seams if they are used as play items rather than display.
FAQ
I have never made a magic ring before. Is it hard? It feels awkward the first few times, but it clicks quickly. The key is holding the loop firmly with your finger and thumb while you work into it. Make a test ring in scrap yarn before starting the actual pattern — by the third or fourth attempt it will feel normal.
My stitch count is off after an increase round. What happened? Count before and after every increase round, not just at the end. If you are working [1 sc, inc] around and lose count of which stitches you have already worked, it is very easy to skip an increase or add one extra. Use a second stitch marker partway through a round to hold your place if needed.
Can I use a different yarn weight? Yes. Going up to bulky yarn with a 5–6mm hook produces a noticeably larger whale shark. Going down to DK or sport weight produces a smaller, denser one. The construction stays the same — only the finished size changes. Just adjust your hook size to match your yarn and check that your fabric is dense enough that stuffing does not show through.
The belly panel is puckering when I sew it on. How do I fix it? Loosen your sewing tension. Curved surfaces and flat panels do not naturally want to lie together, and tight stitching forces puckers. Sew with a relaxed tension and use more anchor pins than you think you need. A small amount of puckering at the very edges is normal and less visible once the piece is photographed.
Do the spots really make a difference? Yes, significantly. Without spots this toy looks like a standard blue fish. With even ten or fifteen scattered white stitches it reads immediately as a whale shark. The spots are quick — they take less time than any of the fins — and the irregularity is what makes them work, so there is no pressure to place them perfectly.
Pattern Note
Row 8 of the belly panel does not include a ch-1 turn instruction, while rows 3–7 each begin with one. This appears to be an omission in the source pattern. Work row 8 the same way as the rows above it: chain 1, turn, then work the two decreases and 7 sc across. The stitch count (9 sts) is correct as written.
Every stitch you put into this one teaches you something that carries forward. Trust the count and take it one round at a time.