Holiday tables gather crochet pinecones among candles and evergreen sprigs every December. Adding a hanging loop turns each one into a tree ornament, and cream, grey or gold yarn makes a neutral set that stays out long after the tree comes down.
Rows of rounded scales overlap from base to tip in this crochet pinecone amigurumi free pattern, giving a solid brown cone the layered look of a real one. Each scale curls slightly outward, and the rows stagger so no gaps show between them. The finished pinecone has an egg shape, wider at the base than at the tip. Choose a yarn with clear stitch definition, because fuzzy yarn blurs the edges of every scale.
Crochet Pinecone Amigurumi
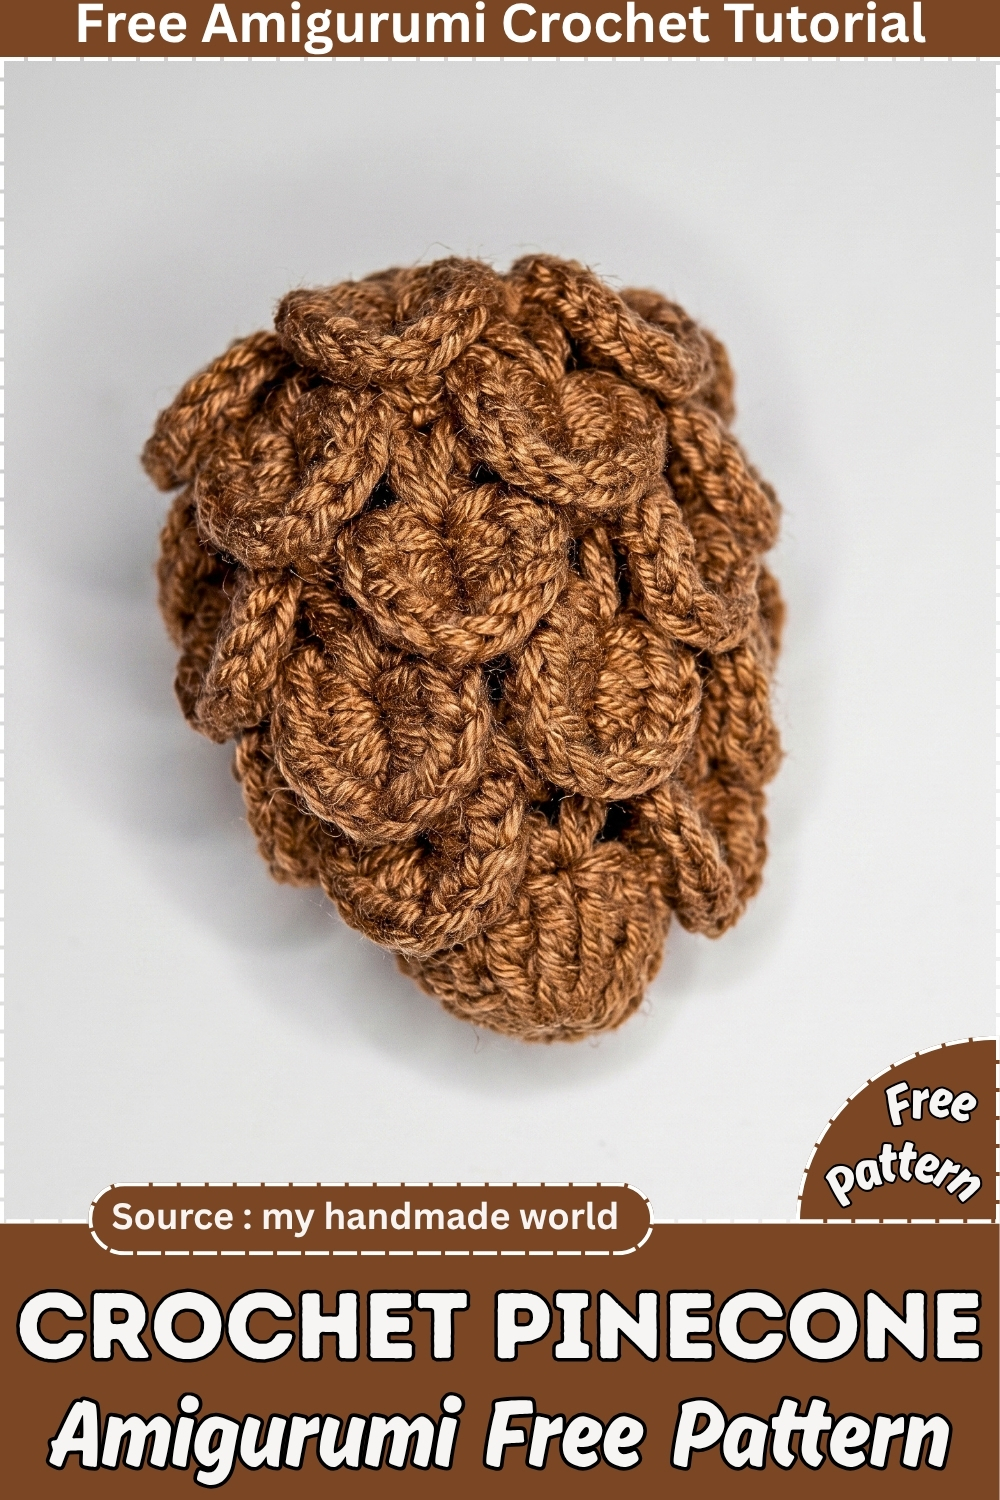
The autumn table was set and something was missing between the candles. Not flowers, which would have wilted by the weekend, and not the ceramic pumpkins that come out every year and look tired by November. A bowl of crocheted pinecones solved it. They photograph well, they survive being knocked over by a cat, and nobody works out they are yarn until they pick one up. Since then I have made them in threes for hostess gifts and tucked single ones into Christmas parcels as an extra. They cost almost nothing in yarn and take an hour each.
Why I Love This One
The scales are built by turning your work mid-round, which is a technique most amigurumi never asks for, and watching that first layer flip into shape is genuinely satisfying.
Materials and Tools
The original calls for a 2.20 mm hook with the yarn left to your choice, which points at crochet thread or a fine fingering weight. Anything heavier will need a bigger hook to match. You will want a blunt yarn needle for weaving ends and small scissors. Fiberfill is optional and depends on how you finish the tip, which I cover further down. Yardage is hard to pin precisely because the scale layers eat more than you expect, but roughly 15 to 20 grams of fine yarn covers a six-row cone. Treat that as an estimate.
Pieces List
One piece, worked continuously from the base ring upward. Nothing to sew together.
- Pinecone body with layered scale rows — make 1
Scale count depends on how many rows you work. The original demonstrates six rows before closing the tip, and you can add more for a taller cone.
Pattern Note
Read this before you start, because the original leaves a lot open. Almost none of the rounds after the first give a stitch count, including every scale row and the entire mesh foundation between them, so you will be counting your own as you go. The first scale is worked with 4 half double crochets on one side and 5 on the other, while every following scale uses 5 and 5. The positioning step also refers back to a 3 chain space when the round before it opened with 5 chains. I have left all of it as written rather than quietly correcting anything.
The Pattern
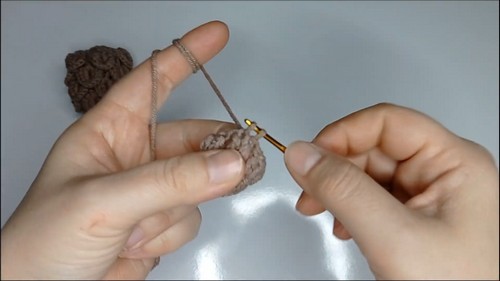
Work with the right side facing unless a step tells you to turn.
Base Ring and Foundation Round
- Make a slip knot and chain 4. Join with a slip stitch into the first chain to form a small ring.
- Chain 4, which counts as part of your foundation.
- Yarn over twice, insert the hook into the centre of the ring, and work a triple crochet, pulling through 2 loops, then 2 loops, then 2 loops.
- Work a total of 11 triple crochets into the centre ring. Join with a slip stitch to the top of the opening chain 4. [11 triple crochets plus the opening chain 4] Checkpoint: a small flat wheel with a visible hole at the middle. It should lie flat on the table, not cup upward. Cupping here means your triple crochets are too short and the whole cone will pinch later.
Second Round: Mesh Base for the Scales
- Chain 3, which counts as your first stitch, then chain 2 more for 5 chains in total.
- Yarn over once, skip the very next stitch, and work a double crochet into the following stitch.
- Chain 1, skip a stitch, and work a double crochet into the next stitch. The original also mentions an optional variation of working two double crochets separated by chains into certain spaces to add structure.
- Continue the pattern of double crochet, chain 1, skip 1 all the way around.
- Chain 1 and slip stitch to close the round. Checkpoint: an open mesh ring of posts and gaps. Count your gaps now and write the number down, because every scale in the next step hangs off one of them and you will need that number again for every row above.
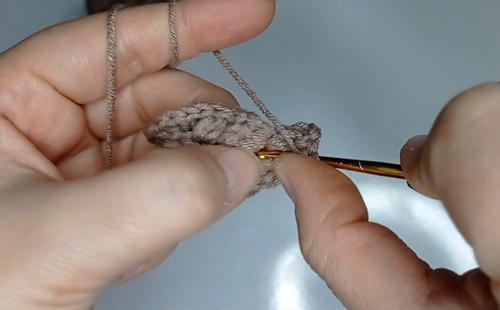
First Layer of Scales
- Slip stitch underneath the opening chain space from the previous round, then chain 2.
- Work 4 half double crochets around that same chain space.
- Chain 1 and turn your work.
- Work 5 half double crochets into the opposite side of the petal base. Checkpoint: the first scale should fold outward and downward on its own, sitting away from the mesh rather than flat against it. If it lies flat, you have worked both sides on the same face instead of turning between them.
- Skip the next space, insert your hook into the following gap, and secure with a slip stitch.
- Move to the next section, work another set of 5 half double crochets, chain 1, turn, work another 5 half double crochets, and slip stitch into the gap.
- Repeat around to complete the first row of scales. Checkpoint: the scales should overlap slightly like roof tiles and all tilt the same direction. Press each one downward with your thumb as you finish it, because crocheted scales want to stand straight out until you train them.
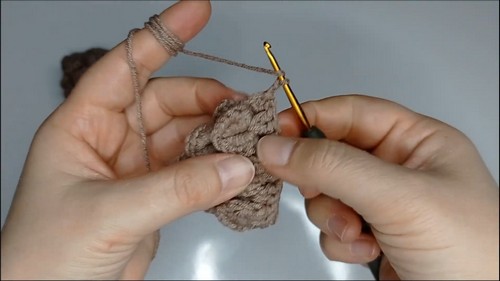
Building the Following Rows
- Chain 3.
- Work double crochets and chain spaces between the existing scales to set up the mesh foundation for the next row of scales.
- Slip stitch to the base, chain 2, work half double crochets, chain 1, turn, and make matching scales around the gaps exactly as in the first layer.
- Repeat for as many rows as you want. The original works up to six rows before closing, and more rows give a taller cone. Checkpoint: each new mesh round should sit slightly narrower than the one below it, hidden behind the scales of the previous row. If you can see the mesh from the outside, your scales are too short or too tightly worked.
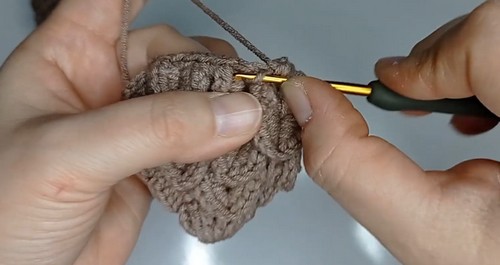
Closing and Shaping the Tip
- Once you reach your final scale row, join it and begin working rounds of single crochet evenly around the top edges.
- Work 1 single crochet, then a decrease made by picking up the front loops of the next stitches together.
- Alternate between 1 single crochet and a decrease around the round.
- Continue with consecutive decreases through front loops only, with no single crochets between them, until the top hole closes completely. Checkpoint: the tip should draw into a firm point rather than a puckered flat spot. Front loop only decreases pull tighter than standard ones, so go slowly and stop before the fabric distorts.
- Fasten off and weave in your ends.
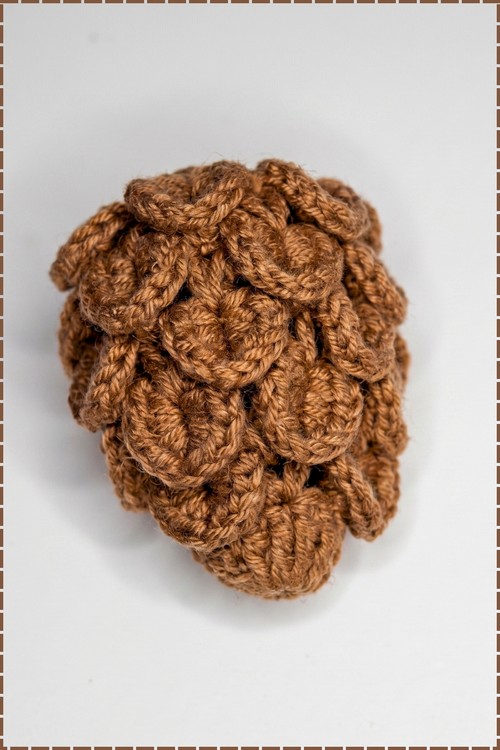
Shaping and Finishing
There is nothing to sew, which means all the shaping happens while you crochet. The single decision worth planning is where you stop. Six rows gives a stubby cone. Eight or nine gives the long narrow shape you see on spruce trees, and the extra rows cost only a few minutes each. Before you start the tip decreases, hold the piece upright and look at the silhouette. If it looks squat, add another scale row. Once the tip closes you cannot go back and add height without unpicking every decrease round you just worked.
Stuffing Guide
The original never mentions stuffing, so this part is my own guidance. The mesh structure holds a natural hollow shape and most makers leave it empty, which keeps the cone light enough to sit on a wreath without pulling it down. If you want firmness, add a small amount of fiberfill through the top opening just before you begin the final consecutive decreases. Keep it light. Stuffing the body fully pushes the scale rows apart and exposes the mesh between them, which is the one thing that stops the piece reading as a real pinecone from a distance.
Troubleshooting
- Scales standing straight out instead of overlapping. Your half double crochets are too loose. Drop a hook size for the scale rows only.
- Mesh visible between rows. Either the scale rows are too far apart or the scales are worked too tightly. Add an extra half double crochet to each side if you want fuller coverage on future rows.
- The base wheel cups instead of lying flat. Check your triple crochet height. Too short and the centre pulls in from round one.
- The tip refuses to close. Front loop decreases leave the back loops loose. Weave the tail through the remaining back loops and pull gently to gather them.
- Cone leans to one side. Your scale rows started from a different gap position each row. Line up the starting point of each row directly above the one below.
Yarn Substitution and Size Scaling
Fine yarn on a 2.20 mm hook produces a small cone, likely somewhere around 5 to 7 cm tall at six rows. That is an estimate rather than a stated size, and scale row height varies a lot between makers. Move up to DK on a 3.5 mm hook and you roughly double every dimension, which suits a mantelpiece bowl. Cotton thread is the better choice for realism because the scales hold their downward tilt crisply. Acrylic goes soft and the scales flop within a few weeks of handling. Wool sits between the two and blocks beautifully.
Colour and Customization Ideas
Brown to tan works, but the natural gradient is more interesting. Start the base rows in a dark chocolate and shift lighter with every scale row so the tip is almost cream. Snow-tipped versions come from working the final two rows in white. Green makes a small tree. Gold or copper thread turns them into ornaments, and a hanging loop chained from the closed tip takes thirty seconds. Some makers work each scale row in a slightly different shade of the same colour family, which reads as depth rather than stripes when you step back.
Safety
There are no safety eyes in this project and nothing plastic anywhere, which makes it one of the simpler pieces to hand over to a child. Two things still matter. Weave every end in for a good few centimetres and bury it inside the body rather than trimming it flush at the surface, because the mesh structure lets short ends work loose faster than solid amigurumi does. If you add a hanging loop, sew it with doubled yarn. And if you use metallic thread anywhere, keep the finished cone away from children under three, since those threads shed fine strands.
FAQ
- How many rows should I actually do? Six is what the original demonstrates and it gives a good short cone. I usually go to eight because real pinecones are longer than people remember. Just decide before you start the tip decreases, since adding height afterwards means unpicking.
- Why turn the work in the middle of each scale? That turn is what makes the scale three dimensional instead of flat. Working both sides of the same chain space from opposite directions forces the stitches to curve outward. Skip the turn and you get a lumpy disc.
- Can I use a bigger hook to speed it up? Yes, but go up in yarn weight at the same time. A large hook with fine thread makes the mesh loose and the whole cone collapses, since the mesh rounds are the only thing holding the structure upright.
- Do I need to block it? Not for acrylic, which will not hold a block anyway. Wool and cotton both benefit from a light steam over the scales to set the downward tilt. Hold the iron above the piece rather than touching it.