Window ledges hold crochet Christmas lanterns all through Advent, with no flame to watch. Yellow in place of the white panels makes each lantern look lit, and red, green and white scraps cover a whole lantern set for the tree or mantel.
Red frames around white panels, each crossed by thin red bars like window panes, give the two lanterns in this crochet Christmas lantern pattern free amigurumi their shape. A green domed roof with a white rim tops each one, followed by a red ring, a small green knob and a white hanging loop. Ridged red sides and a green base finish the body. Stuff the body firmly before attaching the roof, since a soft lantern bends where the loop carries its weight.
Crochet Christmas Lantern Amigurumi
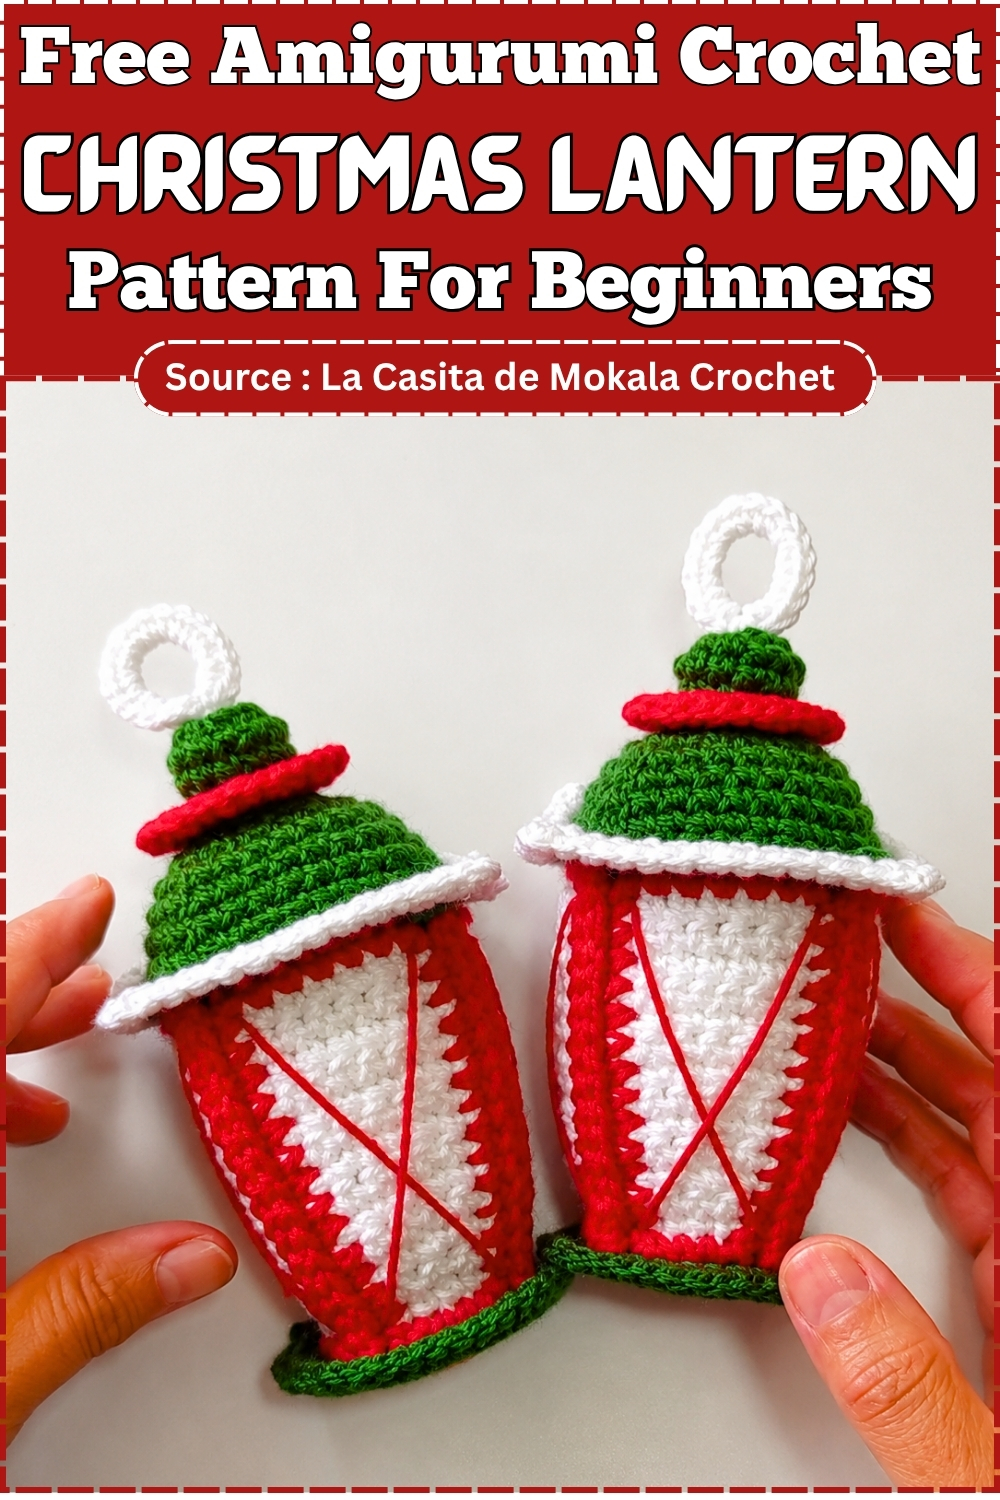
A four-panel hanging lantern worked flat and then seamed into a trapezoid box, finished with a pitched green roof and a white loop for hanging. It suits crocheters who already work comfortably in rows and rounds and want a structural make rather than a creature. There is no shaping intuition required. What it does demand is patience with seaming, because four separate panels have to line up cleanly before anything looks like a lantern. Budget an evening for the panels and a second session for the roof. Hang it on a tree, a door handle, or a shelf edge.
Materials and Tools
The original calls for two-strand 100% acrylic at roughly 2 mm thickness in white for the panel bases, red for the borders and lower base, and green for the overhangs and roof. Colours are yours to change. You will also need a 3 mm hook, good quality siliconized fiberfill, a blunt yarn needle and scissors. A pair of tweezers or small pliers helps enormously when pushing stuffing into the narrow roof point. Yardage estimates are approximate rather than pattern-stated, but around 40 grams total across all three colours covers a lantern this size comfortably.
Pieces List
Nine components in total, though several are worked directly onto the assembled lantern rather than made separately.
- White trapezoid panels — make 4
- Red border round on each panel — worked onto all 4 panels
- Green bottom overhang — worked onto the assembled body, 1
- Red base cap — make 1
- Green roof — worked onto the top of the assembled body, 1
- Green and white top overhang trim — worked onto the roof, 1
- Red decorative collar band — make 1
- White hanging loop — make 1
- Red embroidered crosses — 4, one per panel
Pattern Note
Read this first, because several sections of the original leave counts open. The red base cap gives a magic ring of 4 and a triple increase to 12, then row 3 is written as an open sequence with no final total, so you cannot tell how many stitches you should end on. The green bottom overhang and the roof decrease rounds are the same. They describe where to increase or decrease but never state the resulting count. I have written them exactly as given rather than inventing numbers. Count your own stitches at each stage and write them down.
The Pattern
Rows are worked flat with a turning chain unless stated otherwise. Rounds are worked continuously.
The Four Lantern Panels (Make 4)
- Make a slip knot and chain 5.
- Row 1: Work 4 sc starting in the second chain from the hook. Chain 1 and turn. [4]
- Row 2: Work 4 sc. Chain 1 and turn. [4] Checkpoint: a small rectangle, not yet tapered. If it already looks wider at one end, you worked into the turning chain by mistake.
- Row 3: 1 sc, 1 inc, 2 sc. Chain 1 and turn. [5]
- Rows 4 and 5: Work 5 sc in each row. [5]
- Row 6: 2 sc, 1 inc, 2 sc. Chain 1 and turn. [6]
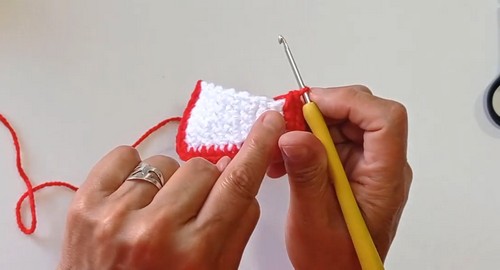
- Rows 7, 8 and 9: Work 6 sc in each row. [6] Checkpoint: the taper should be visible now, one narrow end and one wider end. The single increase per shaping row sits roughly in the middle, so the edges slope evenly on both sides.
- Row 10: 2 sc, 1 inc, 3 sc. Chain 1 and turn. [7]
- Rows 11 and 12: Work 7 sc in each row. [7] Checkpoint: a clean trapezoid. Lay all four panels on top of each other before you go further. Any panel that is a row short or a stitch off will pull the finished box crooked, and it is far easier to redo one panel now than to unpick a seam later.
- Cut a short tail, chain 1 and fasten off.
Red Border on Each Panel
- Work a round of sc all the way around the panel edge, working a triple increase of 3 sc into the same stitch at each of the four corners.
- Close each panel with an invisible join and weave the loose ends in.
- Common snag here: if the corners cup instead of sitting square, your triple increases are landing one stitch in from the actual corner point. Slide them out to the true vertex and the panel will lie flat.
Joining the Panels
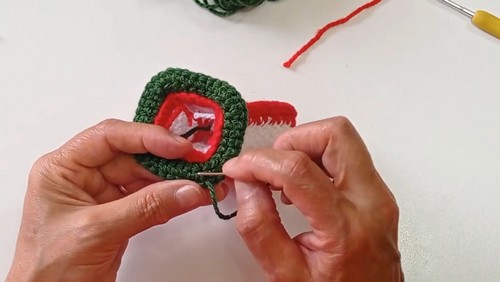
- Hold the panels together in pairs with wrong sides facing.
- Join them along the side edges with tightly worked slip stitches.
- Continue until all four are joined into the three dimensional trapezoid lantern body. Checkpoint: stand it on a table. It should sit square with the narrow ends all at the top. Loose slip stitches show as gaps along the vertical seams, so keep them snug and consistent rather than fast.
Green Bottom Overhang
- Work around the lower edge stitches, picking up only the front loop of each stitch.
- Round 1: Work 1 sc in each central stitch, with increases at the corners.
- Round 2: Work through both loops, making 2 increases at each corner and single sc along the sides. Close with an invisible join. Checkpoint: this should flare outward like a small skirt, sitting proud of the lantern wall rather than hugging it. If it lies flat against the body you are missing corner increases.
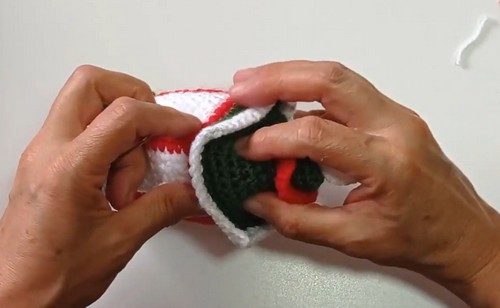
Red Base Cap
- Round 1: Make a magic ring with 4 sc. [4]
- Round 2: Work a triple increase of 3 sc into every stitch. [12]
- Round 3: Work 1 sc, 1 triple increase, 2 sc, 1 triple increase, repeating the sequence around and closing with an invisible join.
- Sew this red base underneath the lantern, keeping the green overhang as the outer visible finish.
- Watch for ruffling on round 3. Triple increases at close intervals grow fast, and if the disc starts waving instead of lying flat, spread the increases further apart on your next attempt rather than adding rounds.
Green Roof
- Attach green yarn to the top edge of the panels, leaving the front loop free for later, and work an opening round of 36 sc. [36]
- Round 2: Work 36 sc through the back loop only. [36] Checkpoint: a defined ridge should appear where the back loop round sits. That ridge is what the top trim hangs off later, so do not lose track of the free front loops.
- Rounds 3 to 5: Work in a spiral, making invisible decreases at the four corners on every round to build the sloped four-sided roof shape.
- Rounds 6 to 8: Keep decreasing evenly until the stitches close in, adding a light amount of fiberfill as you go. Fasten off by closing the top ring. Checkpoint: the roof should be pitched and firm at the peak, not domed. Domed usually means the decreases wandered off the corner lines, so keep a marker on all four corners as you spiral.
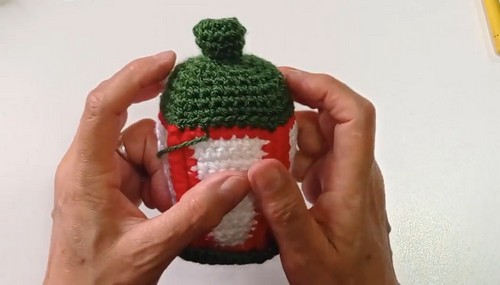
Top Overhang Detail
- Pick up the free front loops left from the first round of the green roof.
- Work a round of sc, using half double crochet increases at the corners.
- Finish with a round in white that includes small picot stitches at each corner point.
- The picots pull the white round tight if you work them too firmly, so keep that final round relaxed and the corners will stay pointed instead of curling under.
Red Collar Band
- Chain 13.
- Work 12 sc back along the chain. [12]
- Next row: Work an increase in every stitch. [24]
- Wrap the strip around the top peak of the lantern like a collar and sew it in place.
White Hanging Loop
- Make a ring of 10 chains joined into a circle.
- Fill the inside of the ring with roughly 18 to 19 sc.
- Sew firmly to the apex of the lantern, above the red collar. Checkpoint: tug it hard before you trim the tail. This loop carries the whole weight of the piece.

Embroidered Crosses
- Using a finer strand of red yarn, embroider crossed diagonals on each panel, running from the lower corners up to the upper corners.
- Knot the ends securely on the inside.
- Keep the tension of these lines even. Pulled too tight, the diagonals dent the panel inward and the lantern loses its box shape from a distance.
Assembly
Order matters more than usual here because most parts are worked directly onto the body. Panels first, then borders, then the four-way seam. Only once the box stands square should you touch the base or the roof. Pin the panels together with locking stitch markers before slip stitching, matching corner to corner rather than working from one end and hoping. The red base cap gets sewn on last at the bottom, tucked under the green overhang. The collar and hanging loop go on after the roof is fully closed. Cross embroidery is genuinely the final step.
Stuffing Guide
This is a hollow structure, so almost none of it gets stuffed. The only place fiberfill goes is the roof, added lightly through rounds 6 to 8 as the decreases close the peak. Use tweezers to feed small pinches in rather than pushing a wad through the shrinking hole. Keep it soft. The roof only needs enough filling to stop the point collapsing inward, and over-stuffing shows immediately as bulging between the four sloped faces. The lantern body stays completely empty, which is what lets light pass through if you sit it over a battery tealight.
Eyes and Child Safety
There are no eyes in this pattern, so nothing needs placing before a piece closes. That said, the finished lantern is often hung within reach of small children, so a few things are worth doing. Sew the hanging loop with doubled yarn and go around the join twice. Knot the embroidered cross ends deep inside the body where fingers cannot reach them. Never use a real candle or a wired light inside an acrylic piece. A battery tealight is the only safe option, and even then it should not sit inside a lantern given to a child under three.
Yarn Substitution and Size Scaling
The original combination of fine two-strand acrylic on a 3 mm hook produces a small hanging ornament, likely somewhere around 10 to 13 cm tall including the loop. Treat that as an estimate, since row gauge on flat sc varies a lot between makers. Move up to DK on a 3.5 mm hook and every dimension grows by roughly a third, which makes a good shelf piece rather than a tree ornament. Cotton is the better substitute here because the panels hold their edges crisply and the box keeps its corners. Acrylic stays softer and the walls bow slightly.
Colour and Customization Ideas
Swap the green roof for deep navy and the red trim for silver and the whole thing reads as a winter street lamp instead. White panels with pale grey borders make a Nordic version. Work the panels in a variegated yarn and skip the embroidered crosses, since busy yarn fights with the diagonal lines. A gold metallic thread carried alongside the white for the picot round catches light nicely. Some makers work a fifth panel in a contrast colour to create a visible door. Sewing a small bell inside the roof before you close it adds sound without adding weight.
FAQ
- Do I need to line the panels with anything to keep them square? No, the red border round does that job. The triple increases at the corners stiffen each vertex enough to hold shape, provided you worked them tightly. If your lantern still slumps, your border tension was loose rather than the panels being wrong.
- Can I put a light inside? Only a battery tealight, and only a flameless one. Acrylic yarn melts rather than burns, which is worse in some ways. Sit the lantern over the light rather than trapping the light inside a sealed base if you want to be able to switch it off.
- What if my roof does not reach 36 stitches? Count the top edge of your assembled body before you start the roof. If it comes to a different number, adjust your opening round to match your actual edge rather than forcing 36 in. Then keep the corner decreases on the four seam lines and the shape will still work out.