Ocean animal collections need a crochet hammerhead shark to break up the usual dolphins and whales. One ball of grey covers the body, and the wide head is a separate piece joined on at the end.
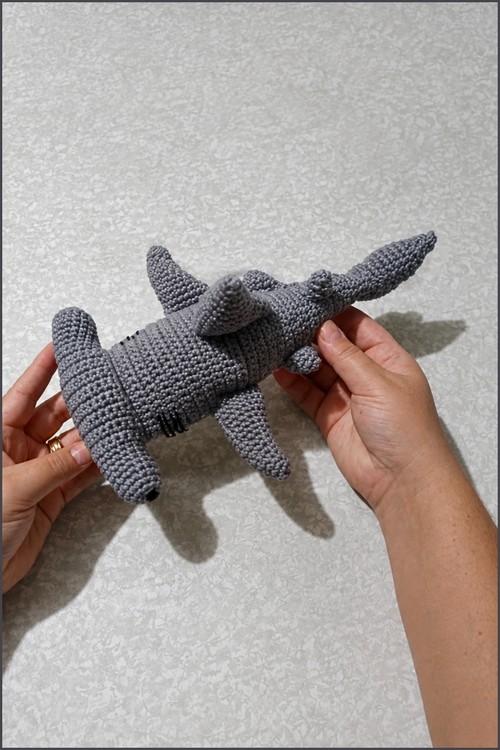
Two wide lobes extend sideways from the snout on this crochet hammerhead shark, each one carrying a black eye right at its outer tip. Grey yarn runs across the whole body, the head piece joins to the front of a tapered torso, and the dorsal fin, side fins and tail attach separately. Stuff the head lobes evenly, because uneven filling tilts the hammer to one side and the eyes stop lining up.
Crochet Hammerhead Shark
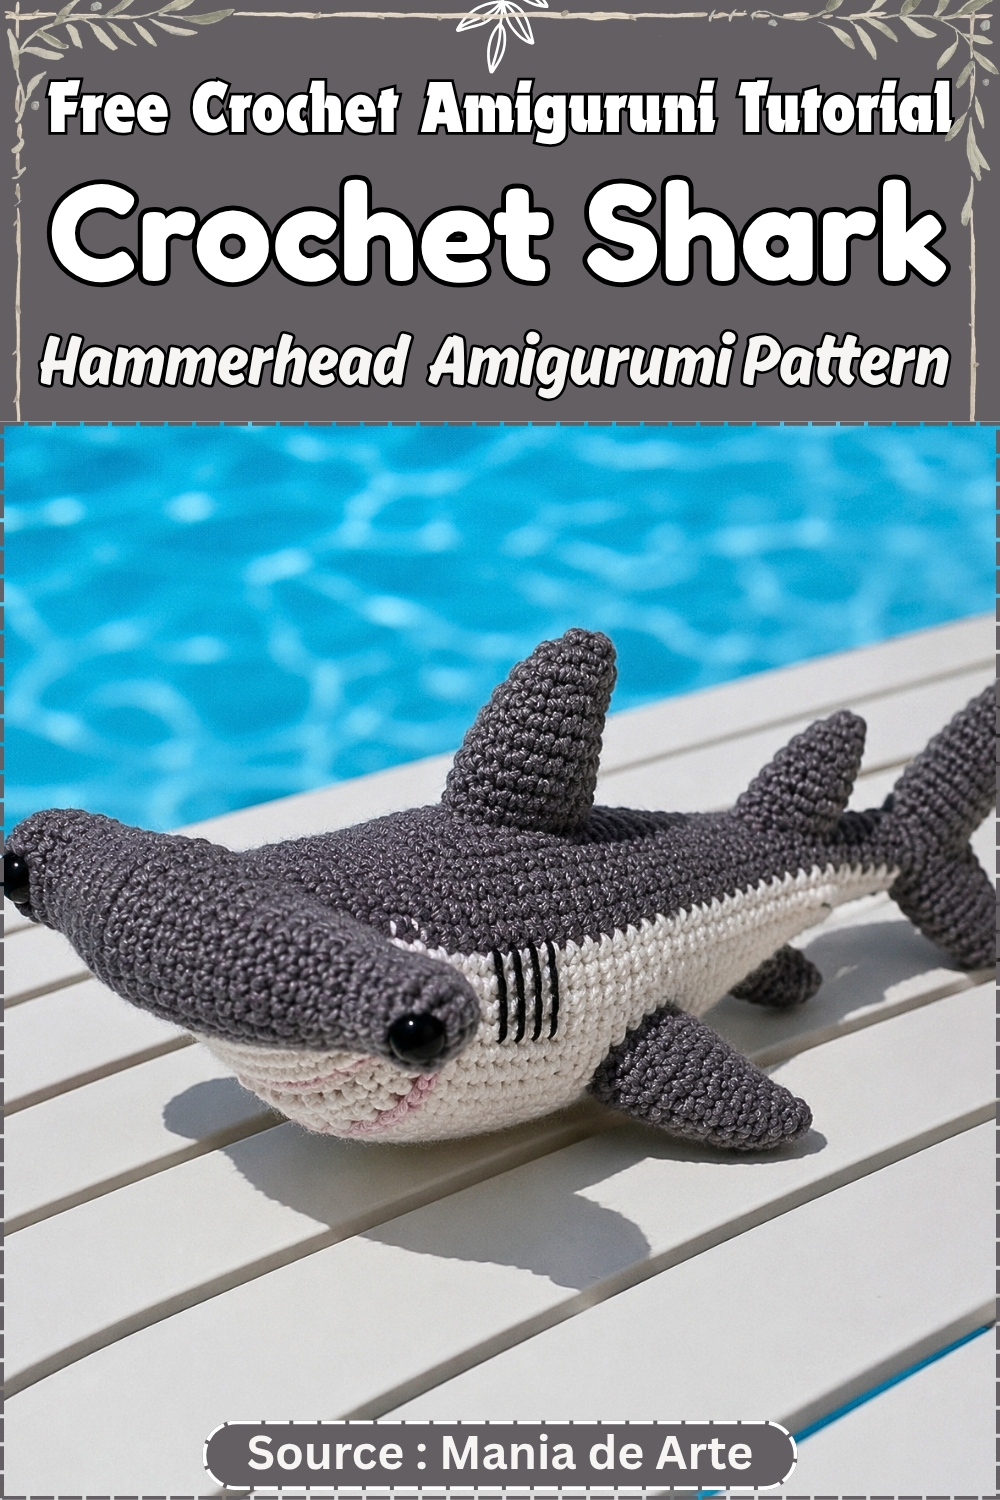
Before you start, here is everything this shark is made of. Knowing the scope upfront helps you plan your yarn amounts and decide what to work on in which order.
- Body × 1
- Hammer Head × 1
- White Belly Patch × 1
- Top Fin × 1
- Side Fins × 2
- Tail Fins × 2
Total pieces: 8
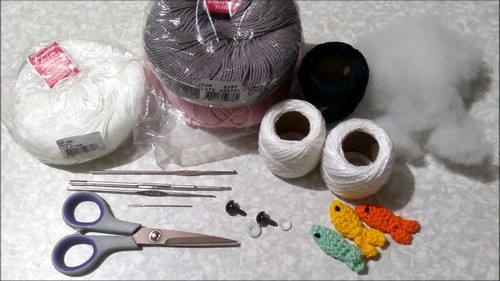
Materials and Tools
- Grey yarn (worsted weight recommended)
- White yarn
- Black yarn (for embroidered eyes or mouth) or safety eyes
- Crochet hook sized to your yarn (typically 3.5–4mm for worsted)
- Polyester fiberfill
- Yarn needle
- Scissors
- Stitch marker
Abbreviations
- MR — magic ring
- sc — single crochet
- inc — increase (2 sc in the same stitch)
- dec — decrease (invisible decrease recommended)
- st — stitch
- sl st — slip stitch
Approximate Specs
These are estimates based on worsted weight yarn and a 3.5mm hook. Your finished size will shift with yarn weight and tension.
- Finished size: approximately 15–18 cm / 6–7 inches from nose to tail
- Difficulty: intermediate beginner
- Time: approximately 4–6 hours across all pieces
Quick Note on Safety Eyes
If this shark is going to a child under three, skip the safety eyes entirely and embroider both eyes with black yarn instead. Safety eyes can become a choking hazard if they work loose. For older children and display pieces, safety eyes placed at the correct time (see Eye Placement section) are fine. The key rule: safety eyes must go in before the piece is closed and stuffed. Once the opening is closed, you cannot get them in cleanly.
The Pattern
Work in continuous rounds unless told otherwise. Use a stitch marker to track your round starts.
Body
Use grey yarn.
- Round 1: MR, 6 sc — 6 sts
- Round 2: inc around — 12 sts
- Round 3: [1 sc, inc] around — 18 sts
- Round 4: [2 sc, inc] around — 24 sts
- Round 5: [3 sc, inc] around — 30 sts
- Rounds 6–14: sc around — 30 sts
- Round 15: [3 sc, dec] around — 24 sts
- Round 16: sc around — 24 sts
- Round 17: [2 sc, dec] around — 18 sts
If you’re new to reading crochet patterns, don’t worry, just follow along with the video tutorial below and use the written pattern as a reference!
Shape checkpoint — Round 6: The body should be a rounded disc shape with a clear dome on top. If it looks flat, your tension is too loose. If the edges are curling inward sharply, it’s too tight.
Shape checkpoint — Round 14: By now you have a smooth tube roughly 4–5 cm tall. The sides should be vertical, not flaring outward. This is the widest section of the shark.
- Begin stuffing at this point. Use small amounts of fiberfill worked in gradually.
- Round 18: [1 sc, dec] around — 12 sts
- Round 19: dec around — 6 sts
- Fasten off and close.
Shape checkpoint — Round 19: The tail end should taper to a blunt point. If the body looks lumpy or misshapen, the stuffing is uneven — redistribute before you close.
- Stuffing notes for the body: Stuff the lower half firmly so the shark holds its round belly shape when placed on a surface. Ease off near the closing end — overstuffing the top third makes Round 19 nearly impossible to close neatly. Use small pinches of fiberfill for the smoothest result.
Hammer Head
Use grey yarn.
- Foundation: Chain 16
- Round 1: sc in 2nd ch from hook, 13 sc, 3 sc in last ch, work back along other side: 13 sc, inc — 32 sts
- Round 2: sc around — 32 sts
- Round 3: 6 sc, inc, 16 sc, inc, 8 sc — 34 sts
- Rounds 4–5: sc around — 34 sts
Shape checkpoint — Round 1: After the first round, the piece should look like a long, narrow oval. The 3 sc at the far end create a slight widening there. If both short ends look identical, recount — one end needs more stitches.
Shape checkpoint — Round 5: This should be a flat, slightly widened oval tablet shape, approximately 7–8 cm at its longest. It should not curl up at the edges significantly.
- Stuff lightly. Fasten off, leaving a long tail for sewing.
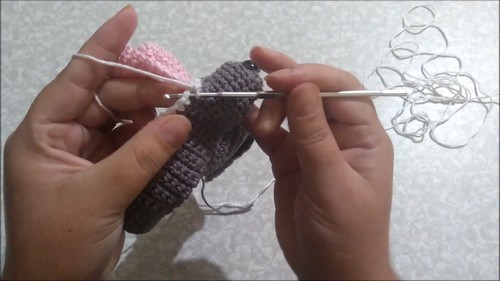
- Sew the head across the front and top of the body, centred, with both long sides extending equally to each side.
White Belly Patch
Use white yarn.
- Foundation: Chain 8
- Row 1: sc in 2nd ch from hook and across — 7 sts
- Row 2: inc, 5 sc, inc — 9 sts
- Rows 3–6: sc across — 9 sts
- Row 7: dec, 5 sc, dec — 7 sts
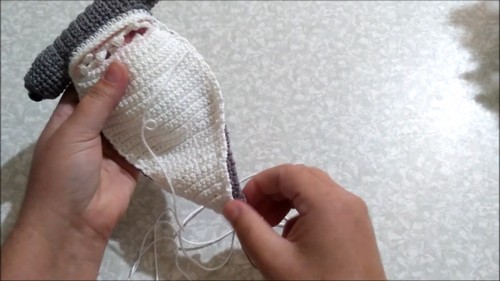
Fasten off. Sew onto the lower front of the shark body.
Top Fin
Use grey yarn.
- Round 1: MR, 4 sc — 4 sts
- Round 2: [1 sc, inc] around — 6 sts
- Round 3: [2 sc, inc] around — 8 sts
- Round 4: sc around — 8 sts
Flatten the fin and sc across the open edge to close. Sew onto the top centre of the body, positioned slightly behind the hammer head.
Side Fins
Make 2. Use grey yarn.
- Round 1: MR, 4 sc — 4 sts
- Round 2: inc around — 8 sts
- Rounds 3–4: sc around — 8 sts
Flatten and sc across the open edge. Sew one fin to each side of the body at the same height, angled slightly downward.
Tail Fins
Make 2. Use grey yarn.
- Round 1: MR, 4 sc — 4 sts
- Round 2: [1 sc, inc] around — 6 sts
- Round 3: [2 sc, inc] around — 8 sts
- Round 4: sc around — 8 sts
Flatten each piece. Sew both to the back end of the body in a V shape, angled slightly apart from each other.
Eyes
- Position one eye near each outer end of the hammer head, slightly outward from centre. This placement is what makes it read as a hammerhead rather than a regular shark — the eyes should feel far apart.
- Safety eye option: Attach before fully closing and stuffing the hammer head. They must be secured before the piece is closed.
- Embroidered eye option: Use black yarn after the head is complete. Make a small cluster of satin stitches in a round shape.
Mouth
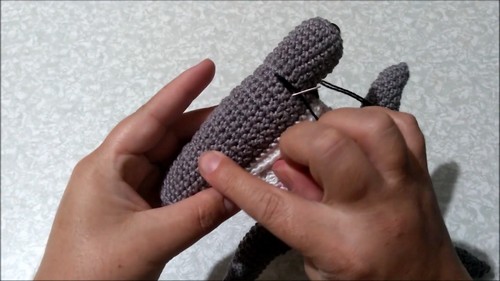
Use black yarn. Embroider a small curved smile on the lower front of the hammer head. Keep it subtle — a few short stitches in a gentle arc. Test placement with a pin before committing.
Assembly Order
Getting the assembly sequence right matters more on this one than on a basic round amigurumi, because the hammer head defines the whole look.
- Complete and stuff the body
- Complete and lightly stuff the hammer head — attach eyes now if using safety eyes
- Sew the hammer head onto the front/top of the body, centred and level. Pin both ends to check symmetry before sewing. This is the most important placement call in the whole project
- Sew the belly patch onto the lower front
- Sew the top fin along the centre top, behind the head
- Sew both side fins at matching heights on either side
- Sew both tail fins to the back end in a V
- Embroider the mouth last
Pin every piece before final stitching. The hammer head especially — one side sitting lower than the other is very visible once the yarn is in.
Troubleshooting
- The hammer head looks lopsided after sewing. Almost always a pinning issue rather than a pattern issue. Remove and re-pin before you start sewing next time, checking from the front at eye level.
- The body won’t close neatly at Round 19. There is too much stuffing near the top. Pull some out, redistribute to the middle, and try again.
- The belly patch is puckering. You are pulling the sewing yarn too tight. Use a looser tension when attaching flat pieces to a curved surface.
- The fins won’t stay upright. Flattening and sc-closing the fin edge first (as the pattern calls for) should help considerably. Make sure you’re sewing through both the fin base and the body firmly.
- The eyes look off-centre on the hammer head. Place them further out toward the tips than feels natural. On a hammerhead shape, eyes that look centred when you hold them up will look too close together once the head is attached to the body.
Yarn Substitution and Size Scaling
Any smooth yarn works for this pattern. The stitches need to be readable, so avoid anything too textured or fluffy for your first attempt. To scale up, go to bulky weight yarn with a 5–6mm hook — expect a finished shark roughly 25 cm long. To scale down to mini size, use fingering weight with a 2.5mm hook, but the hammer head construction becomes quite fiddly at that scale. Acrylic yarn is easiest to block and holds its shape well for the body.
Colour and Customisation Ideas
The grey-and-white version is the classic read, but this silhouette handles colour well. A pale teal body with a cream belly reads as an oceanic illustration toy. Deep navy with silver-grey fins leans dramatic. For a nursery-friendly softened version, dusty rose or sage grey works surprisingly well — the hammer head shape is distinctive enough that the toy reads as a shark even in non-shark colours. You can also embroider small dot patterns or stripes across the body for a decorative look.
Toy Safety
- Use embroidered eyes for children under 3
- Reinforce all fin attachments — the tail and side fins get the most handling
- Trim all yarn ends short and weave in thoroughly, ideally twice
- Check the hammer head attachment periodically on a well-loved toy
FAQ
What yarn weight works best for this pattern? Worsted weight is the easiest starting point. It gives a finished shark that is a good hand-size and the stitches are easy to count. You can use DK, but size down your hook by about 0.5mm to keep the fabric dense enough that the stuffing doesn’t show through.
I’ve never worked from a chain foundation before. Is this hard? The hammer head starts with a chain rather than a magic ring, which feels different but isn’t difficult. You crochet along one side of the chain and then come back along the other side — think of it like crocheting around an oval outline. The piece will sit a little awkwardly until you’ve done a couple of rounds, then it settles into shape.
Can I make this without safety eyes? Yes, and the embroidered version looks great on this pattern. Use black yarn and satin stitch a small oval or circle on each side of the head. The slightly wonky handmade look actually suits amigurumi well.
How do I keep the tail fins from drooping? Sew them at a slight upward angle rather than straight across the back of the body. The V arrangement looks better in photos and holds its shape longer than a flat horizontal attachment.
This is my first time making multiple fins. Any advice for keeping track? Make all the fins before you attach any of them. Lay them out next to the body to compare size and shape before sewing. It is much easier to spot a fin that came out too small when you can see all of them side by side.