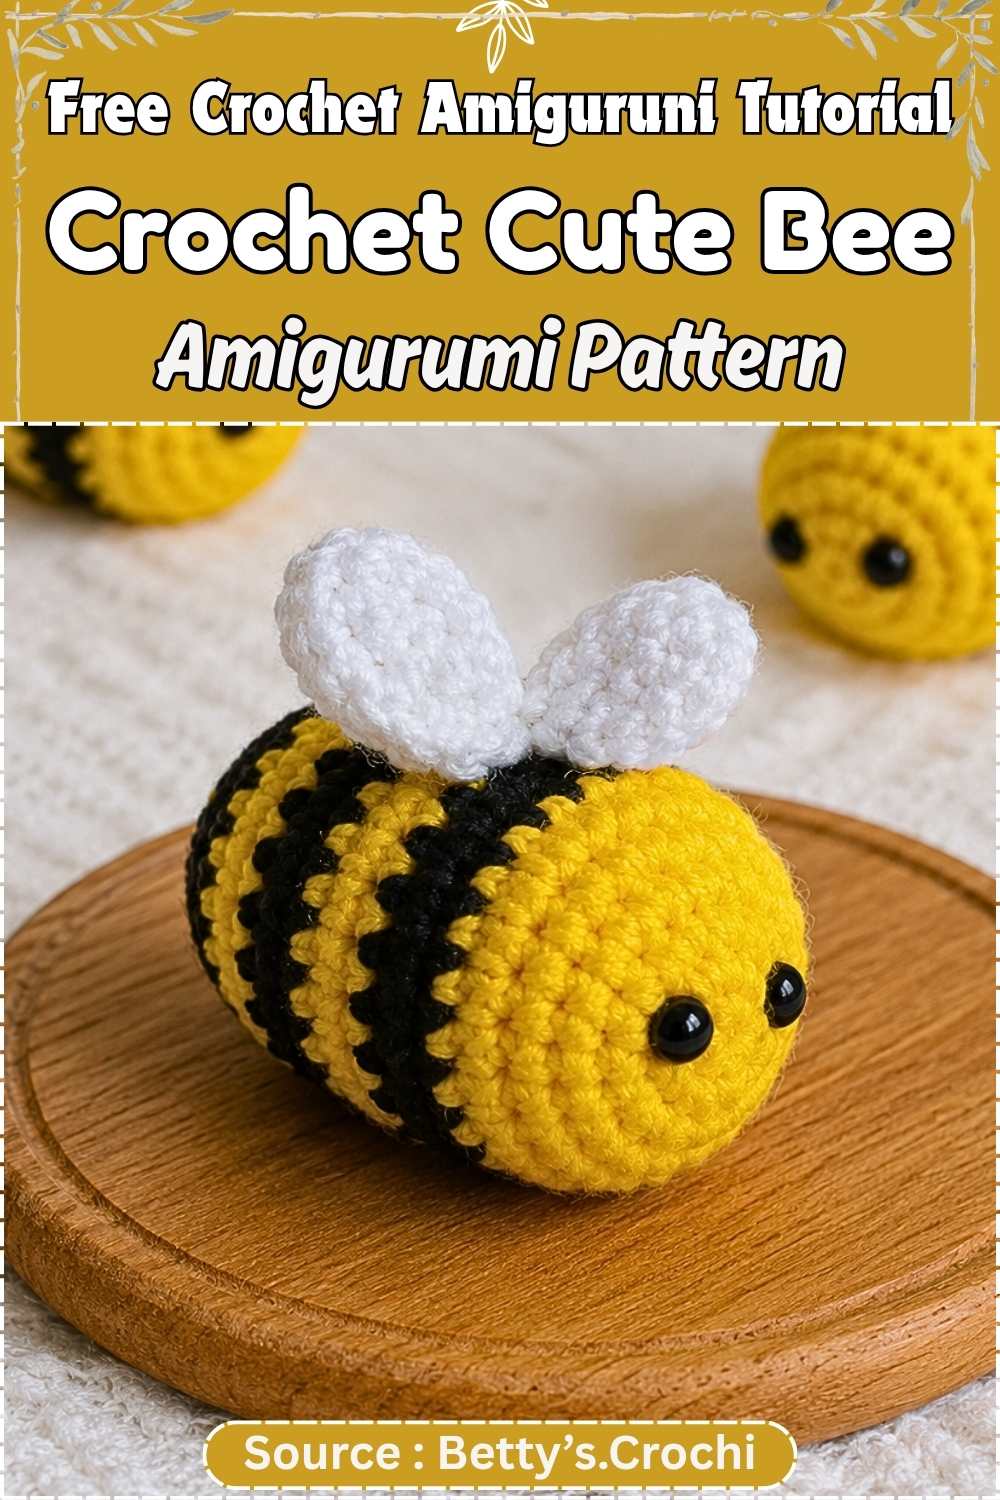
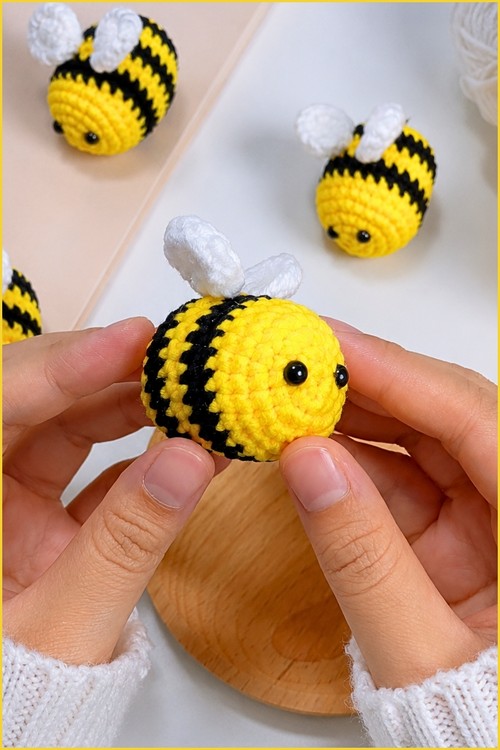
Sunny kitchen windowsills make a cheerful perch for the amigurumi bee, and the free crochet bee pattern adds white wings and shiny black eyes. Stitch a whole swarm of cute crochet bees for a spring party table, since chubby little critters look sweeter grouped on a wooden tray.
Small, round, and built in yellow and black stripes, this amigurumi bee is a genuinely good first project. The body starts with a magic ring and grows through simple increases before the stripe rounds create that recognisable bee look. Wings attach to the back with no complex construction needed. Because this uses joined rounds rather than the spiral method most amigurumi patterns use, it feels different from what beginners might expect, and that is worth knowing before you start. The written pattern covers the first six rounds of the body; the black stripe sections and wing construction are demonstrated in the companion video.
Crochet Cute Amigurumi Bee
Beginners sometimes worry that joined rounds are harder than continuous crochet. They are not. Slip stitch, chain 1, continue. That is the whole extra step. What joined rounds give you is a very clear round boundary, which actually makes it easier to count your stitches and catch mistakes early. Keep your stitch marker at the slip stitch join and you will always know exactly where you are in the round. The magic ring, the increases, and the invisible decrease are the three techniques that will carry you through this entire pattern.
Materials and Tools
- Yellow yarn for the body
- Black yarn for the stripes
- White or pale grey yarn for the wings
- Crochet hook suited to your yarn weight (a 2.5 mm to 3.5 mm hook is typical for amigurumi)
- Small safety eyes, or black embroidery thread for children under three
- Fiberfill stuffing
- Stitch marker
- Tapestry needle
- Scissors
Yarn weight is not specified in the source. A sport or DK weight with a 2.5 to 3 mm hook gives a bee that fits easily in a child’s hand. Go down one hook size from whatever the yarn label recommends to keep the fabric tight enough that stuffing does not show through.
Pieces List
- Body (yellow with black stripes): make 1
- Wings: make 2 (full wing pattern in the video)
Both wings are made before assembly. The body is fully closed and stuffed before wings attach.
Beginner Technique Notes
The magic ring is how almost every amigurumi starts. Wrap the yarn around two fingers to form a loop. Insert the hook through the loop, pull up a new loop, and chain 1 to secure it. Work your first round of single crochets into that loop, not into a chain. Once the round is done, pull the starting tail to close the centre hole. If the ring starts to loosen later, a stitch through the tail end locks it permanently.
Joined rounds are what this pattern uses instead of the more common spiral method. At the end of every round, slip stitch into the first stitch of that round to join it, then chain 1 before starting the next round. That chain 1 is a turning chain that lifts your hook to the right height. It does not count as a stitch. Work the first stitch of the new round into the same place you just slip stitched. Keep your stitch marker at the slip stitch point so the join is easy to find.
The increase means working two single crochets into the same stitch. You insert the hook, pull up a loop, yarn over and pull through to complete the first sc, then insert into the exact same stitch again and work a second sc. One stitch goes in, two come out.
The invisible decrease gives a neater finish than a standard sc2tog. Insert the hook into the front loop only of the next stitch, then into the front loop only of the stitch after it. Pull up one loop through both front loops. Yarn over and pull through both loops on the hook. It looks like a regular single crochet and sits flat against the fabric. Use it whenever the pattern calls for a decrease.
Marking the round matters more in joined construction than almost anywhere else. The slip stitch join can be easy to confuse with a regular stitch if you are moving quickly. Keep the marker at the join stitch and move it up every round the moment you slip stitch to close. Do not crochet past the marker without moving it first.
Safety Eye Timing
Safety eyes must go in before the body is fully closed. The exact round depends on the full video pattern, but place them while the opening is still wide enough to reach both hands inside comfortably and press the washers firmly onto the posts. Do not wait until the last few decrease rounds. Once a washer seats, it cannot come off without cutting the post.
Position the eyes on the front face of the body, level with each other, before pressing the washers. Hold the piece up and look at it from the front at eye level before locking them in.
For children under three: embroider the eyes with black floss or a doubled strand of black yarn after the bee is finished. A tight satin stitch oval or a small French knot both work well at this scale.
The Pattern
Body (Yellow)
- This pattern uses joined rounds. At the end of every round, slip stitch to join, then chain 1 before starting the next round. The chain 1 does not count as a stitch.
- Start with a magic ring.
- Round 1: 6 sc into the magic ring. (6)
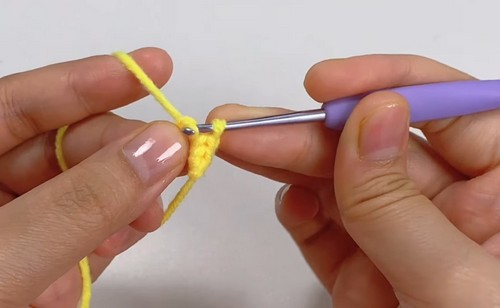
- Round 2: Slip stitch to join, ch 1. Work 6 inc. (12)
- Round 3: Slip stitch to join, ch 1. Work (1 sc, 1 inc) × 6. (18)
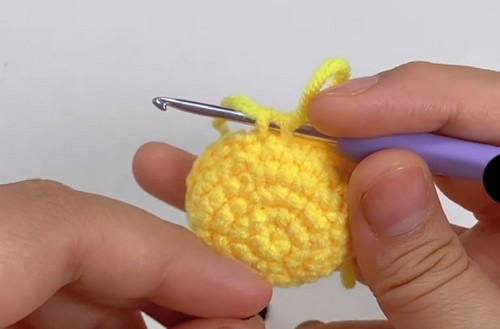
- Round 4: Slip stitch to join, ch 1. Work (2 sc, 1 inc) × 6. (24) Checkpoint: the piece should be a flat, even disc with no cupping or ruffling; cupping means tension is too tight, ruffling means too loose, and either will affect how the stripe rounds sit later.
- Rounds 5 and 6: Slip stitch to join, ch 1. Work 24 sc. (24) Checkpoint: the disc should be just beginning to curve upward at the edges, the very start of the body dome; if it is already a deep bowl, tension has tightened between rounds.
Don’t let crochet patterns intimidate you! If you’re a beginner, the video tutorial below makes it super easy to follow along!
Assembly
Make both wings before attaching anything. Attach eyes, nose and any embroidered mouth detail to the face first, so the face is oriented correctly before the wings go on.
Wings sit on the upper back of the body, one on each side. Pin both in place and hold the bee upright before committing to any stitches. Check that both wings sit at the same height and angle when viewed from the front and the back. A wing positioned even a little higher on one side makes the whole bee look mid-tumble. The right spot is just behind the centre line of the body, angled slightly outward and upward.
Stuffing Guide
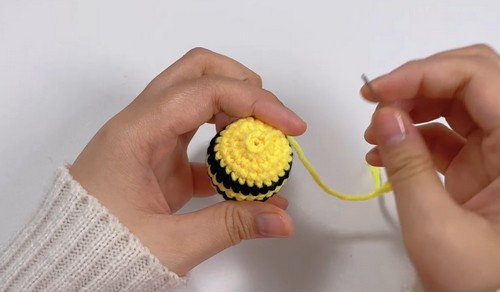
Add stuffing gradually in small pinches as the body grows rather than waiting until the opening narrows. A single large handful at the end always creates lumps. Stop before the body feels full, because the closing decrease rounds compress the stuffing further and a lightly packed Round 6 becomes a firm, right-feeling bee by the time it is closed. Wings stay flat and unstuffed throughout.
Toy Safety
Safety eyes are not suitable for children under three. Embroider instead. Check all yarn ends are woven in and trimmed. Any yarn tails left loose on a toy for a young child are a hazard, so pull each one through the body twice before trimming.
FAQ
What is the difference between joined rounds and continuous rounds? Which is harder? Joined rounds have a slip stitch and chain 1 at the end of each round; continuous rounds keep going in a spiral. Neither is harder once you have done it a few times. The slip stitch gives you a very clear round boundary, which makes counting easier.
My magic ring is loose in the middle. How do I fix it? Thread the starting tail onto your needle and run it around the stitches of Round 1. Pull gently to cinch the centre closed, then weave the tail through a few stitches inside the body and trim. Do this before stuffing, not after.
I can not tell where my round starts and ends. What do I do? This is exactly why the stitch marker matters. Place it in the first stitch of each round the moment you chain 1 after the slip stitch join. Do not crochet past it without moving it up. If you have already lost track, count backward from the slip stitch join to find the round start.
The body looks flat after Round 6. Is that right? Yes. At Round 6 it should still be mostly flat with just a slight upward curve at the edges. The dome shape develops as the stripe and decrease rounds continue in the video portion of the pattern.
Can I change the colours or skip the black stripes? You can. A solid yellow bee, a lavender bee, or a pale blue bee all work with the same construction. The black stripes are worked in the video section of the pattern, so any colour swap there is a simple yarn substitution at those rounds.
Stick with the pattern, take it one round at a time, and the bee will come together exactly as it should.