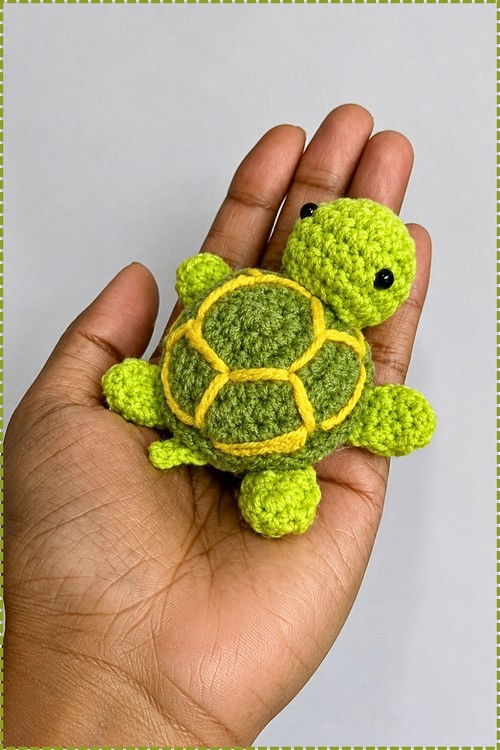
Lime green flippers and an olive shell traced in sunny yellow give the crochet sea turtle a bright look on any nursery shelf. Ocean-loving kids can tuck the sea turtle amigurumi into a party favor bag, and two shiny black bead eyes keep its tiny face friendly.
My first attempt at this little creature came out looking like a green dumpling with legs, and I kept it anyway. Since then I have made a small pile of them, mostly from milk cotton scraps too short for anything else.
Crochet Sea Turtle Amigurumi
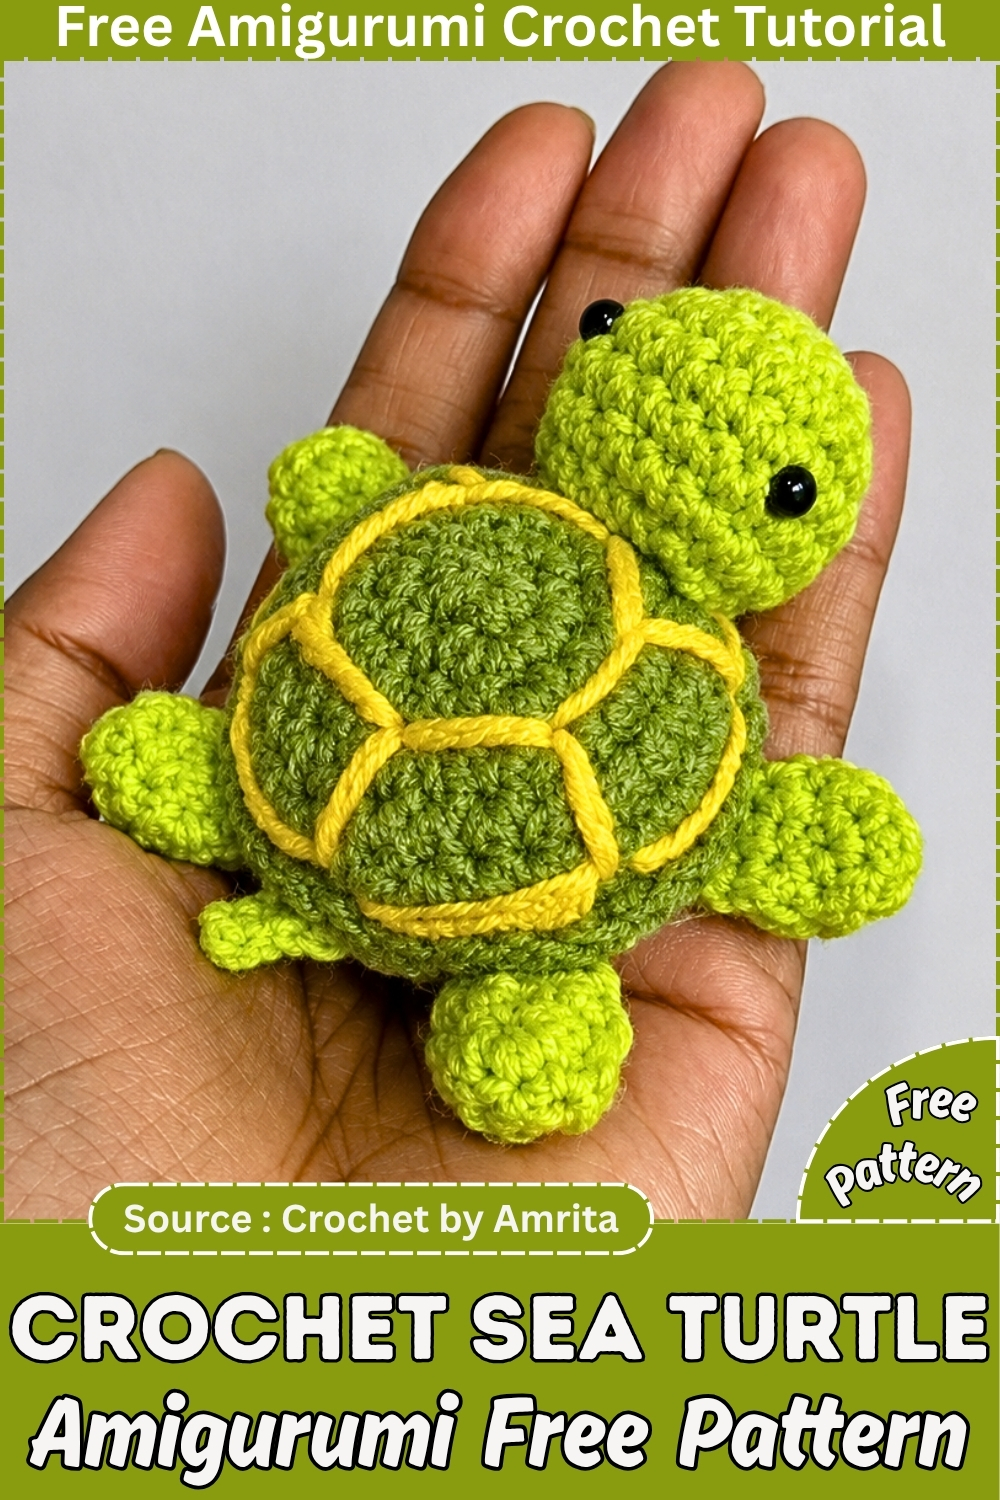
Every one taught me something new about the shell seam. The trick is a single crochet join that catches only the front loops of the top shell, which leaves a crisp ridge all the way around. Yellow embroidery turns a plain dome into a proper carapace in about fifteen minutes. Finished, it sits in your palm and clips onto a bag easily. One evening is usually enough.
What You Are Making
This turtle is built from small flat and domed pieces that come together at the shell seam. Nothing here is difficult, but the parts are tiny, so it helps to see the full list before you start.
- 1 head in light green
- 1 top shell in dark green
- 1 underbelly in brown
- 4 leg ovals in light green
- 4 leg ovals in brown (each pairs with a green oval to make one leg, so 4 legs in total)
- 1 tail, chained directly onto the body in light green
- Yellow embroidery on the top shell
- 1 keyring loop (optional)
Materials and Tools
Quantities below are my own estimates for a single turtle, not figures from the original pattern. Milk cotton goes a long way at this size.
- 4 ply milk cotton in dark green for the top shell (roughly 8 to 10 g)
- 4 ply milk cotton in light green for the head, legs and tail (roughly 5 to 8 g)
- 4 ply milk cotton in brown for the underbelly and leg backs (roughly 5 to 8 g)
- 4 ply milk cotton in yellow for the shell embroidery (a metre or two)
- 3.0 mm or 3.5 mm crochet hook (3.0 mm gives tighter stitches and is the better choice here)
- 5 mm safety eyes (4 mm or 6 mm also work, depending on the look you want)
- Fiberfill stuffing
- Yarn needle
- Stitch marker
- Scissors
- Keyring or bag clip (optional)
Expect a finished turtle of roughly 8 to 9 cm from nose to tail with the 3.0 mm hook. That is an approximation and will shift with your tension and yarn. Most makers finish in around two to three hours.
Abbreviations (US Terms)
- MR: magic ring
- sc: single crochet
- inc: increase (2 sc in the same stitch)
- dec: invisible decrease over 2 stitches
- sl st: slip stitch
- ch: chain
- FLO: front loop only
Before You Start
Every round in this pattern is joined with a slip stitch and a chain 1 rather than worked in a spiral. In most joined round patterns the ch 1 does not count as a stitch, so your first sc of the next round goes into the same stitch you just joined into. Keep your marker in that first stitch and move it up each round. Joined rounds leave a faint seam line on the back of each piece, which is worth turning toward the underbelly when you assemble.
Safety eyes go into the head after Round 6 and before Round 7. Once Round 7 is worked and the head is stuffed, there is no clean way to get a washer onto the back of an eye, so do not skip ahead.
Crochet Sea Turtle Pattern
Part 1: The Head
Rounds
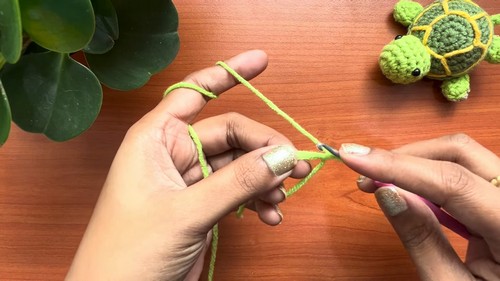
- Start with light green yarn.
- R1: Make 6 sc in a magic ring. Pull tight, sl st into the first st, ch 1. Place a stitch marker. (6 sts)
- R2: Inc in each stitch around. Sl st, ch 1. (12 sts)
- R3: (1 sc, inc) repeat around. Sl st, ch 1. (18 sts) Checkpoint: a flat disc about the size of a small coin, with no hole showing in the centre.
- R4: 1 sc in each stitch around. Sl st, ch 1. (18 sts)
- R5: 1 sc in each stitch around. Sl st, ch 1. (18 sts)
- R6: 1 sc in each stitch around. Sl st, ch 1. (18 sts) Checkpoint: the edges have turned straight up into a short cup, roughly like a thimble.
Safety Eyes
- Pause after Round 6.
- Place the safety eyes between Rounds 4 and 5.
- Leave exactly 5 stitches of space between the two eyes.
- Snap the safety backs on securely.
Closing
- R7: (1 sc, dec) repeat around. Sl st, ch 1. (12 sts) Checkpoint: the opening has pulled in and the head looks like a rounded little nose cone, still open at the back.
- Fasten off, leaving a long tail for sewing.
- Stuff the head firmly with fiberfill.
Never made an amigurumi before? The video tutorial below is the perfect starting point, and the written pattern is right here whenever you’re ready!
Part 2: The Top Shell
Rounds
- Switch to dark green yarn.
- R1: 6 sc in a magic ring. Sl st, ch 1. (6 sts)
- R2: Inc in each stitch around. Sl st, ch 1. (12 sts)
- R3: (1 sc, inc) repeat around. Sl st, ch 1. (18 sts) Checkpoint: flat and round, identical in size to Round 3 of the head.
- R4: (2 sc, inc) repeat around. Sl st, ch 1. (24 sts)
- R5: (3 sc, inc) repeat around. Sl st, ch 1. (30 sts) Checkpoint: still lying flat on the table; any ruffling at the edge means your tension has loosened.
- R6: 1 sc in each stitch around. Sl st. (30 sts) Checkpoint: the outer edge tips up very slightly, giving a shallow saucer rather than a flat circle.
Finishing
- Do not cut the yarn.
- Leave a large loop on your hook. You will use it to join the shell pieces later.
Part 3: The Underbelly
Rounds
- Switch to brown yarn.
- Work exactly the same as the Top Shell from R1 to R5.
- R1: 6 sc in a magic ring. Sl st, ch 1. (6 sts)
- R2: Inc in each stitch around. Sl st, ch 1. (12 sts)
- R3: (1 sc, inc) repeat around. Sl st, ch 1. (18 sts)
- R4: (2 sc, inc) repeat around. Sl st, ch 1. (24 sts)
- R5: (3 sc, inc) repeat around. Sl st, ch 1. (30 sts) Checkpoint: a completely flat brown disc, a touch smaller across than the top shell because it has no Round 6.
Finishing
- Skip Round 6.
- Fasten off and weave in the short tail.
Part 4: Shell Embroidery
Before Joining
- Thread yellow yarn onto your needle.
- Stitch a star or snowflake pattern on top of the dark green shell.
- Start from the centre magic ring.
- Stitch straight lines outward to the edge of Round 4 or 5.
- Connect the tips of the lines around the edge to form a hexagon.
- Tie the loose ends together securely on the inside of the shell. They will be hidden for good once the body is stuffed.
Part 5: Joining the Shell and Underbelly
Joining Round
- Place the top shell and underbelly wrong sides together, with the smooth sides facing out.
- Pick up the working loop you left on the dark green top shell.
- Single crochet around the edge to join the two pieces.
- Insert your hook through the front loop only of the top shell and through both loops of the brown underbelly. This gives a clean seam. Checkpoint: about halfway round, a neat raised dark green ridge should be forming along the edge, with the brown sitting just underneath it.
- When about 5 stitches remain, pause and stuff the shell generously with fiberfill.
- Close the remaining 5 stitches with slip stitches instead of single crochet. Checkpoint: the body is now a rounded dome on top and nearly flat underneath, sitting steady without rocking.
- Fasten off and weave in the end.
Part 6: The Legs (Make 4)
Leg Ovals
- For each leg, crochet one light green oval and one brown oval.
- R1: Ch 4.
- R2:
- Starting in the 2nd ch from the hook, work 1 sc in each of the next 2 chains.
- Work 3 sc in the last chain. This turns your work naturally.
- Working down the opposite side of the chain, work 1 sc in each of the next 2 chains.
- Sl st to join. (7 sts) Checkpoint: a small flat oval, about the shape of a jellybean, with no cupping.
- Green pieces: fasten off, leaving a long tail for sewing.
- Brown pieces: fasten off and trim the tail short.
Leg Assembly
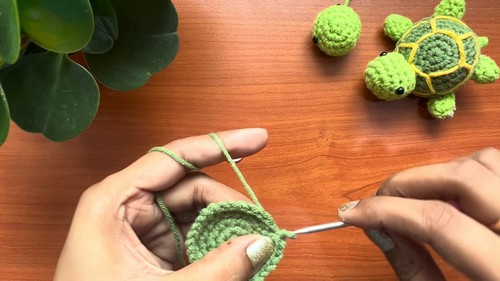
- Place one green and one brown piece together, flat sides facing each other.
- Use the long green tail to whipstitch them together.
- Sew only through the front loops of both pieces.
- Do not stuff the legs.
- Repeat until you have 4 finished legs.
Part 7: Final Assembly
Attach the Head
- Position the head at the front of the shell.
- Sew it mainly to the brown underbelly edge.
- Make sure the eyes are centred.
- Sew securely and weave in the tail.
Attach the Legs
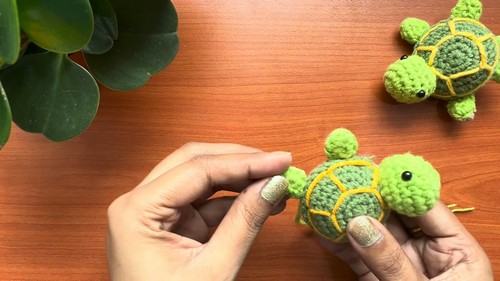
- Pin the 4 legs to the brown underbelly, two near the front and two near the back.
- Keep the green side of each leg facing up and the brown side facing down.
- Sew each leg firmly in place.
Make the Tail
- Attach light green yarn directly to the back centre of the underbelly.
- Ch 4.
- Sl st in the 2nd ch from the hook.
- Sl st in each of the remaining 2 chains.
- Sl st back into the same space on the body.
- Tie a knot and weave the ends inside the shell.
Add Hardware (Optional)
- To use the turtle as a bag charm, attach a keyring loop to the top centre of the dark green shell.
Assembly Tips and Placement
Pins first, needle second. Every time. A turtle this small looks wrong with even one stitch of misplacement, and pins let you see that before it is permanent.
Think of the underbelly as a clock face with the head at 12. The front legs sit comfortably around 10 and 2, the back legs around 4 and 8, and the tail lands at 6. Set all four legs on with pins before you sew any of them, then turn the turtle over and check it from above. You should see a little green paddle peeking out at each corner of the shell.
Turn the joined round seam of the head downward so it disappears against the underbelly. Because most of the head is anchored to the brown edge, it tends to tilt nose down a fraction, which oddly makes the finished turtle look like it is sniffing the table. If you prefer it looking straight ahead, a few extra stitches where the top of the head meets the shell ridge will lift it.
Sew the head and legs before the tail. The tail is chained straight off the body, and having it in place while you handle the turtle for everything else only gets it stretched.
Stuffing Guide
The head wants firm stuffing. Push small pieces right into the nose end first, then fill toward the opening until it holds its shape when squeezed lightly. A soft head sags once it is sewn on, and the eyes start to tilt inward.
The legs stay completely flat. No stuffing at all, which keeps them paddle shaped and lets the turtle sit level.
The shell is the part people get wrong. Stuff generously, but stop when the dome is rounded and the underbelly still sits mostly flat. Overstuffing shows in two places: the brown starts pushing out between the seam stitches, and the yellow embroidery lines stretch and look thin. Understuffing shows as a dent in the centre of the shell when you press it. Add the fiberfill in small tufts rather than one big wad, since lumps read clearly through milk cotton.
Troubleshooting
- There is a hole in the centre of the magic ring. Pull the tail tighter before you weave it in, and give it a second tug after Round 2. Milk cotton has very little stretch, so a ring that looks closed at Round 1 can loosen later.
- The shell ruffles instead of lying flat at Round 5. Your increases are fine; your tension is drifting looser as the rounds grow. Go down to the 3.0 mm hook if you are on the 3.5 mm, or just tighten up on the outer rounds.
- The eyes look uneven or off centre. Count the 5 stitches between them twice, and check both eyes sit in the same gap between Rounds 4 and 5. Fix it before Round 7, because once the head is closed the washers are locked in.
- The joined round seams make a diagonal line across the shell. This is normal for joined rounds. Turn that line toward the back or side when you join the shell so the embroidery draws the eye instead.
- Brown shows through gaps along the shell seam. That usually means overstuffing. Pull a little fiberfill out through the last 5 stitches before closing them, and keep your hook inserted through both loops of the underbelly every time.
- The legs curl up after sewing. Your whipstitch is pulling too tight. Sew with relaxed tension through the front loops only and press each leg flat between your fingers once it is done.
- The embroidery puckers the shell. Leave a little slack on every line before taking the next stitch. Pulling yellow yarn snug against milk cotton gathers the fabric underneath.
Yarn Substitution and Size Scaling
Any 4 ply cotton or cotton blend works with the same hook, and the turtle will come out close to the same size. Milk cotton splits easily, so if you are tired of fighting it, a smooth mercerised cotton gives crisper stitches and a sharper seam ridge.
For a bigger turtle, move to DK or worsted acrylic with a 3.5 mm to 4.0 mm hook. My rough expectation is that worsted pushes it up toward 12 cm long, though your tension will decide. Scale the safety eyes up to 8 mm or so at that size, and keep the 5 stitch spacing. Chunky chenille also works for a squishy version, but the embroidery gets lost in the pile, so stitch the shell lines in a thicker yarn.
Colour and Customisation Ideas
Swap the dark green for a sea glass blue with a cream underbelly and the turtle reads more like a nursery piece than a reef animal. A pink shell with white embroidery makes a sweet gift for a little sister. For a realistic loggerhead, try caramel brown on top with a pale tan underside and thin brown embroidery instead of yellow. Making a small family in three sizes is fun too, using the scaling notes above.
Toy Safety
Safety eyes are not suitable for children under three, however firmly you snap them on. For a toy going to a baby or toddler, embroider the eyes instead with black yarn: work a few short horizontal stitches over one round, placed in the same spot between Rounds 4 and 5 with 5 stitches between them. Do this after Round 6, before you work Round 7 and stuff the head, so you can hide the knots inside.
Leave off the keyring loop for small children as well, since the hardware is a choking risk. Give every attached piece a firm tug once it is sewn on, especially the legs and tail. Anything that shifts needs a few more stitches.
FAQ
- Can I use acrylic instead of milk cotton? Yes, and it is easier on the hands. It will be slightly fuzzier, so the shell embroidery looks softer, but the pattern works the same.
- Why do I join every round instead of working in a spiral? Joined rounds give the shell an even edge for the FLO seam, and the stitch counts stay easy to check. If you switch to spirals, your stitch counts will still match but the shell edge may come out slightly uneven where the rounds step up.
- Do the legs really stay unstuffed? They do. Two layers of 7 stitches are plenty of bulk at this size, and stuffing would make them round and stiff instead of flat flippers.
- How long will one turtle take me? Somewhere around two to three hours for most people, with the embroidery and assembly eating more time than the crochet. Your second one will be quicker.
- Can I make this as a keychain for a teenager? Absolutely. Attach the keyring loop to the top centre of the shell, and sew through it several times so a bag swinging around all day does not pull it loose.
Make two, and you will notice the second shell seam is already neater than the first.