
Meet your next favorite make: this free crochet cow amigurumi pattern comes with full instructions for the legs and arms, so no guessing on the fiddly bits. The sweet, chunky little cow works up into a squishy softie that’s perfect as a baby shower gift, nursery shelf friend, or something to keep for yourself. Detailed step-by-step shaping means it’s approachable even if amigurumi is fairly new to you—the spots are the fun part. Ready to make your own herd? Free pattern this way.
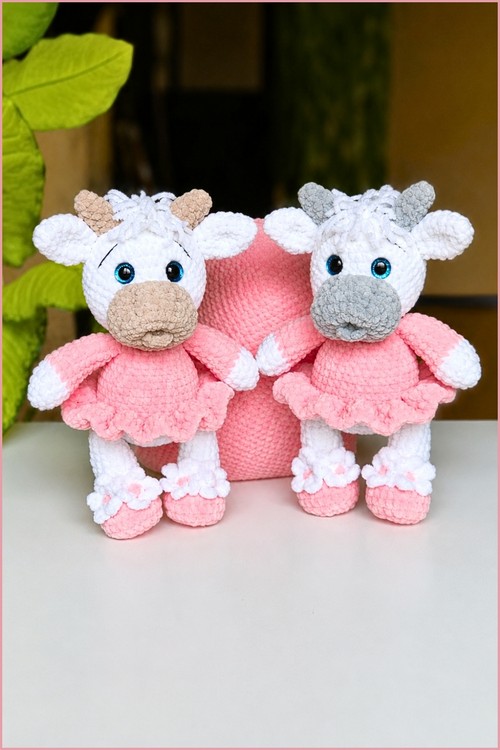
This crochet cow lovey Amigurmi pattern is one of those projects that looks impressive the moment you finish it. The chunky chenille yarn gives the finished doll a soft, almost velvety look that makes it irresistible for little hands to hold.
Crochet Cow Lovey Amigurmi

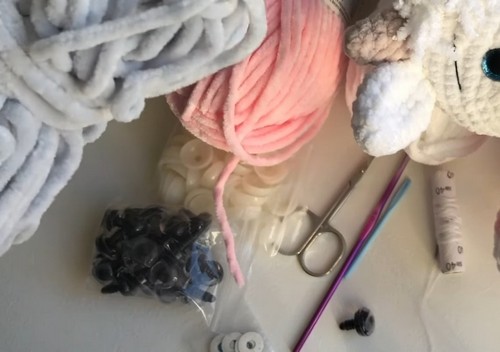
Materials & Tools
Yarn:
- Himalaya Dolphin Baby in Pink — main color for the legs and upper arms
- Himalaya Dolphin Baby in White — hoof base and arm tips
- Himalaya Dolphin Baby in Gray — small amount set aside for head details in Part 2
- Alize Softy Plus — for the hair accent
Hook: 4.0 mm for all main construction; 3.0 mm optionally for decorative details
Other supplies:
- 16 mm safety eyes (set aside for Part 2)
- Approximately 50 g of high-quality polyester fiberfill
- Stitch markers
- Sturdy yarn needle
Abbreviations
- sc — single crochet
- inc — increase (2 sc into the same stitch)
- dec — decrease (2 stitches worked together into one)
- sl st — slip stitch
Difficulty & Time
Easy to confident beginner. Shaping is straightforward, rounds stay short, and the pattern is almost entirely single crochet. Set aside an evening or two and you’ll have all four limbs finished and ready to attach.
Technique Notes
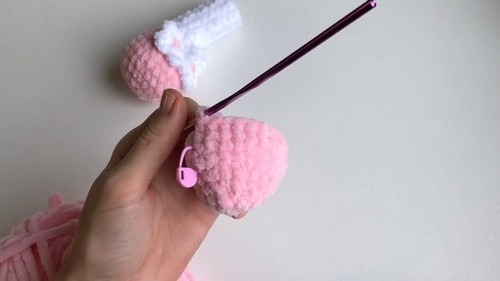
- All four limbs are worked in continuous rounds — no joining slip stitch at the end of each round, just keep going into the next stitch. This is standard amigurumi construction and it keeps the fabric surface smooth. Drop a locking stitch marker into the first stitch of every new round and move it up as you go. On a fluffy microfiber yarn like Dolphin Baby, losing your place mid-round is genuinely easy — the marker is the only reliable fix. Use it without exception, and your stitch counts will stay accurate across all four pieces.
- The arms open from a magic ring, giving you a perfectly closed center with no gap. Pull it snug before you work Round 2. The legs start from a foundation chain instead, with early-row increases building the oval hoof shape. Work those increases exactly as written and the toe definition forms on its own — no extra shaping needed. The successive decreases in Row 8 are what create the front-facing toe profile, so before pinning anything to the body, orient those decreases to face forward. All the face symmetry in Part 2 depends on this alignment being consistent across both legs.
- Color changes happen at the very first stitch of the switching round. Draw your new color through on the final pull-through of the last stitch in the outgoing round — this keeps the color boundary clean and prevents a bleed of the old shade into the new section. Cut the old color with a tail long enough to weave in securely. With Dolphin Baby’s texture, longer tails are more forgiving — run each end through at least two or three passes in different directions before trimming. Align all color transitions to the inner sides of the limbs where they’ll sit against the body and be less visible in the finished piece.
- For decreases, the invisible decrease — inserting through the front loops only of two consecutive stitches before completing as a normal sc — keeps the surface cleaner than a standard sc2tog. On a fluffy yarn the difference is subtle, but it prevents the small gap that can open up along a decrease line when pieces are stuffed and pulled taut. Stuff hooves and paw tips firmly so they hold their shape; taper the fiberfill gradually toward the top of each limb and leave the uppermost portion lightly filled or empty so the pieces lie flat at the attachment point without bulk.
The Pattern
Part 1 — The Legs (Make 2)
Row 1:
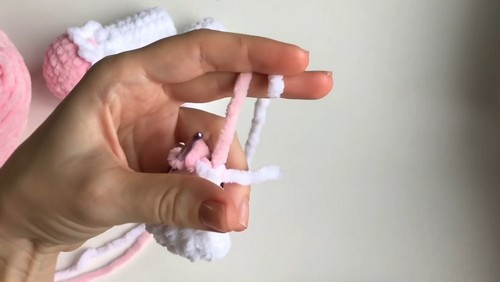
- Chain 4 with Pink yarn and the 4.0 mm hook
- Starting in the 2nd chain from the hook, work 1 sc, then 1 sc in the next chain
- Work 3 inc as you turn and continue along the opposite side of the chain
Row 2:
- Begin with 1 inc and place your stitch marker here
- Work 1 sc, then 3 inc in a row
- Work 1 sc, then finish the row with 2 inc
Row 3:
- Work 1 sc, then 1 inc
- Work 2 sc, then 1 inc
- Work 1 sc, 1 inc, 1 sc, 1 inc
- Work 2 sc, then 1 inc
- Finish with 1 sc and 1 inc
Row 4:
- Work 4 sc
- Repeat the combination of 2 sc and 1 inc a total of 3 times
- Finish the row with 7 sc
Rows 5 to 7:
- Work sc evenly around each row with no shaping changes across all 3 rows
If you’re new to reading crochet patterns, don’t worry, just follow along with the video tutorial below and use the written pattern as a reference!
Row 8:
- Work 10 sc
- Work 4 dec in succession to shape the front of the hoof
- Finish the row with 5 sc
Row 9:
- Switch to White yarn on the first stitch
- Work 7 sc, 2 dec, 1 sc, 2 dec
- Finish the row with 3 sc
Rows 10 to 13:
- Work sc evenly around each row for all 4 rows
Row 14:
- Work 5 sc, 1 dec, 6 sc, and 1 dec
Rows 15 to 16:
- Work sc evenly around each row for both rows
Row 17:
- Work 11 sc, then finish with 1 dec
Row 18:
- Work sc evenly around the row
Finishing the legs:
- Slip stitch into the next stitch, cut the thread, and pull it through to tighten
- Stuff the leg firmly, making sure the Row 8 decreases face forward to define the toe front
- Optional: use the 3.0 mm hook and Pink yarn to crochet two small flowers and sew one to the side of each leg
Part 2 — The Arms (Make 2)
Row 1:
- Work 5 sc into a magic ring using White yarn and the 4.0 mm hook
Row 2:
- Work 5 inc to finish the round with 10 stitches total
Row 3:
- Repeat the combination of 1 sc and 1 inc around to reach 15 stitches
Rows 4 to 5:
- Work sc evenly around each row for both rows
Row 6:
- Switch to Pink yarn on the first stitch
- Repeat the combination of 3 sc and 1 dec a total of 3 times around

Rows 7 to 12:
- Work sc evenly around each row for all 6 rows
Row 13:
- Work 10 sc, then finish with 1 dec
Row 14:
- Work sc evenly around the row
Finishing the arms:
- Slip stitch into the next stitch, cut the thread
- Stuff the arm carefully, tapering the fiberfill toward the top
Stuffing & Assembly Notes
- Stuff hooves and paw tips firmly so each piece holds a solid, recognizable shape against the weight of the body
- Taper the stuffing as you move up each limb, leaving the top section lightly stuffed or empty so pieces lie flat when attached
- Add fiberfill in small pinches throughout — one large clump causes lumps and stretches the stitches apart
- Fasten off with long yarn tails so you have enough matching thread for sewing everything together
- Before pinning, confirm the successive hoof decreases from Row 8 face forward — this is the anchor point for all the face symmetry that follows in Part 2
- Align color transitions on the inner sides of each limb where they’ll sit against the body and be less visible
- Set the 16 mm safety eyes and Gray yarn aside now so they’re ready — the head comes in Part 2, and centering the face correctly depends entirely on the hoof orientation established here
Customization Ideas
- Color palette: Pink and White is the classic farmyard read, but this cow lovey is just as charming in all-white with black patches for a Holstein look, or soft lavender and cream for something more whimsical. The two-color construction is baked into the leg and arm rows, so a palette swap costs nothing extra in complexity.
- Size: Dolphin Baby on a 4.0 mm hook produces a lovey-scale limb set. For a miniature version, fingering weight on a 2.5 mm hook scales everything down significantly. A chunky chenille on a 6.0 mm hook produces oversized limbs for a larger cuddle toy — ideal for toddlers who want something substantial to hold.
- Optional flowers: The small decorative flowers on the legs are made with the 3.0 mm hook in Pink yarn and take very little time to add. They read as a sweet finishing detail in photos and give the piece a handmade quality that stands out. Alternatively, a simple embroidered cross stitch or a tiny bow in a contrasting color achieves a similar effect with even less effort.
- Hair accent: Alize Softy Plus gives the hair a distinctive loopy texture. Any fringed, looped, or fur-effect yarn in a similar weight works as a substitute if Softy Plus isn’t in your stash — even a few knotted lengths of a contrasting color gives the same wispy forelock impression.
FAQ
Q: Can I substitute a different yarn and still get the same plush result?
Dolphin Baby and Softy Plus are both microfiber-based, which is the source of the cloud-like softness in the finished lovey. If you substitute, another microfiber or chenille-style yarn in a similar weight is the closest match. Standard acrylic will work for the construction but produces a noticeably firmer, less plush result — the stitch definition reads differently and the piece won’t have the same tactile quality. If the lovey is a baby gift, softness is usually a priority, so the yarn choice matters more here than it would in a standard amigurumi.
Q: Are 16 mm safety eyes safe for a baby gift?
Safety eyes with plastic locking washers are not recommended for children under three due to choking risk, regardless of size. For a baby version, embroider the eyes using black yarn in a tight satin stitch, or use small circles of black felt sewn flat and trimmed close. The nose in Part 2 can be treated the same way. A fully embroidered face is the safest option and looks just as charming on a lovey intended for very young children.
Q: My limbs look uneven between the left and right sides. What’s happening?
The most common cause is the stitch marker not being moved up consistently, which lets the round start drift and shifts the shaping off-center over several rows. Re-mark the first stitch of every round without fail. Also check whether your tension changed between pieces — if one arm feels noticeably tighter than the other, you likely tensioned differently during a second work session. Working all four limbs in a single sitting, or at least completing both legs before starting the arms, helps keep tension consistent across the set.