
Those big floppy ears are impossible to resist this free crochet elephant amigurumi pattern turns simple stitches into the softest little stuffed friend. The rounded shaping and oversized ears give the finished plush loads of character, and the step-by-step instructions keep the assembly clear so nothing feels guesswork. A gentle, satisfying make that’s ideal for baby gifts, nursery decor, or a first amigurumi if you’re just getting started with plushies. Ready to make yours? Grab the free elephant pattern and get hooking.
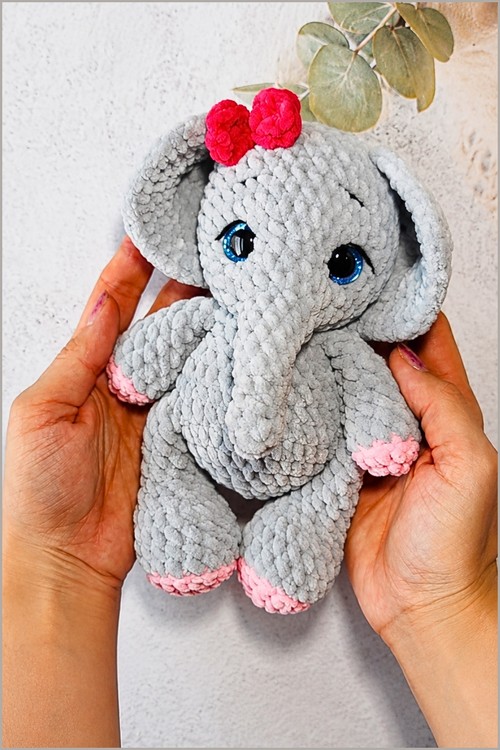
There is something about a crochet elephant that never goes out of style, and this free amigurumi pattern might just be the most adorable version out there. Worked in soft gray chenille yarn with little pink feet and a tiny red bow, this elephant has a charm that makes it hard to put down once you start.
Crochet Elephant Amigurumi
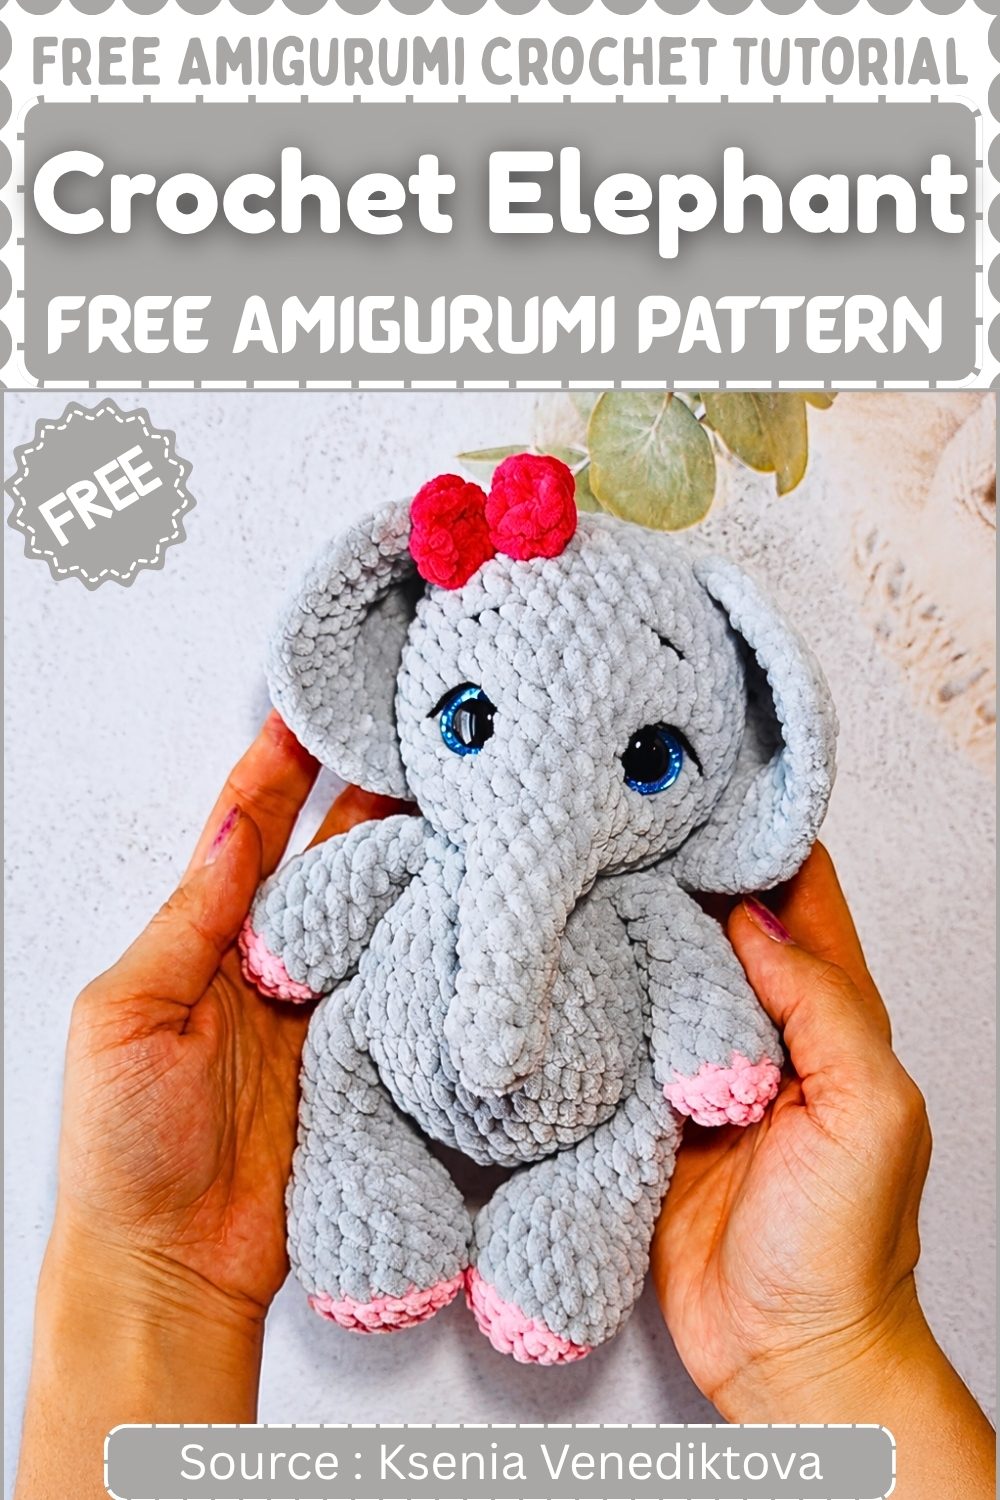
The construction is straightforward enough for beginners while still producing a result that looks polished and professional. From the chunky rounded body to those expressive blue safety eyes, every part of this pattern is designed to come together smoothly so you can focus on the fun of making it.
- The body, legs, and arms all join as you crochet, so there’s barely any sewing at the end — just the head and ears.
Materials & Tools
Yarn:
- Plush chenille in gray (main color) — for the head, body, ears, and limbs
- Plush chenille in a contrasting accent color — for the pads on the feet and hands
- Black cotton thread for embroidering fine facial details
Hook:
- 3.5 mm is strongly recommended for chenille to keep stitches tight so stuffing doesn’t show through
- The pattern also references a 5.5 mm hook — use the smaller size for best results with plush yarn
Other supplies:
- 16 mm safety eyes
- Polyester fiberfill stuffing
- Tapestry needle
- Scissors
- A lighter — essential for melting and sealing the raw cut ends of chenille yarn so it doesn’t shed
Abbreviations
- MR — magic ring
- sc — single crochet
- inc — increase (2 sc into the same stitch)
- dec — decrease (2 stitches worked together into one)
- sl st — slip stitch
- ch — chain
- BLO — back loops only
Difficulty & Time
This is an intermediate make. The individual stitches stay simple throughout, but you’ll encounter back-loop-only rounds, mid-round color changes, in-round leg and arm joins, a crocheted chain tail, and sculpted eye socket placement at assembly. None of these are technically difficult in isolation — the challenge is managing them together cleanly while keeping your shaping even. Plan on a few relaxed sittings, with most of your attention going into clean joins and firm, even stuffing.
Tips
1. Seal every chenille end with your lighter immediately after cutting. Chenille sheds aggressively from a raw cut end, and even a well-woven tail can work loose over time. A quick half-second pass with a lighter melts the fibers together and locks the end permanently. Hold the flame just close enough to melt — not close enough to scorch the yarn.
2. Stuff limbs in layers, not all at once. Pushing one large clump of fiberfill into a leg or arm compresses it unevenly and creates flat spots. Tear the stuffing into small tufts, push each tuft to the bottom with a pencil or the back of your hook, then add the next. For the upper third of each limb, leave the stuffing sparse or skip it entirely so the pieces lie flat against the body after joining.
3. Place safety eyes before stuffing the head past the halfway point. Once the head is fully stuffed, reaching in to position and lock the washer on a 16 mm eye is difficult and the result is often off-center. Position both eyes between Rounds 12 and 13 while the head is still accessible, check symmetry from the front and both sides, then lock the washers and continue stuffing.
The Pattern
Legs (Make 2)
Start with your accent color yarn.
- Round 1: Work 6 sc into a magic ring. [6 sts]
- Round 2: Work 6 inc around. [12 sts]
- Round 3: Work the combination of 1 sc and 1 inc a total of 6 times around. [18 sts]
- Color change: Switch to main color (gray).
- Round 4: Working in BLO, work 18 sc around. [18 sts]
- Rounds 5–7: Work 18 sc around for 3 rounds. [18 sts]
- Round 8: Work 3 sc, then 6 invisible dec in succession, then 3 sc. [12 sts]
- Round 9: Work 4 sc, then 2 dec, then 4 sc. [10 sts]
- Stuff the foot firmly with fiberfill at this point.
- Rounds 10–13: Work 10 sc around for 4 rounds. [10 sts]
- Finish: Crochet 2 extra sc to align your hook with the middle side of the leg. Pinch the top edges flat together and crochet through both layers with 4 sc to close the leg. Fasten off.
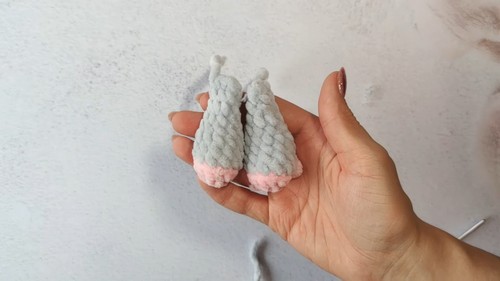
Arms (Make 2)
Start with your accent color yarn.
- Round 1: Work 6 sc into a magic ring. [6 sts]
- Round 2: Work 6 inc around. [12 sts]
- Color change: Switch to main color (gray).
- Round 3: Working in BLO, work 12 sc around. [12 sts]
- Rounds 4–5: Work 12 sc around for 2 rounds. [12 sts]
- Round 6: Work the combination of 4 sc and 1 dec a total of 2 times around. [10 sts]
- Round 7: Work 10 sc around. [10 sts]
- Stuff the arm lightly with fiberfill at this point.
- Round 8: Work the combination of 3 sc and 1 dec a total of 2 times around. [8 sts]
- Round 9: Work 8 sc around. [8 sts]
- Finish: Pinch the top edges flat together and crochet through both layers with 2 sc, followed by a sl st to close. Fasten off.
Just starting out with crochet? The video tutorial below is a great place to begin, or challenge yourself with the written pattern below!
Trunk and Head
Use main color yarn throughout.
- Round 1: Work 6 sc into a magic ring. [6 sts]
- Round 2: Work 6 sc around. [6 sts]
- Round 3: Work 5 sc, then 1 inc. [7 sts]
- Round 4: Work 6 sc, then 1 inc. [8 sts]
- Round 5: Work 7 sc, then 1 inc. [9 sts]
- Round 6: Work 8 sc, then 1 inc. [10 sts]
- Round 7: Work 9 sc, then 1 inc. [11 sts]
- Round 8: Work 10 sc, then 1 inc. [12 sts]
- Round 9: Work 2 sc, then 6 sl st to create the angled mouth area, then 4 sc. [12 sts]
- Lightly stuff the trunk with fiberfill before working past this round so it stays smooth and accessible.
- Round 10: Work the combination of 1 sc and 1 inc a total of 6 times around. [18 sts]
- Round 11: Work the combination of 2 sc and 1 inc a total of 6 times around. [24 sts]
- Round 12: Work the combination of 3 sc and 1 inc a total of 6 times around. [30 sts]
- Round 13: Work the combination of 4 sc and 1 inc a total of 6 times around. [36 sts]
- Rounds 14–19: Work 36 sc around for 6 rounds. [36 sts]
- Place your 16 mm safety eyes between Rounds 12 and 13 now, measuring outward symmetrically from the trunk with 10 to 12 empty stitches between them. Check alignment from the front and both sides before locking the washers.
- Round 20: Work the combination of 4 sc and 1 dec a total of 6 times around. [30 sts]
- Round 21: Work the combination of 3 sc and 1 dec a total of 6 times around. [24 sts]
- Round 22: Work the combination of 2 sc and 1 dec a total of 6 times around. [18 sts]
- Round 23: Work the combination of 1 sc and 1 dec a total of 6 times around. [12 sts]
- Stuff the head generously at this point — tear fiberfill into small tufts and push it firmly into the cheeks for a round, chubby face. Keep the neck region densely packed.
- Round 24: Work 4 dec to close the remaining gap. Finish with a sl st. Using your tapestry needle, weave the yarn tail through the remaining front loops and pull completely closed. Hide the tail inside the head.
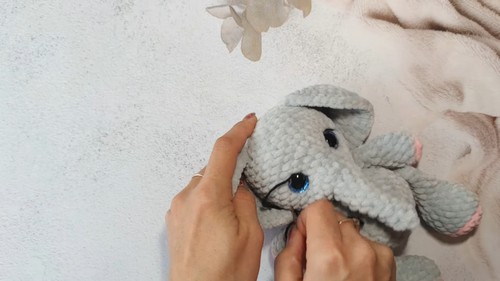
Ears (Make 2)
Use main color yarn throughout.
- Round 1: Work 6 sc into a magic ring. [6 sts]
- Round 2: Work 6 inc around. [12 sts]
- Round 3: Work the combination of 1 sc and 1 inc a total of 6 times around. [18 sts]
- Round 4: Work the combination of 1 inc and 2 sc a total of 6 times around. [24 sts]
- Round 5: Work the combination of 3 sc and 1 inc a total of 6 times around. [30 sts]
- Round 6: Work 1 sc, then 1 inc, then work the combination of 4 sc and 1 inc a total of 5 times, then 3 sc. [36 sts]
- Round 7: Work the combination of 5 sc and 1 inc a total of 6 times around. [42 sts]
- Finish: Finish with a sl st. Fasten off and weave in the tail ends.
Body
Use main color yarn throughout.
- Round 1: Work 6 sc into a magic ring. [6 sts]
- Round 2: Work 6 inc around. [12 sts]
- Round 3: Work the combination of 1 sc and 1 inc a total of 6 times around. [18 sts]
- Round 4: Work the combination of 2 sc and 1 inc a total of 6 times around. [24 sts]
- Round 5: Work the combination of 3 sc and 1 inc a total of 6 times around. [30 sts]
- Round 6: Work the combination of 4 sc and 1 inc a total of 6 times around. [36 sts]
Round 7 — Tail and leg joins:
- Chain 8. Starting in the 2nd chain from your hook, work 7 sl st back down the chain to form the tail.
- Continue around the body row normally, working 7 sc.
- Hold the first leg flush against the body and crochet through both the leg layer and the body layer at the same time for 5 sc.
- Work 12 sc along the front of the body.
- Hold the second leg flush against the body and crochet through both layers for 5 sc.
- Finish the round with 7 sc. [36 sts]
Round 8: Work the combination of 4 sc and 1 dec a total of 6 times around. [30 sts]
- Round 9: Work 30 sc around. [30 sts]
- Round 10: Work the combination of 3 sc and 1 dec a total of 6 times around. [24 sts]
- Round 11: Work the combination of 2 sc and 1 dec a total of 6 times around. [18 sts]
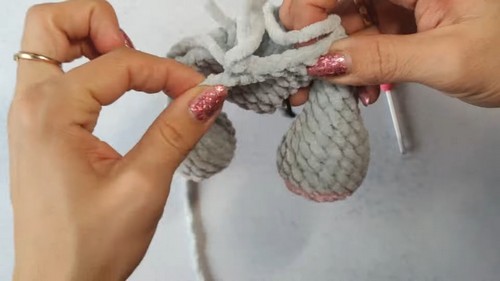
Round 12 — Arm joins:
- Work 18 sc around. During this round, align the arms directly above the legs.
- Hold the first arm against the body and crochet through both layers together for 4 sc.
- Work approximately 4 to 5 sc across the chest.
- Hold the second arm against the body and crochet through both layers for 4 sc.
- Finish the round.
Finish: End with a sl st. Leave a long tail for sewing to the head. Stuff the body firmly with fiberfill.
Assembly
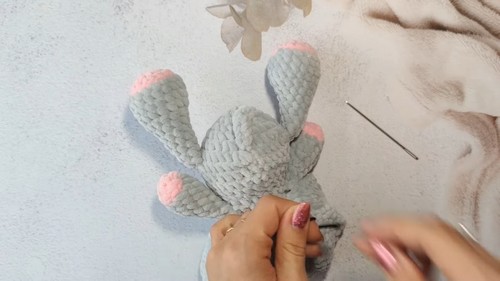
- Thread a long length of matching gray yarn onto your tapestry needle.
- Orient the body so the chain tail points directly backward and the legs face forward.
Hold the finished head against the open neck of the body and whipstitch through both the neck loops and the base of the head, loop by loop, working all the way around until the join is secure.
- Pinch each ear slightly at the lower base to create a cupped, realistic shape before sewing.
- Position the ears symmetrically near Round 16 of the head, a few stitches back from the outer edge of each eye, and sew them down firmly.
- Use black cotton thread to embroider any additional facial details around the eye area.
FAQ
Q: Which hook size should I actually use — 3.5 mm or 5.5 mm?
For chenille yarn specifically, the 3.5 mm hook is the right choice. Chenille has a loose, fibrous structure that gaps easily at a relaxed tension, which lets the white stuffing show through the finished fabric. The tighter gauge from a smaller hook compresses the pile and closes those gaps. The 5.5 mm size produces a much softer, faster fabric but you’ll likely see stuffing through the stitches — especially on the body and head where the piece takes the most handling.
Q: Can I use a standard acrylic yarn instead of chenille?
Yes, and the pattern works identically — but the finished elephant will look noticeably different. Smooth acrylic shows every stitch clearly, giving a more structured, precise look rather than the soft plush finish chenille creates. If you swap to a smooth yarn, the invisible decrease will matter more because stitch gaps become visible. You can also drop hook size slightly to keep your gauge snug. The two-color foot and hand pads will read more crisply on a smooth yarn, which can actually be a plus.
Q: Are 16 mm safety eyes safe for a baby gift?
No — safety eyes with plastic locking washers are a choking hazard for children under three, regardless of size. For a baby or toddler elephant, embroider the eyes using satin stitches in black cotton thread instead. A slightly larger oval satin stitch with a single highlight stitch in white gives a beautiful, safe eye that photographs well. The nose can also be sculpted with a few tight gathering stitches pulled through the trunk tip rather than using any hardware at all.
Q: My legs are flopping outward instead of facing forward. How do I fix it?
The leg direction is set during the Round 7 join. The cluster of 5 sc that attach each leg to the body needs to run along the inner top edge of the leg, not the front — when you hold the leg flush to the body for the join, make sure the foot is pointing straight down and forward before you start crocheting through both layers. If a leg has already been joined at the wrong angle, it can often be repositioned by carefully unpicking those 5 joining stitches and re-crocheting them with the leg re-oriented.
Customization Ideas
- Before you dive into the pattern, here’s where the real fun is — because this elephant is a blank canvas with excellent bones.
- Color palette: The gray and accent-pad combination is classic, but this elephant works just as well in a warm caramel with cream pads for a more earthy feel, or a dusty mauve with blush accents for something softer and more gift-ready. The two-color construction is built right into the leg and arm rounds, so switching the palette costs you nothing extra in effort.
- Size scaling: The pattern uses chenille on a 3.5 mm hook for a firm, mid-sized toy. Drop to a DK weight yarn on a 3.0 mm hook for a pocket-sized version. Go up to a chunky chenille on a 5.0 mm hook for an oversized shelf elephant that really makes a statement. The construction scales cleanly either direction.
- Face expression: The slip stitch section in Round 9 of the trunk creates the angled mouth baseline. A few extra embroidered stitches in black cotton thread can give the elephant a subtle smile, a calm neutral expression, or even downturned eyebrows for a grumpy-cute look. The eyes are placed with 10 to 12 stitches between them — nudging that spacing inward makes the face read as younger and rounder.
- Accessories: A crocheted saddle blanket in a contrasting color, tacked across the back of the body, photographs beautifully. A tiny chain stitch flower tucked behind one ear is another five-minute addition that changes the character of the whole piece. The ears can also be left flat or pinched at the base for two completely different silhouettes.