Birdwatchers hang crochet bird amigurumi robins on the tree every December, just like the ones on Christmas cards. Brown, red and yellow scraps cover each robin from one bird amigurumi free pattern, and stitched eyes can replace the googly ones for a sturdier finish.
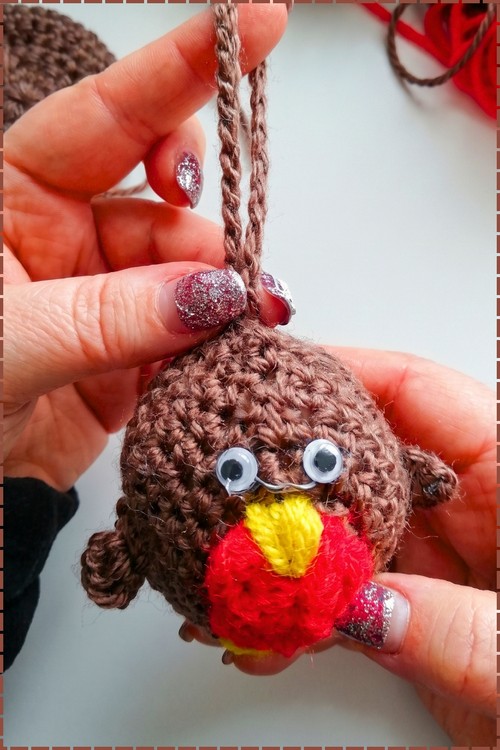
Googly eyes and a fuzzy red breast give character to the round brown robin in this free crochet robin bird amigurumi pattern, worked as one piece. A pointed yellow beak sits over the red patch, and small rounded wings stick out at each side. A braided yarn loop rises from the top of the head, so the robin hangs from a branch. Glue the googly eyes firmly, since they pop off easily and small children can choke on them.
Crochet Robin Bird Amigurumi
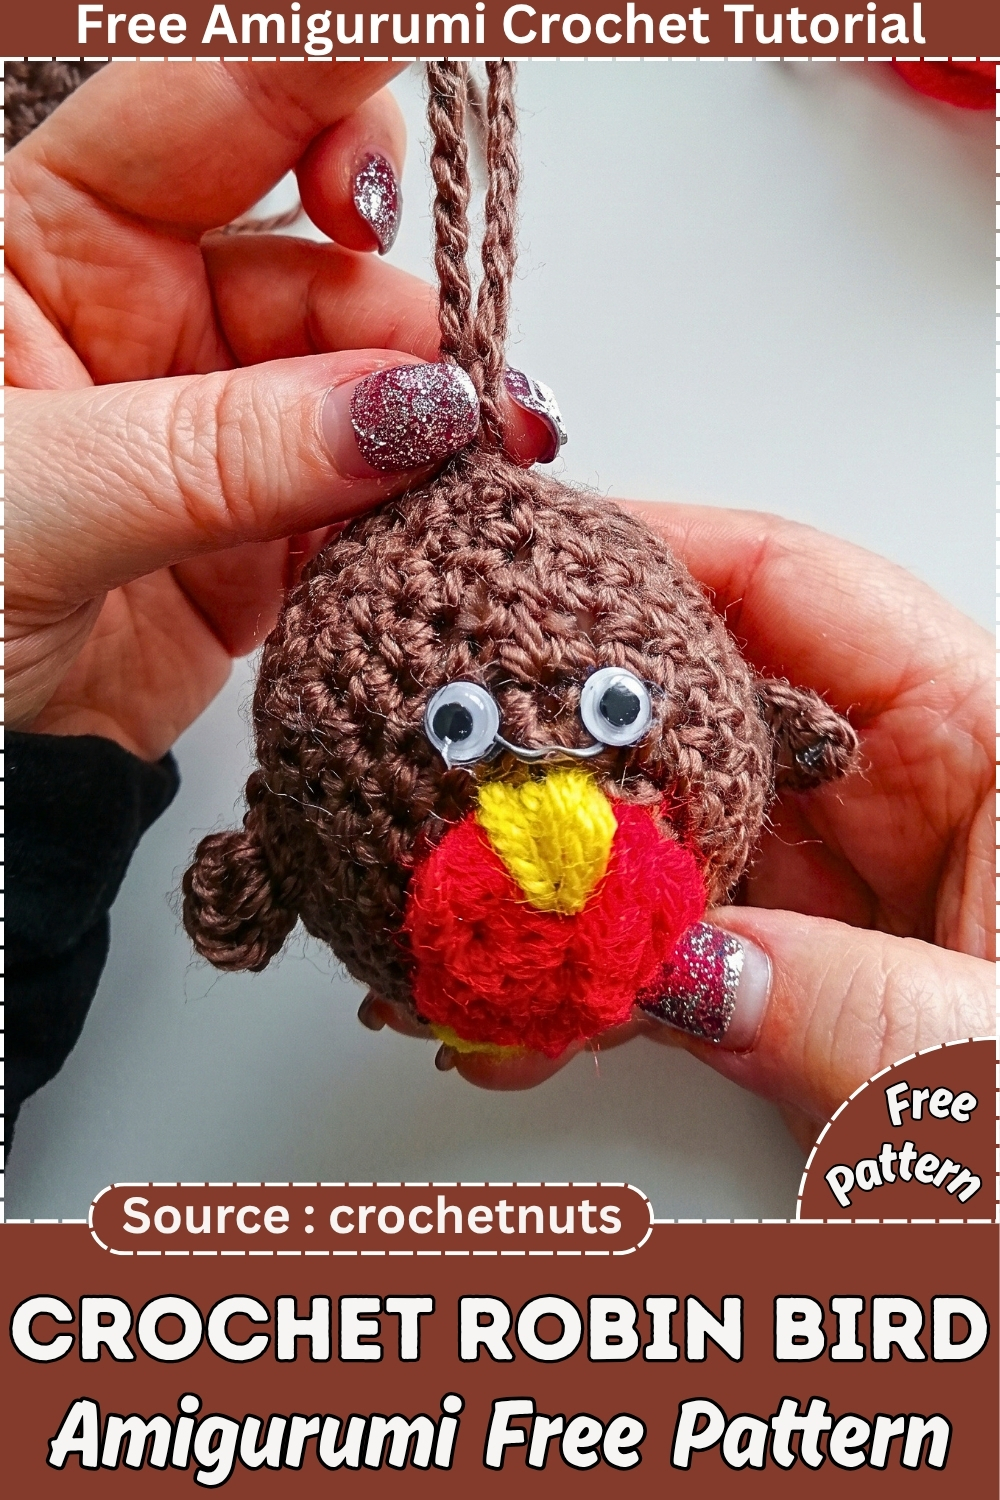
Two flat brown circles, seamed around the edge and lightly stuffed, with a red circle sewn on the front for the breast. That is the entire construction. There is no shaping to follow, no decrease rounds, and no separate head or tail to sew on, which makes this a good project for anyone who finds standard amigurumi assembly fiddly. The beak and feet are embroidered straight onto the front disc rather than crocheted. It hangs well on a tree or a door wreath, works up in an evening, and eats almost no yarn, so it is a sensible make for scraps or for a batch of small gifts.
Materials and Tools
Quantities are approximate and based on typical DK gauge, not measured from the original make.
- DK yarn in brown or dark gray for the body, roughly 20 to 25 g.
- DK yarn in red for the breast, a few metres is enough.
- DK yarn in yellow for the beak and feet, a scrap will do.
- Black yarn for embroidered eyes, plus a little white if you are working bullion knot eyes.
- Size 4 crochet hook, or whatever hook keeps your stitches tight enough that stuffing cannot peek through.
- Toy stuffing, a small handful.
- Wool or yarn needle.
- Small wobbly eyes and a glue gun, if you are going that route.
- Scissors.
Expect somewhere around 1 to 2 hours from start to finish, and a bird roughly 2.5 inches across.
Pieces List
- Brown body discs: 2
- Red breast disc: 1
- Beak: embroidered, not crocheted
- Feet: embroidered, not crocheted
- Wings: worked directly into the seam during joining
Three crocheted pieces total. Everything else happens with a needle.
Abbreviations Used
- Ch: chain
- SC: single crochet
- DC: double crochet
- Sl st: slip stitch
- Increase: 2 single crochets worked into the same stitch
The Pattern
Body Discs (Make 2 in Brown)
- Make a slip knot and work 4 chain stitches, keeping them tight.
- Slip stitch into the first chain to form a small ring.
- Round 1: work 6 single crochets into the center ring, then join with a slip stitch into the top of the first stitch. Pull the starting tail tight to close the center hole. [6] Checkpoint: the middle should be a solid dot with no visible hole. If a gap remains after pulling the tail, thread the tail onto a needle and cinch it from the back before you go any further, because the hole only gets more obvious as the disc grows.
- Round 2: chain 1, which does not count as a stitch here or in any following round. Work 2 single crochets in each stitch around and join with a slip stitch. [12] Checkpoint: this should sit flat on the table like a small coin. Any cupping at this stage means an increase was missed, and it is worth pulling back one round rather than fighting it later.
- Round 3: chain 1. Work 1 single crochet in the next stitch, then 2 single crochets in the following stitch, and repeat that pair all the way around. Join with a slip stitch. [18]
- Round 4: chain 1. Work 1 single crochet in each of the next 2 stitches, then 2 single crochets in the next stitch, and repeat all the way around. Join with a slip stitch. [24] Checkpoint: still flat, still round. If the outer edge is starting to ripple or wave, you are increasing faster than the disc needs, so work one plain round with no increases to settle it.
- Continue in this pattern, adding one more plain single crochet between increases on every round, until the disc reaches the size you want. In DK yarn this usually lands around round 7 or 8, at roughly 42 to 48 stitches.
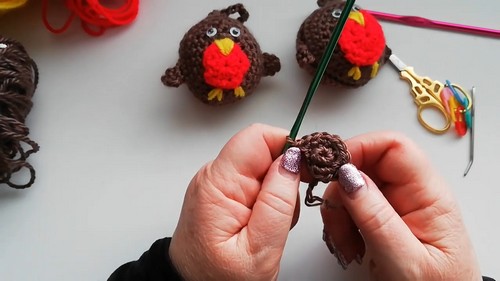
- The original discs measure about 2.5 inches, or 7 cm, across.
- Fasten off. Leave a long tail on at least one disc for the joining seam.
- Make the second disc exactly the same way, stopping on the same round as the first. Checkpoint: hold both discs together and check the edges line up all the way around. Two discs that differ by even one round will pucker along the seam, and there is no fixing that during assembly.
Still learning how amigurumi patterns work? That’s totally okay, follow the video tutorial below and check the written pattern as you go!
Red Breast (Make 1 in Red)
- Work exactly the same circle pattern as the brown discs, starting with the 4 chain ring and 6 single crochets. [6]
- Continue increasing round by round until the red disc measures about 1.25 inches, or 3.5 cm, across. In DK this is usually round 4, at around 24 stitches.
- Fasten off, leaving a tail long enough to sew all the way around the edge. Checkpoint: laid on top of a brown disc, the red circle should cover a little under half the width. Larger than that and the bird reads as a strawberry rather than a robin.
Face and Detailing on the Front Disc
- Pick one brown disc to be the front, and do all of this work before the two discs go together. Once the seam is closed you cannot hide any tails at the back.
- Position the red circle slightly below the center of the front disc.
- Sew around the edge of the red piece with a wool needle to anchor it flat. Take the stitches through the very outer edge of the red disc so the middle stays slightly domed. Fasten off at the back.
- Double the yellow yarn so you are working with two strands together.
- Embroider a small triangular beak just above the red breast, slightly off center, passing through the center point about 4 times to build up a solid shape. Checkpoint: the beak should read as a filled wedge, not an outline. If it looks thin, add another pass through the same center point rather than making it longer.
- Using the same doubled yellow yarn, embroider two small upside down V shapes at the bottom of the body for the feet.
- Secure and weave in all yellow ends at the back.
- Add the eyes now, before joining. Either glue on small wobbly eyes, or embroider them by working a bullion knot in white yarn for each eye base and a single small black stitch on top for the pupil.
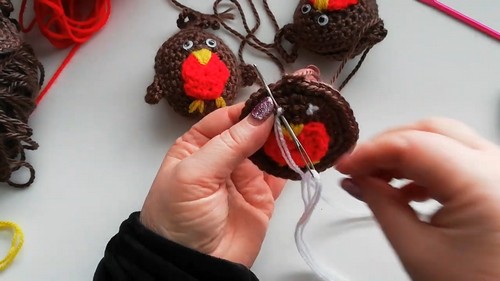
Joining, Wings and Stuffing
- Place both brown discs together with the wrong sides facing inward and the finished front outward.
- Starting at the top with the long tail, slip stitch the front and back loops of the outer edges together, working through both discs at once. Checkpoint: the seam should look like a neat raised ridge running around the outside. If the edge is buckling as you go, your slip stitches are too tight, so loosen your grip and let the yarn sit rather than pulling each stitch down.
- When you reach roughly the halfway point, just above the center line on one side, make the first wing: chain 2, then work 2 double crochets into the same space.
- Resume slip stitching the next stitches along the edge.
- Continue slip stitching around the bottom and up to the opposite side, then repeat the same chain 2 and 2 double crochet sequence to form the second wing. Checkpoint: both wings should sit at the same height. Count the stitches between the first wing and the bottom center before you place the second one, since eyeballing this on a round shape goes wrong more often than not.
- Keep slip stitching toward the top, stopping while a small gap is still open.
- Stuff the inside lightly through that gap. Checkpoint: the bird should stay flat and disc shaped, just with some softness to it. This is an ornament, not a ball, so a thin even layer is all it needs.
- Finish slip stitching the opening closed.
- If you want a hanging loop, chain a few stitches at the top and anchor the end securely into the seam.
- Fasten off and weave in all remaining ends.
Eye Timing and Safety
- The eyes go on the front disc during the detailing step, before the two discs are joined and stuffed. That order matters for both options. Glued wobbly eyes need a flat, unstuffed surface to bond to properly, and embroidered eyes need access to the back of the disc so the knots and tails can be buried out of sight.
- Glue-on eyes are not suitable for any toy going to a child under three. They pull off. For young children, use the embroidered option instead, or skip the bullion knots entirely and work two small black satin stitch dots, which is faster and just as effective at this scale. Bury the black tails inside the bird before you close the seam.
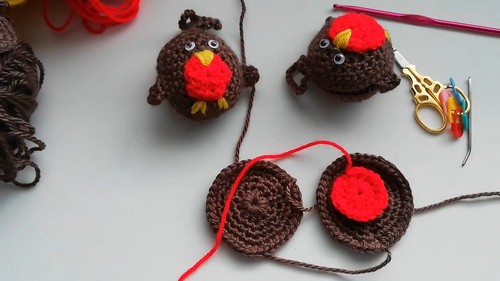
Assembly Order
- Sew the red breast to the front disc first, while the disc is flat and easy to hold.
- Embroider the beak, then the feet.
- Add the eyes.
- Weave in every tail on the back of the front disc.
- Only then join the two discs.
Pin the red breast in place with two pins and hold the disc at arm’s length before sewing. Breast placement sets the whole look of the bird, and slightly low is better than slightly high.
Stuffing Guide
- Stuff lightly. This piece is meant to stay flat.
- Add small pinches through the gap and spread each one out to the edges with your finger or the blunt end of the hook before adding the next.
- The corners near the wings are where stuffing tends to bunch, so check those before closing.
- Overstuffing shows first at the seam, where the slip stitch ridge starts to gape and the two edges separate. If you can see stuffing anywhere along the join, take some back out.
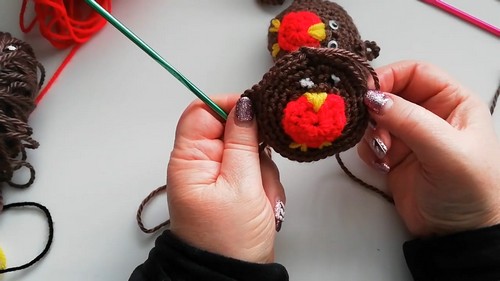
Yarn Substitution and Size Scaling
Worsted weight yarn on a 4 mm hook gives a bird closer to 3.5 inches across, which is a better size for a wreath than for a tree. Sport or 4 ply on a 2.5 mm hook takes it down to around 1.75 inches, small enough for a garland, though the embroidered beak gets fussy at that scale and is easier with a single strand of yellow rather than doubled.
Since the discs are worked to a measurement rather than a stitch count, any yarn will work. Just count your rounds on the first disc and write the number down, because you need the second one to match exactly.
Color and Customization Ideas
- Swap the red breast for pale yellow and you have a blue tit, especially if the body goes to soft blue.
- A few short white stitches scattered across the back disc suggest snow.
- Work the last round of the brown discs in a slightly darker shade for a defined outline.
- Replace the hanging chain with a loop of ribbon threaded through the top seam.
Pattern Note
Two things are worth knowing before you start.
- The hook is given only as size 4, which is ambiguous. Depending on the sizing system that could mean a 4 mm hook, a 2 mm steel hook, or something else again. The useful instruction is the one attached to it: use whatever hook makes your stitches tight enough that stuffing does not show through. For DK yarn that is usually 3 mm to 3.5 mm.
- The pattern also gives stitch counts only for the first two rounds and then switches to a measurement, so there is no stated count for the finished disc. That works fine, but it puts the responsibility on you to make both brown discs identical. Count the rounds on the first one. Do not measure the second one with a tape and hope.
FAQ
- Do I have to join each round with a slip stitch? The pattern is written that way, and joined rounds give you a tidier flat circle than continuous spirals do for a piece like this. You can work in a spiral with a stitch marker if you prefer, but the seam edge will sit slightly off true.
- Can I use safety eyes instead? Yes, and they are more secure than glue. Fit them through the front disc during the detailing step, before the discs are joined, since you need to reach the back to fasten the washers.
- My two discs came out different sizes. Can I still use them? If the difference is under about a quarter inch you can ease the bigger one in as you seam and nobody will notice. Anything more than that will pucker, and it is quicker to redo the smaller disc than to fight the seam.