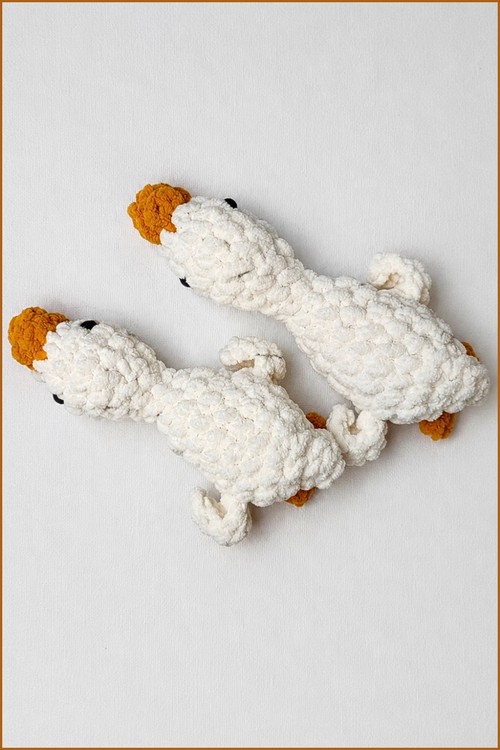
Goose fans get a cream crochet goose with an orange beak, orange feet and a soft, bumpy plush texture that is easy to squeeze. Make a matching pair of small amigurumi geese for a porch shelf, a nursery basket or a gift for anyone who loves silly farm birds.
This small goose is worked entirely in one piece, from the orange beak down to a perky tail, with no sewing at all. Wings form inside Round 14 and the feet appear mid round in Round 16, so assembly is limited to weaving in ends. Makers who already know the magic ring and basic decreases will get through it comfortably in an evening or two. Beginners can manage it too if they read the wing round slowly before starting. Finished height lands somewhere around 10 to 12 cm in DK yarn. A longer neck keeps it from reading as a duck, which matters more than you would think.
Crochet Goose
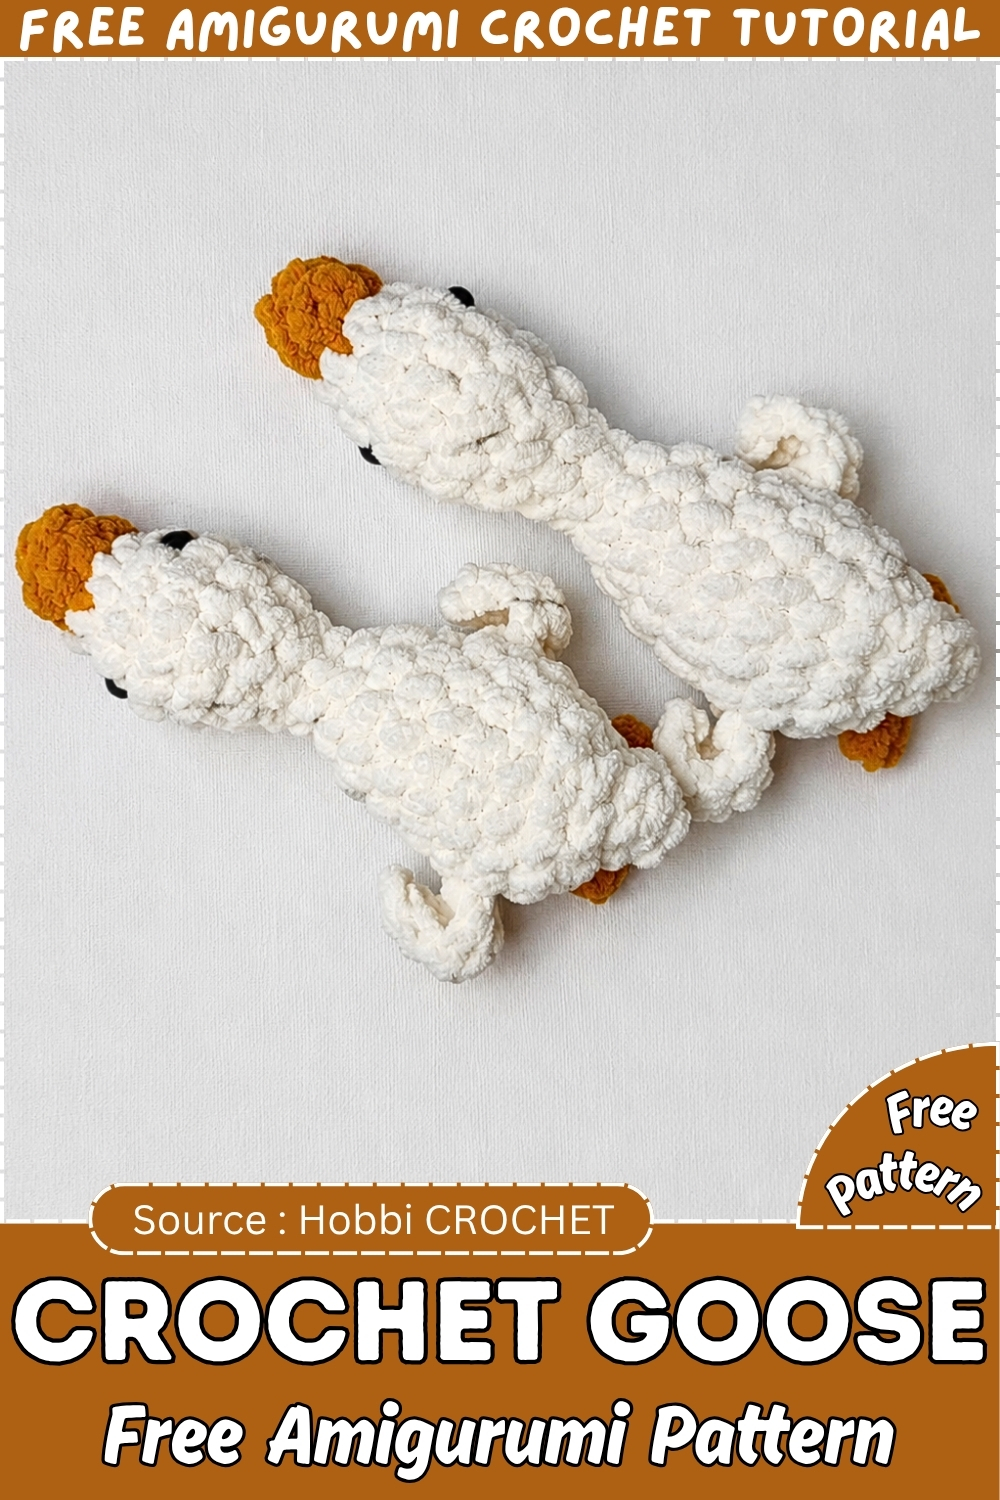
Anyone who hates sewing on parts will appreciate this one. Every feature grows straight out of the body rounds, so nothing can come loose at a seam later. Only two colours are needed, white for the body and orange for the beak and feet. The tail closes using a small trick past the stitch marker that tilts the rear upward and gives the goose a natural sitting posture. Expect a soft, squishy finish rather than a firm one. It makes a quick gift for a farm themed nursery shelf or a fun desk companion for an adult who loves geese.
Pieces List
- Goose body: 1 piece, worked continuously from beak to tail
- Head and beak: built in with an orange to white colour change
- Neck and body: continuous from the head
- Wings: 2, worked directly into Round 14
- Feet: 2, worked directly into Round 16
- Tail: shaped by the closing method
Nothing gets sewn on. The only finishing step is securing the eyes during construction and weaving in ends.
Materials and Tools
- White yarn for the main colour
- Orange yarn for the beak and feet
- 8 mm safety eyes
- Polyester fiberfill
- Crochet hook suited to your yarn weight
- Stitch marker
- Yarn needle
- Scissors
The pattern leaves yarn weight open. My suggestion is DK or light worsted with a 3 to 3.5 mm hook, which should give a goose of roughly 10 to 12 cm, though your tension will move that number. Go one hook size below the band recommendation either way. Stuffing should never peek through the fabric.
Safety Eye Timing
The 8 mm eyes go in between Rounds 4 and 5, after Round 6 is worked but before Round 7 starts narrowing the head. They must be locked in before any stuffing goes in or the opening closes. For a goose going to a child under three, skip the safety eyes and embroider them with black yarn or floss once the goose is finished.
The Pattern
Head and Beak
- Begin with orange yarn.
- Round 1: Magic ring with 6 sc. (6)
- Round 2: 1 sc in each stitch around. On the final yarn over of the 6th stitch, pull through with white yarn to change colour. (6) Checkpoint: this should be a very small flat orange disc with the white waiting; if it is already cupping, Round 1 was worked too tight.
- Fix for a loose colour join: if a loose loop sits at the change point, pull the orange tail snug from the inside before moving on, or a gap will show at the base of the beak.
- Round 3: (1 sc, 1 inc) × 3. (9)
- Round 4: (2 sc, 1 inc) × 3. (12)
- Rounds 5 and 6: 1 sc in each stitch around. (12)
- Safety eyes: insert the 8 mm eyes between Rounds 4 and 5, about 4 stitches apart. Hold the head at eye level and check alignment before pressing on the washers, because they cannot come off once seated.
- Round 7: (1 sc, 1 invisible dec) × 4. (8)
- Round 8: (2 sc, 1 dec) × 2. (6) Checkpoint: the head should be a small rounded ball, orange at the tip and white around the eyes; if the beak does not stand apart, the Round 2 colour change likely happened a stitch late.
- Stuff the head lightly now, only enough to hold its round shape. Too much fiberfill pushes the stitches around the eyes apart and changes the expression.
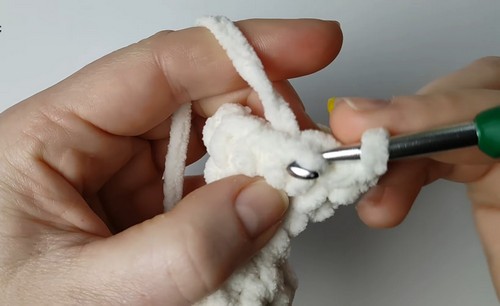
Neck and Body
- Continue in white.
- Round 9: 1 sc in each stitch around. (6)
- Round 10: (1 sc, 1 inc) × 3. (9)
- Round 11: (2 sc, 1 inc) × 3. (12)
- Round 12: 1 sc in each stitch around. (12)
- Round 13: (3 sc, 1 inc) × 3. (15) Checkpoint: the body should now be clearly wider than the neck at Round 9, giving a readable narrow neck and rounder body.
- Fix for stiff neck rounds: if Rounds 9 to 13 feel hard to work into, your tension has crept tighter since the head, so relax your yarn hand.
Just starting out with crochet? The video tutorial below is a great place to begin, or challenge yourself with the written pattern below!
Wings
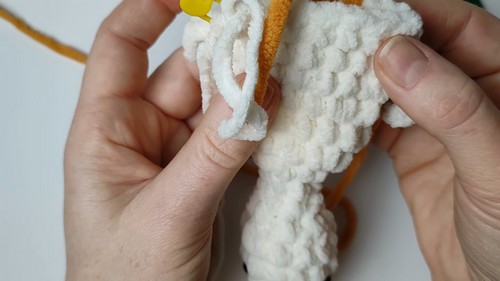
- Read all of Round 14 before starting. It is the busiest round in the pattern.
- Round 14: In the first stitch, work 1 sc, then chain 5.
- Starting in the 2nd chain from the hook and working back down: 1 sc, 1 hdc, 2 dc in the next chain, 1 hdc in the last chain. First wing done.
- Close the wing: pull up a loop from the base stitch and a loop from the next body stitch, then work 1 sc through both loops.
- Work 7 sc across the front of the body.
- Repeat the chain 5 wing sequence for the second wing and close it the same way.
- Work 7 sc across the back of the body to finish the round. (15) Checkpoint: both wings should angle outward a little from the sides, and they should match; if one is bigger, the two chain sequences were not worked the same way.
- Round 15: 1 sc in each of the 15 stitches, pushing both wings forward out of the way as you pass them. (15)
- Fix for a flattened wing: catching a wing stitch in Round 15 pulls it against the body, so keep both wings well clear of the hook.
Feet
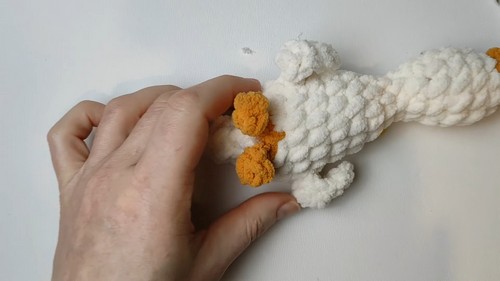
- Round 16: Work 4 sc in white, changing to orange on the 4th sc.
- First foot: chain 4, work 1 dc into the 2nd chain from the hook, then slip stitch down the remaining chains.
- Slip stitch into the next body stitch to anchor the foot.
- Second foot: chain 4, work 1 dc into the 2nd chain from the hook, then slip stitch down the remaining chains, changing back to white on the final slip stitch.
- Work 9 sc in white to complete the round. (15) Checkpoint: both feet should point forward or slightly outward with some floppiness, which is correct; a foot twisting backward means the anchor slip stitch landed in the wrong stitch.
- Fix for stubby feet: tight chains make stiff little nubs, so work the foot chains looser than feels natural.
Decreasing and Closing
- Round 17: Decrease twice before the legs, 1 sc between the legs, decrease twice after the legs, then continue with sc and dec to the stitch marker. (Stitch count reduces from 15.)
- Pattern note: the stitch count after Round 17 is not given in the pattern. Work the decreases as described and count afterward so you know where you stand before Round 18.
- Round 18: (1 sc, 1 dec) repeated around to the stitch marker.
- Tail accent: work 4 more sc past the marker to lift the back slightly, so the closing point sits at the rear as a small upturned tail.
- Add a little more stuffing to the body, keeping it soft and squishy.
- Cut the yarn leaving about 15 cm. Pull the tail through the front loops of the remaining stitches with your hook or needle.
- Cinch firmly to close into a small rounded tail. Knot and hide the tail inside the body. Fix for a goose that tips over: before cinching, shift some stuffing from the head area toward the base instead of adding more.
Stuffing Guide
Keep the head light. Enough to round it, never so much that the eye stitches gape. The body should finish soft, closer to a stress ball than a tennis ball. Wings and feet get no stuffing at all, since their shape comes purely from the stitches.
Assembly
There is nothing to pin or sew on this goose. The eyes went in between Rounds 4 and 5, and every other part grew out of the body as you worked. What remains is weaving in four tails from the two colour changes, one at Round 2 and the pair at Round 16. Send each tail off in a different direction so they hold.
Toy Safety
Safety eyes are not suitable for children under three, so embroider instead for that age. Trim every yarn end close before gifting. On a goose that gets played with, check the base of each foot now and then, and stitch it tighter if a chain starts loosening.
FAQ
How can I tell if Round 14 worked? Count your 5 chains before working back down, since five stitches go into four chains. If the wing fans out from the side of the body when you finish, you got it right.
Why won’t my goose sit up straight? Usually the head holds too much stuffing and the base too little. Move fiberfill around before the final cinch rather than packing in more, and let the tail accent pull the rear down.
Can I turn this into a duckling? Easily. Swap the white for yellow and keep the orange beak and feet, with every round left exactly the same.