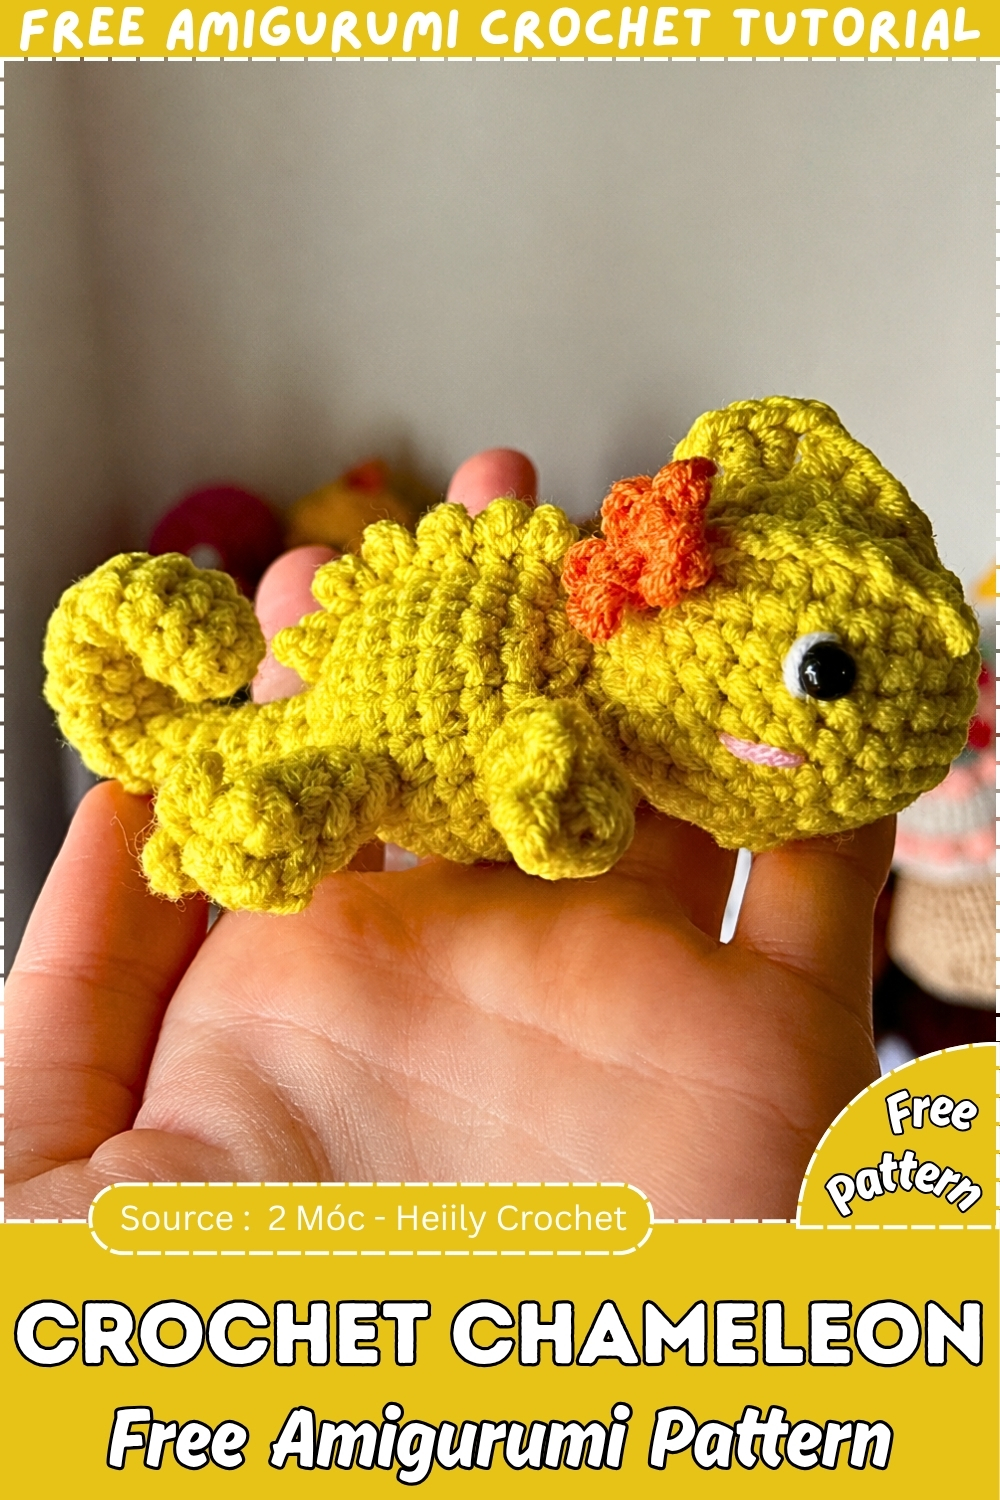
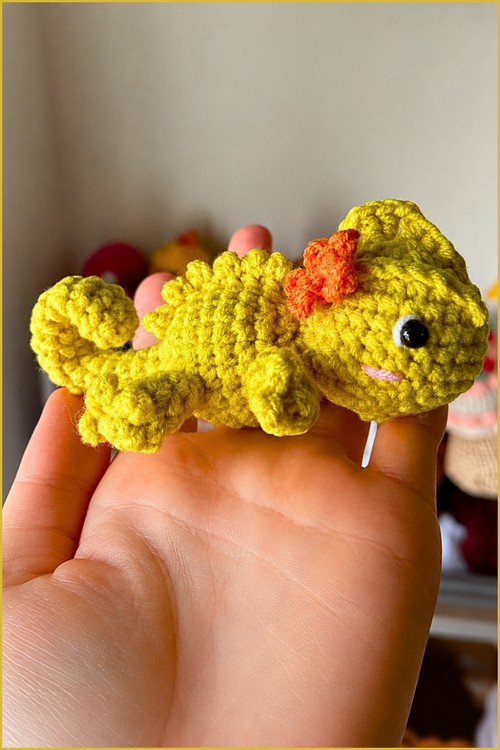
Perch the crochet chameleon on the rim of a houseplant pot, where its chartreuse body and curled tail blend right into the leaves. Reptile-loving kids can line up the amigurumi chameleon with other pocket-sized animals on a shelf, and a bright orange flower crowns its head.
Last spring my neighbour’s son started keeping a real veiled chameleon in a glass tank by his bed, and he asked if I could make one he was allowed to hold. That request turned into this little green fellow with a curled tail and hooded eyes. Kids seem to love the tail most.
Crochet Chameleon Amigurumi
Rolling it up and watching it stay put feels like a small magic trick. Most of the shaping comes from the body, worked from the tail tip upward in one long tube. Small spikes and toes take patience, but nothing is hard. Give yourself a weekend.
Why I Love This One
The tail curl does all the work of making it look alive, and it costs nothing but a few hidden stitches.
Pieces List
- 1 head (green)
- 1 body and tail, worked as a single piece (green)
- 2 eyes (white)
- 2 eyebrow ridges (green)
- 4 legs (green)
- 1 big head spike (green)
- 1 strip of little back spikes (green)
- 1 embroidered mouth (pink or brown)
Materials and Tools
The pattern lists a 2.5 mm or 3.0 mm hook but no yarn weight, so the weight below is my estimate for that hook range.
- Spring green yarn for the head, body, legs, ridges and spikes (sport or light DK cotton suits these hooks; roughly 25 to 35 g, approximate)
- White yarn for the eyes
- A tiny amount of black or pink yarn for facial details
- 2.5 mm or 3.0 mm crochet hook, depending on your yarn weight
- 10 mm safety eyes, or black felt for pupils
- Fiberfill stuffing
- Tapestry needle
- Stitch marker
- Scissors
With sport weight cotton, expect a chameleon around 10 cm long with the tail curled. That is a rough figure. Most makers need four to five hours spread over a couple of sittings.
Abbreviations (US Terms)
- MR: magic ring
- ch: chain
- sc: single crochet
- hdc: half double crochet
- inc: increase (2 sc in one stitch)
- dec or sc2tog: decrease (single crochet 2 stitches together)
- sl st: slip stitch
- st(s): stitch(es)
- FO: fasten off
Safety Eye Timing
The safety eyes go into the white eye domes, not into the head. Insert them into the centre of each dome right after Round 3 of the eye, while the back of the dome is still open, and before the domes are sewn onto the head. Once a dome is stitched down, there is no way to fit a washer behind it.
Chameleon Crochet Pattern
Part 1: The Head
Rounds
- Work in continuous rounds with green yarn.
- Round 1: 6 sc in MR. (6)
- Round 2: Inc in each st around. (12)
- Round 3: [1 sc, inc] repeat 6 times. (18)
- Round 4: [2 sc, inc] repeat 6 times. (24) Checkpoint: a flat disc, lying smooth with no ripple at the edge.
- Round 5: Sc in each st around. (24)
- Round 6: Sc in each st around. (24)
- Round 7: Sc in each st around. (24)
- Round 8: Sc in each st around. (24) Checkpoint: the sides have turned straight up into a short cup.
- Round 9: [3 sc, inc] repeat 6 times. (30)
- Round 10: Sc in each st around. (30)
- Round 11: Sc in each st around. (30)
- Round 12: Sc in each st around. (30)
- Round 13: Sc in each st around. (30)
- Round 14: Sc in each st around. (30) Checkpoint: a deep, slightly bulging cup, wider at the opening than at Round 8.
- Round 15: [3 sc, dec] repeat 6 times. (24)
- Round 16: [2 sc, dec] repeat 6 times. (18)
- Begin stuffing the head firmly.
- Round 17: [1 sc, dec] repeat 6 times. (12) Checkpoint: a firm round ball with only a small opening left.
- Round 18: Dec 6 times. (6)
- FO, leaving a long tail for sewing.
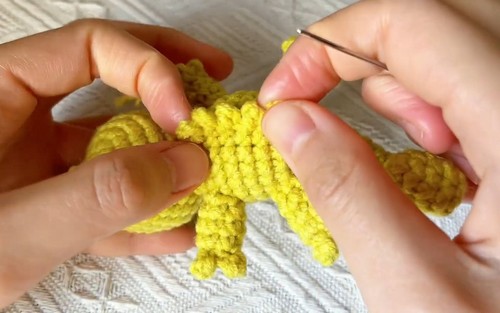
Part 2: The Body and Tail
Tail Rounds
- Start at the very tip of the tail and work up toward the neck.
- Use green yarn.
- Round 1: 4 sc in MR. (4)
- Round 2: Inc, 3 sc. (5)
- Rounds 3 to 15: Sc in each st around. (5)
- This long tube forms the curled tail. Do not stuff it yet. Checkpoint: a skinny tube about the width of a drinking straw that tends to twist slightly as you go, which actually helps the curl later.
If you’re new to reading crochet patterns, don’t worry, just follow along with the video tutorial below and use the written pattern as a reference!
Body Rounds
- Round 16: Inc, 4 sc. (6)
- Round 17: [Inc, 2 sc] repeat 2 times. (8)
- Round 18: [Inc, 3 sc] repeat 2 times. (10)
- Round 19: [Inc, 4 sc] repeat 2 times. (12)
- Round 20: [Inc, 3 sc] repeat 3 times. (15) Checkpoint: the tube now flares into a narrow cone where the body begins.
- Round 21: Sc in each st around. (15)
- Round 22: [Inc, 4 sc] repeat 3 times. (18)
- Round 23: [Inc, 5 sc] repeat 3 times. (21)
- Round 24: Sc in each st around. (21)
- Round 25: [Inc, 6 sc] repeat 3 times. (24)
- Round 26: Sc in each st around. (24) Checkpoint: this is the widest point of the body, rounded like the belly of a small egg.
- Round 27: [Dec, 6 sc] repeat 3 times. (21)
- Round 28: [Dec, 5 sc] repeat 3 times. (18)
- Round 29: Sc in each st around. (18)
- Round 30: [Dec, 4 sc] repeat 3 times. (15)
- Round 31: Sc in each st around. (15) Checkpoint: the body tapers to an open neck, giving a teardrop shape with a long tail trailing off the narrow end.
- FO, leaving a long tail for sewing.
- Stuff the main body (Rounds 16 to 31) firmly.
- Leave the skinny tail completely unstuffed so it can roll up easily later.
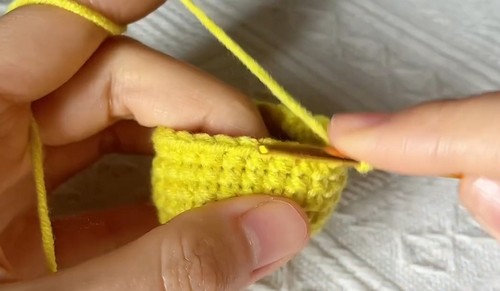
Part 3: The Eyes (Make 2)
Rounds
- Use white yarn.
- Round 1: 6 sc in MR. (6)
- Round 2: Inc in each st around. (12)
- Round 3: Sc in each st around. (12) Checkpoint: a small shallow dome, like an upturned button.
- FO, leaving a long tail for sewing.
- Insert your safety eyes into the centre of each white dome now, or plan to glue black felt pupils on later.
Part 4: Eyebrow Ridges (Make 2)
Row
- Use green yarn.
- Row 1: Ch 9. Starting in the 2nd ch from your hook, sl st in each chain across. (8) Checkpoint: a thin firm cord that curves slightly on its own.
- FO, leaving a long tail.
- These become the hooded eyelids above the eyes.
Part 5: The Legs (Make 4)
Rounds
- Use green yarn.
- The hdc stitches create the natural bend at the elbows and knees.
- Round 1: 4 sc in MR. (4)
- Round 2: Sc in each st around. (4)
- Round 3: 2 hdc in each of the next 2 sts, sc in the next 2 sts. (6)
- Round 4: Hdc in the next 4 sts, sc in the next 2 sts. (6) Checkpoint: the little tube has a visible bend, with the hdc side bulging outward like a knee.
- Round 5: [Inc, 2 sc] repeat 2 times. (8)
- Round 6: Sc in each st around. (8)
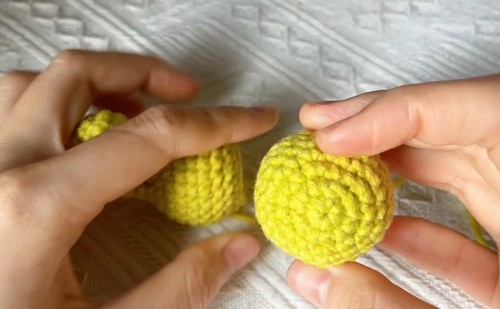
Toes
- Round 7: Work in the front loops only.
- Sl st into the first st.
- [Ch 2, sl st in the 2nd ch from hook, sl st in the next stitch on the base] repeat 3 times to make 3 toes.
- Sl st to the end of the round. Checkpoint: three tiny nubs stand out from the edge of the leg.
- FO, leaving a long tail.
- Stuff the upper part of the leg very lightly.
Part 6: The Spikes
Big Head Spike (Make 1)
- Use green yarn.
- Round 1: 4 sc in MR. (4)
- Round 2: Inc in each st around. (8)
- Round 3: Sc in each st around. (8)
- Round 4: [Inc, 3 sc] repeat 2 times. (10) Checkpoint: a small soft cone, open at the wide end.
- FO, leaving a long tail.
- Do not stuff.
Little Back Spikes (Make 1 Strip)
- Use green yarn.
- Row 1: Ch 14.
- Row 2: Starting in the 2nd ch from your hook, work [ch 2, sl st in the 2nd ch from hook to make one pointed spike, sl st in the next 2 base chains].
- Repeat this all the way across the chain to make a strip of about 6 small spikes. Checkpoint: a narrow strip with evenly spaced little points along one edge.
- FO, leaving a long tail.
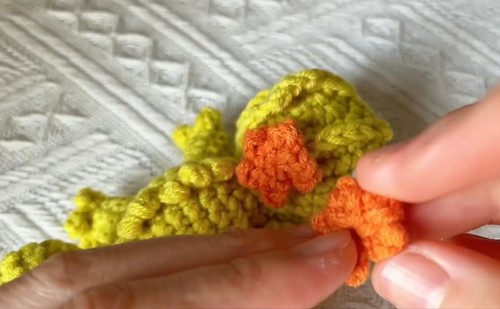
Part 7: Assembly
Attach the Head
- Pin the head to the open neck of the body.
- Angle the head slightly to the left or right for a curious look.
- Sew securely using the long tail left on the head.
Sew on the Legs
- Pin the four legs to the bottom sides of the body.
- Check how it balances on a flat surface before sewing.
- Make sure the bent elbow, the side with the hdc stitches, points upward.
- Sew the legs in place.
Attach the Eyes and Ridges
- Sew the white eye domes onto the sides of the head, leaving about 3 to 4 stitches of space between them across the top of the head.
- Sew the green eyebrow ridges arched over the top of each white eye, like an awning.
Add the Spikes
- Sew the big spike onto the top back of the head.
- Sew the strip of little spikes down the spine of the back.
Curl the Tail
- Roll the unstuffed tail tube up tightly into a spiral toward the body.
- Using a tapestry needle and a scrap of green yarn, make a few hidden stitches through the spiral to hold the curl permanently.
Facial Details
- Embroider a straight line across the front of the face for a mouth, using pink or brown yarn.
Assembly Guide
- The order matters more than usual here, because each step changes how the next one balances.
- Head first. Pin it all the way around the neck with the closed end of the head facing the body, then turn the whole thing and look at the tilt from the front before sewing. A small angle reads as curious. Too much and it looks like it is falling over.
- Legs come next, and pins are the whole point. Set all four on with the hdc bend facing up, stand the chameleon on the table and nudge them until it sits level without leaning. The front pair usually lands somewhere under the widest part of the body, and the back pair closer to where the body narrows toward the tail. As I read the leg, the rounded magic ring end meets the body and the toe round sits on the table. Your sewing tail comes off at the toe end, so run it up inside the leg with your needle before you start stitching.
- Pin both eye domes before sewing either one, and look straight down at the top of the head to check the gap between them. Then lay the ridges over the eyes and pin those too. Spikes go on last before the tail curl, since a curled tail makes the body awkward to hold while you work along the spine.
Stuffing Guide
- The head wants firm stuffing, started after Round 16 and topped up before Round 18 so it holds its round shape on the neck. The body from Round 16 to Round 31 is also firm. Push the filling well up toward the neck so the head has something solid to sit on.
- The tail stays completely empty. Watch the transition at Round 16, because stuffing creeps down into the tube very easily, and even a small plug there will stop it from rolling tightly. The legs get only a whisper of stuffing in the upper part. The big head spike gets none.
- Overstuffing shows first at the neck. If the opening bulges, the head sits on a dome of fiberfill and wobbles no matter how well you sew it. Pull a little out until the neck edge lies flat.
Toy Safety
Safety eyes and glued felt pupils are not suitable for children under three. For a toy going to a baby or toddler, skip both and embroider a black pupil onto each white dome with black yarn, using a few short stitches across the centre. Do this after Round 3 of the eye and before sewing the domes onto the head, so the yarn ends can be hidden behind the dome. Small parts on this toy are tiny, so tug every spike and toe once it is sewn on, and add stitches anywhere that shifts.
FAQ
- Can I stuff the tail a little so it feels sturdier? I would not. Even a small amount stops it rolling into a tight spiral, and the hidden stitches are what keep the curl in place anyway.
- What yarn weight should I use with a 2.5 mm hook? Sport weight or a light DK cotton is my usual pick for that size. Anything thicker and the tail tube gets hard to roll.
- Will a 10 mm safety eye fit in such a small white dome? It should, since the dome is 12 stitches around. If your tension runs tight and the shank feels crowded, an 8 mm eye looks fine too.
- How do I stop the head from flopping forward? Firm stuffing right up to the neck edge helps most. Then sew all the way around the neck, not just at a few points, and go round a second time if it still nods.