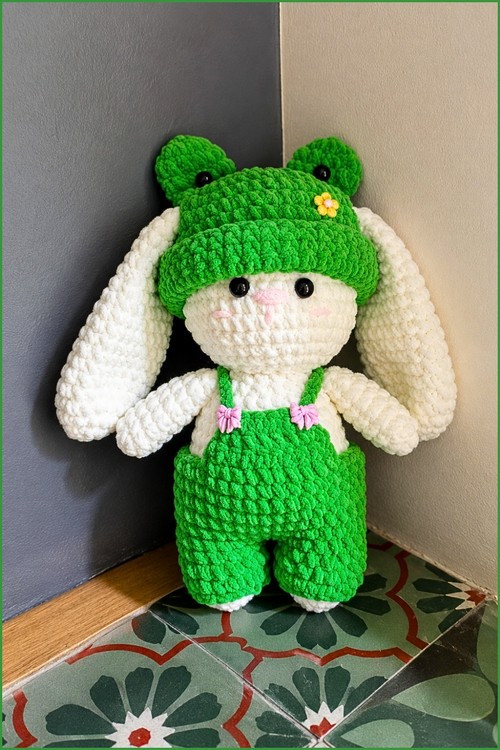
Dress a white plush bunny in green crochet bunny clothes, with a tiny yellow flower on the frog hat and pink bows on the dungaree straps. Easter mornings get extra cheer from the frog bunny crochet toy, which sits happily on a nursery shelf beside other plush animals.
This pattern dresses a plush bunny in a two part frog costume: a hat with round eye stalks and a pair of bib dungarees. Openings in the hat let the bunny’s own ears poke through, so you see both animals at once.
Crochet Frog Bunny
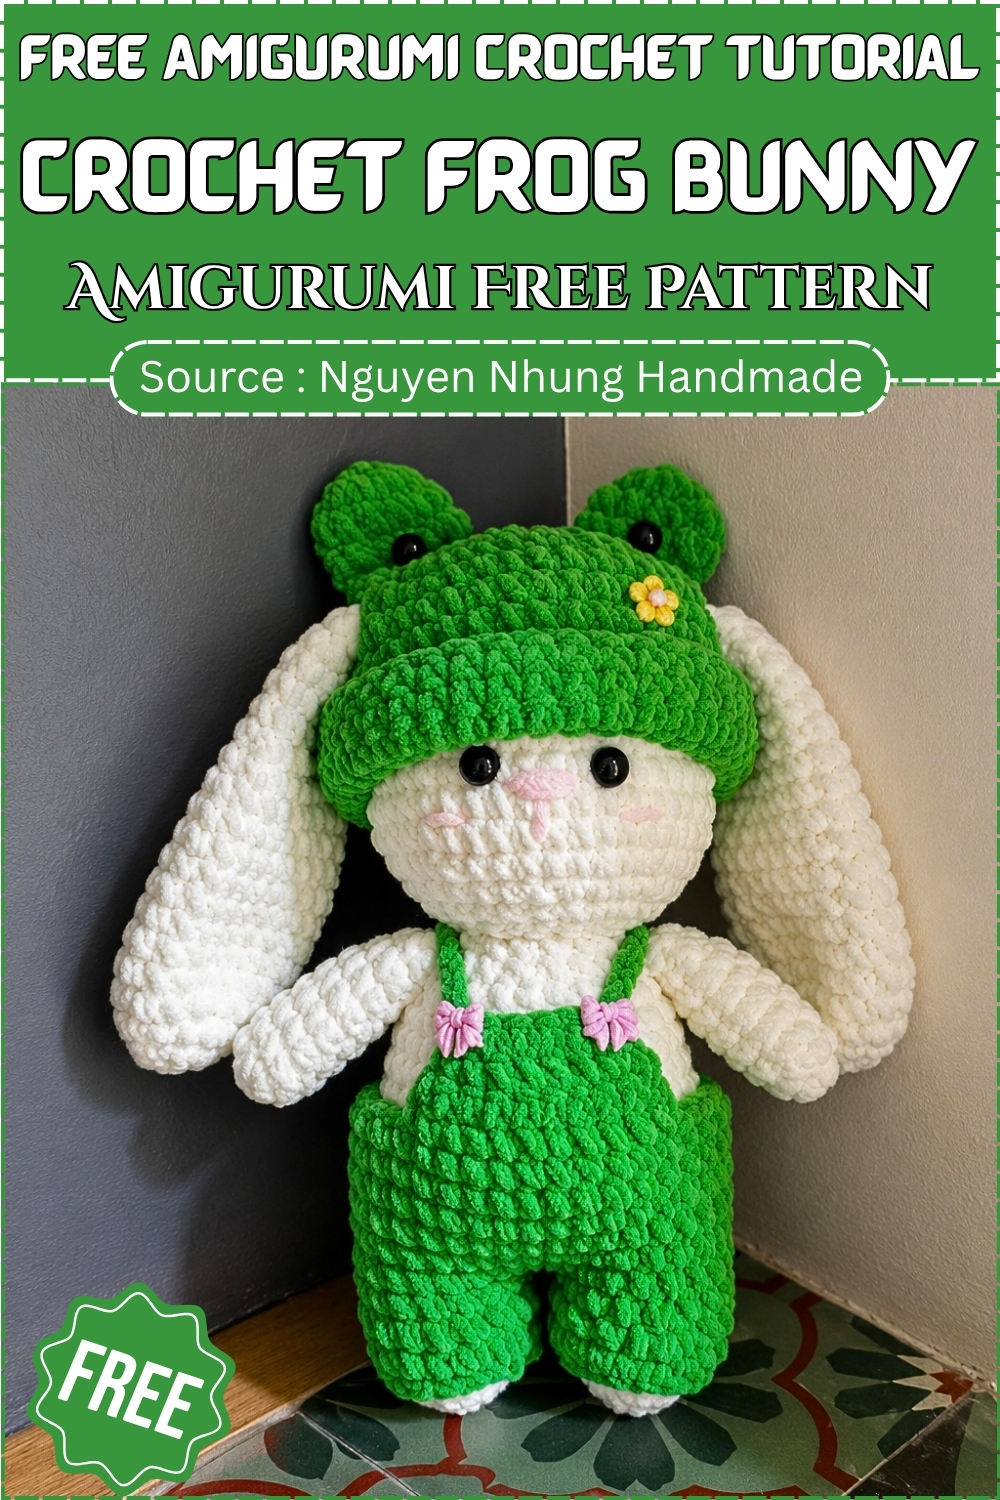
Velvet chenille on an 8 mm hook works up fast and hides most stitch lines. Anyone comfortable with single crochet and basic increases can follow it. Experienced makers will likely finish in an afternoon or so. Bring your own bunny, since only the outfit is covered here. A finished amigurumi bunny or a store bought plush roughly 25 to 35 cm tall should fit.
Materials and Tools
The yardage and fit below are approximate, so treat them as a starting point.
- Velvet chenille yarn (sold in Vietnam as len nhung đũa), approximately 2.5 skeins
- 8 mm crochet hook
- Two 14 mm frog style safety eyes, or black embroidery thread or felt circles if the toy is for a young child
- Hot glue gun
- Blush or decorative charms for the cheeks (optional)
- Tapestry needle and scissors
- Stitch markers
- Small pinch of fiberfill for the eye stalks (optional)
Work a little looser than your usual tension. Chenille compresses under tight stitching, and the pieces end up stiffer than you’d expect.
Fit depends heavily on how you handle chenille. At a relaxed 8 mm gauge the hat should suit a bunny head somewhere around 20 to 25 cm in circumference, with the dungarees sized for a body in proportion. Measure your plush before you start the dungarees, because the strap length is there to be adjusted.
Pieces List
- Hat: make 1, worked in joined rounds
- Frog eye stalks for the hat: make 2
- Dungaree legs: make 2, then joined and continued as one body
- Front bib flap: make 1, worked flat from the joined dungarees
- Straps: make 2, chains only
Five pieces in total. The hat takes the longest. The straps are just chains.
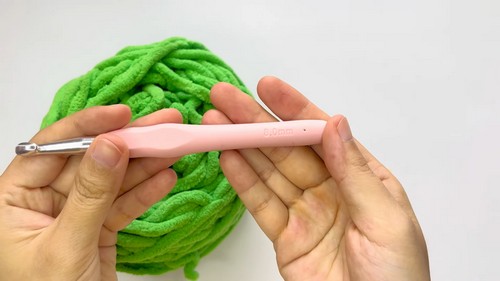
Crochet Frog Bunny Pattern
Work the pieces in this order: hat, eye stalks, dungaree legs, dungaree body, bib, then straps.
Chenille hides its stitches well, so counting by eye gets unreliable fast. Run a fingertip over the tops of the round instead and count the little ridges by feel. It’s quicker than squinting.
The Hat
Every round in the hat ends with a slip stitch into the first stitch of that round, followed by chain 1 before you begin the next round. This is joined round construction, not a continuous spiral. Mark the first stitch of each round anyway.
- Round 1: Make a magic ring and work 8 single crochet into the ring. Pull closed. 8 stitches.
- Round 2: Work 2 single crochet in each stitch around. 16 stitches.
- Round 3: Work 1 single crochet, then 1 increase. Repeat around. 24 stitches.
- Round 4: Work 3 single crochet, then 1 increase. Repeat around. 30 stitches.
- Round 5: Work 2 single crochet, 1 increase, then 2 single crochet. Repeat around. 36 stitches.
- Round 6: Work 5 single crochet, then 1 increase. Repeat around. 42 stitches. Shape checkpoint: The crown should sit like a flat plate, wide and even, with no cupping at the edges. Quick fix: If it’s already trying to form walls, your tension is tighter than the pattern expects, so go up a hook size rather than fighting it.
- Round 7 (ear holes): Work 10 single crochet, chain 5, skip 5 stitches, work 15 single crochet, chain 5, skip 5 stitches, then work the remaining 7 single crochet to finish the round. Shape checkpoint: Your count for this round is 10 worked, 5 skipped, 15 worked, 5 skipped and 7 worked, which accounts for all 42 stitches. Quick fix: If the count feels off partway through, the 15 single crochet between the gaps is the usual culprit. Place a marker right after the first chain 5 before you work that middle section.
- Round 8: Work single crochet in every stitch around, placing 5 single crochet directly into each chain 5 space from the previous round to restore the count. 42 stitches. Quick fix: Fill both chain spaces with real stitches. Leaving them as gaps will throw off every round after this one.
- Rounds 9 to 15: Work single crochet evenly around in each round. Slip stitch at the end of round 15, fasten off, and weave in the ends. Shape checkpoint: By round 10 the hat should have clear vertical walls, sitting like a cylinder with a domed top, and the ear holes should show as two neat horizontal openings that don’t pull or pucker. Quick fix: If one hole looks tighter than the other, the chain 5 in round 7 was worked at uneven tension. This is very hard to correct once round 8 is done, so check both holes before you go further.
Notes for the hat:
- Rounds 1 to 6 build a smoothly domed crown. Rounds 4 to 6 each add 6 stitches, just spread differently.
- Round 7 is the only tricky round in the whole outfit. Read it through twice before starting.
Still getting the hang of reading crochet patterns? That’s completely okay, the video tutorial below breaks everything down in a simple, beginner-friendly way!
Frog Eye Stalks for the Hat
Make 2.
- Round 1: Make a magic ring and work 6 single crochet into the ring. Slip stitch to join, then chain 1.
- Round 2: Work 2 single crochet in each stitch around. 12 stitches. Slip stitch to join, then chain 1. Shape checkpoint: You should have a small flat circle with an even edge all the way around.
- Rounds 3 to 4: Work 12 single crochet evenly around with no increases or decreases. Slip stitch at the end of round 4 and fasten off, leaving a long tail for sewing. Shape checkpoint: Each finished stalk should be a short, even cylinder, a fat little tube about as tall as it is wide. Quick fix: If one stalk is narrower than the other, recount round 2. Nothing else on this piece changes the width, so a size difference almost always comes from a missed increase.
The pattern doesn’t call for stuffing the eye stalks. You can leave them hollow or add a small pinch of fiberfill before sewing, which helps them keep their shape over time.
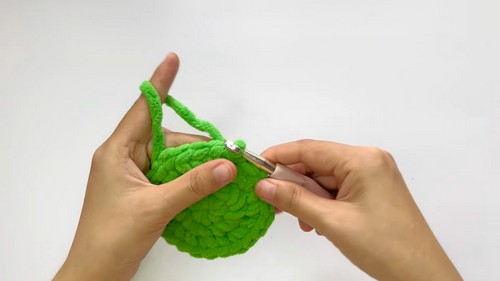
Dungaree Legs
Make 2. Work both legs the same way until the join.
- Round 1: Chain 16, slip stitch into the first chain to form a ring, chain 1, then work 16 single crochet around the ring. Slip stitch to join, then chain 1. Quick fix: Untwist the foundation chain before you slip stitch it into a ring. Chenille is thick enough that a twist stays hidden until the leg is two rounds deep, and by then you’ll be starting over.
- Round 2: Work 16 single crochet evenly around. Slip stitch to join, then chain 1.
- First leg: Fasten off here and set it aside.
- Second leg: Do not cut the yarn. Chain 3, then slip stitch into any stitch on the first leg to join the two legs together. Shape checkpoint: Before making that join, hold both legs side by side. They should match exactly in circumference and height. Quick fix: A single missed stitch in round 1 or 2 makes the join round awkward and uneven, so recount now if they differ.
Dungaree Body
- Round 3 (join round): Chain 1, work 16 single crochet around the first leg, work 3 single crochet along one side of the 3 chain bridge, work 16 single crochet around the second leg, then work 3 single crochet along the other side of the bridge. Slip stitch to join, then chain 1. 38 stitches. Shape checkpoint: Count 16 on each leg and 3 on each side of the bridge before moving on. Quick fix: Ending with more or fewer than 38 usually means you worked into the base of the bridge chain instead of along it, or miscounted a leg.
- Rounds 4 to 9: Work single crochet evenly around the whole body in each round. Slip stitch at the end of round 9, fasten off, and weave in the ends. Shape checkpoint: By round 6 the dungarees should look like a very short tube sitting on top of two smaller tubes, with a smooth crotch join and no large hole. Quick fix: If a gap shows at the crotch, close it with a few stitches from the yarn tail before you weave it in.
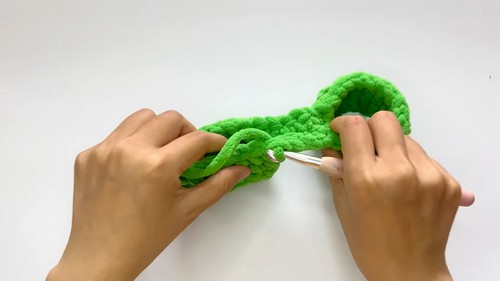
Front Bib Flap
Turn the finished dungarees to the front. Find the central 11 stitches across the front panel and mark both ends.
- Row 1: Join yarn at the first marked stitch, chain 1, and work 11 single crochet across. Chain 1 and turn. Mark the centre stitch of this row before you begin row 2. With an odd count the bib centres itself, as long as the decreases sit at the true edges.
- Row 2: Work 1 decrease, 7 single crochet, then 1 decrease. Chain 1 and turn. 9 stitches.
- Row 3: Work 1 decrease, 5 single crochet, then 1 decrease. Chain 1 and turn. 7 stitches.
- Row 4: Work 1 decrease, 3 single crochet, then 1 decrease. Do not turn. 5 stitches. Shape checkpoint: The bib should taper evenly from 11 stitches at the base to 5 at the top, forming a neat trapezoid. Quick fix: If one side draws in faster, a decrease landed off centre. They always go in the first and last positions of each row.
Straps
- First strap: Chain 18 from the top corner of the bib, then attach it to the back of the dungarees. Lengthen or shorten the chain to suit your plush. Pin the end in place for now and save the final sewing for assembly.
- Second strap: Repeat on the other top corner of the bib, using the same chain count as the first. Quick fix: If a chain twists, let it hang freely before attaching the second end and it will untwist on its own. Blocking chenille is close to impossible, so a twist is much easier to stop than to fix later.
Safety Eye Timing
The eyes on this outfit go onto the eye stalks, not into a stuffed body. Attach them once both stalks are finished after round 4, and before the stalks are sewn onto the hat. Glue each 14 mm eye to the flat centre of a stalk, which is the magic ring end. After the stalks are fixed to the hat, you can’t reach inside them anymore.
Hot glue doesn’t lock an eye in place the way a washer does. If you’d like a firmer hold, ease the eye post between the stitches at the centre of the stalk and press the washer on from inside the open end before the stalk goes onto the hat. For a toy going to a child under three, skip the plastic eyes completely and embroider the pupils onto each stalk in black thread with satin stitch.
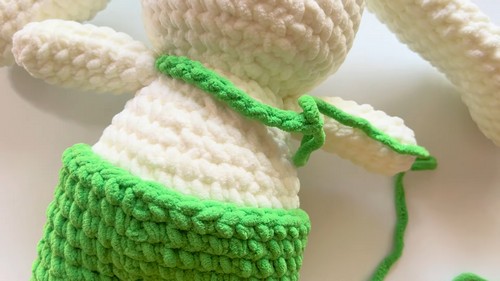
Assembly
Work in this order, and pin each piece before you glue or sew anything.
- Eye stalks onto the hat. With the eyes already fitted, sew or glue both stalks onto the top of the hat, set symmetrically across the crown. Pin them and look at the hat straight on first. They always seem to drift apart, so place them closer together than feels right. Once the hat is on the bunny’s head they’ll read correctly.
- Cheeks and charms. These go on after the eyes so you can balance the face as a whole. Blush circles sit just below and slightly to either side of the eye stalks.
- Hat onto the bunny. Fit the hat over the bunny’s ears through the round 7 openings. It should sit firmly without glue, though a few invisible stitches between the ear holes and the ears will stop it shifting.
- Dungarees onto the bunny. Slide them over the legs and pull up. The bib sits at the front, and the straps either cross or run straight to the back depending on your toy’s shape.
- Straps to the back. Test the length on the bunny before sewing each strap permanently to the back waistband. The straps should hold the bib flat against the chest without hitching the front of the dungarees upward.
Stuffing Guide
- This pattern makes an outfit, so the hat and dungarees stay completely unstuffed. The eye stalks can take a small pinch of fiberfill to hold their tube shape, which helps once chenille relaxes with handling. Don’t pack them full, though, or they’ll bulge and tilt the eyes outward.
- On the bunny itself, keep the legs and lower body moderately firm rather than tight. A plush that’s overstuffed below the waist strains the crotch join of the dungarees, and with chenille you’ll see it first as stitches spreading at the bridge.
Toy Safety
Because the eyes are glued rather than locked with washers, they can work loose with play. Embroider them for anyone under three. For older children, felt circles fixed with a fabric adhesive that dries flexible hold better than rigid craft glue, which can crack and let go over time. Check the bond on the eyes and charms every so often if the toy gets handled a lot.
Yarn Substitution and Size Scaling
- The original yarn is a Vietnamese velvet chenille sold by the stick or bundle rather than by weight, so matching it outside Southeast Asia takes some hunting. Any bulky chenille or velvet yarn roughly 5 to 6 mm thick should behave similarly on an 8 mm hook. Lion Brand Chenille Thick and Quick or something like it is a reasonable swap.
- Dropping to a worsted chenille on a 5.5 mm hook will likely make the hat around 15 to 20 percent smaller, which can suit a smaller plush. Going thicker is riskier. The chain 5 gaps get proportionally narrower and may not clear chunkier bunny ears.
FAQ
- What size plush does this fit? Medium to large stuffed bunnies, somewhere in the 25 to 35 cm range, going by the 42 stitch hat and 16 stitch legs. Chenille gauge varies a lot, so measure the head and legs before you start.
- Can I use a different yarn? Any bulky velvet or chenille at a similar thickness will work. A smooth cotton or acrylic on the same hook won’t. The drape and coverage change completely and the crown loses its soft rounded look.
- Do the ears have to go through the hat? For the costume to read properly, yes. The bunny ears sticking out of a frog hat are the whole joke, and covering them just leaves you with a green bunny.