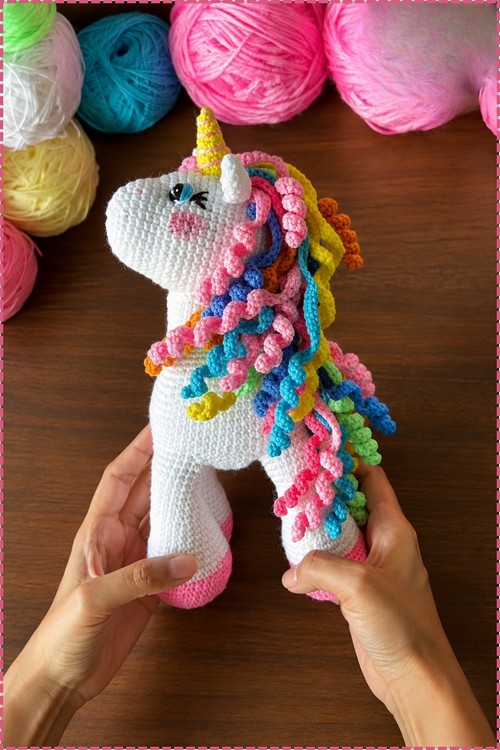
Toy shelves look brighter with the crochet unicorn amigurumi standing on them, a golden horn rising over its snowy white face and rosy cheeks. Rainbow curls in pink, blue, yellow and green tumble down the crochet unicorn’s neck and make it a cheerful birthday gift.
Four long legs come first, and the body grows straight out of them with no sewing at the hips. That single trick is why the finished toy stands up on its own instead of toppling sideways.
Crochet Unicorn Amigurumi
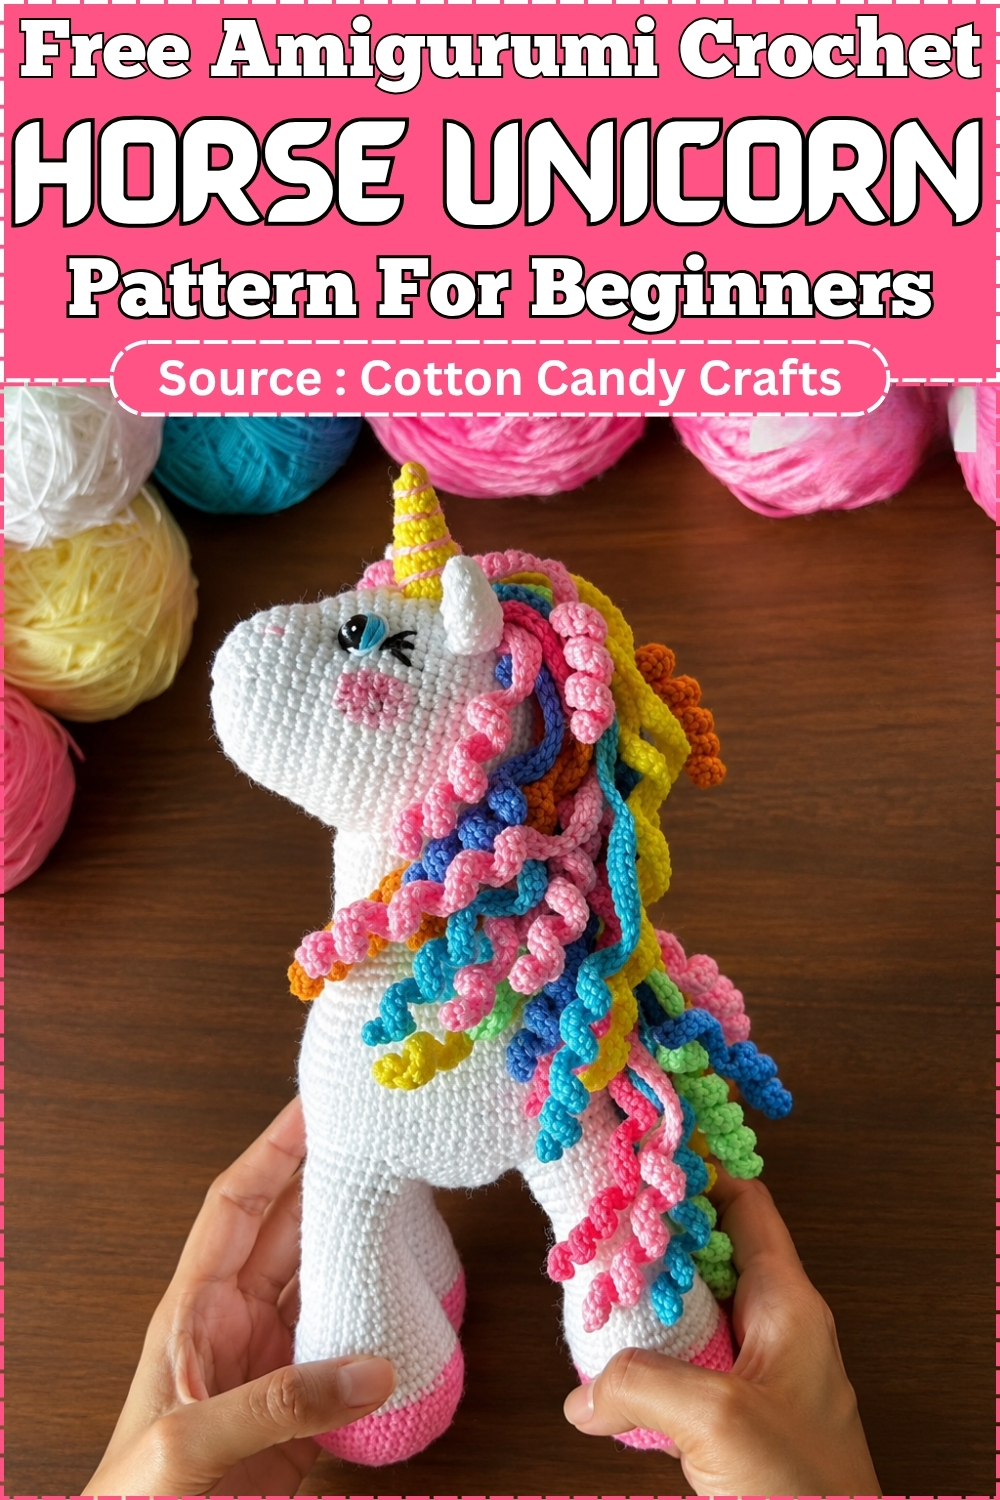
Expect a few evenings of plain single crochet, broken up by a joining round that looks scary on paper and turns out to be mostly chains and careful counting. Spiral curls in leftover colours make the mane. Pink hooves come from a back loop round that sets a clean rim. Sleepy embroidered eyes skip the safety eye question entirely. Older kids tend to claim these fast.
Quick Facts
These are my estimates, not figures from the pattern.
- Finished size: roughly 22 to 28 cm tall to the tip of the horn with sport or DK weight yarn, approximate
- Difficulty: intermediate, mainly because of the leg joining round
- Time: around 8 to 12 hours, approximate
- Piece count: 4 legs that become the body, 1 head, 2 ears, 1 horn, plus as many mane and tail curls as you like
Pieces List
- 4 legs (pink hooves, white legs), joined to form the body
- 1 body, worked straight off the legs (white)
- 1 belly closure, worked into the leftover leg stitches (white)
- 1 head (white)
- 2 ears (white)
- 1 horn (yellow, wrapped with pink)
- Short and medium curls for the mane (any colours)
- Long curls for the tail (any colours)
Colour and Customisation Ideas
A pastel rainbow mane is the classic look, but two colours read cleaner than six. Try lilac and mint curls on a white body with gold horn yarn, or go fully moody with a grey body under a deep purple mane. For a gift, match the mane to the child’s bedroom so the toy looks like it belongs there.
Hooves are worth playing with. Silver or pale gold gives a storybook finish, while a darker brown looks more like a real horse. The horn wrap is another easy swap. A metallic thread spiralled around it in place of the pink strand catches the light nicely.
Materials and Tools
The pattern suggests a 2.5 mm or 3.0 mm hook but leaves the yarn weight open. Quantities below are approximate.
- White yarn for the body, legs, head and ears (roughly 80 to 100 g, approximate)
- Pink yarn for the hooves, horn wrap and nostril embroidery
- Yellow yarn for the horn
- Black yarn for eye embroidery
- Assorted colours for the mane and tail curls
- Crochet hook sized for your yarn (2.5 mm or 3.0 mm is typical)
- Polyfill or fiberfill stuffing
- Stitch markers (several help during the joining round)
- Yarn needle
- Scissors
Abbreviations (US Terms)
- MR: magic ring
- sc: single crochet
- inc: increase (2 sc in one stitch)
- dec: invisible decrease (sc 2 together)
- BLO: back loop only
- ch: chain
- st(s): stitch(es)
Crochet Unicorn Pattern
Part 1: Legs (Make 4)
Hoof
- Start with pink yarn.
- Round 1: Make a MR, 6 sc in the ring. (6)
- Round 2: Inc in each st around. (12)
- Round 3: [1 sc, inc] around. (18)
- Round 4: [2 sc, inc] around. (24)
- Round 5: [3 sc, inc] around. (30) Checkpoint: a flat pink disc, which becomes the sole of the hoof.
- Round 6: Working in BLO, 30 sc. (30) Checkpoint: the edge turns sharply upward, leaving a neat ridge around the base.
- Rounds 7 to 11: 30 sc in each round, 5 rounds total. (30)
Leg
- Change to white yarn.
- Rounds 12 to 18: 30 sc in each round, 7 rounds total. (30) Checkpoint: a straight sided tube with the pink hoof clearly separated from the white leg.
- Round 19: [3 sc, dec] around. (24)
- Rounds 20 to 24: 24 sc in each round, 5 rounds total. (24)
- Round 25: [2 sc, dec] around. (18)
- Rounds 26 to 31: 18 sc in each round, 6 rounds total. (18) Checkpoint: a long leg that narrows in two clear steps from the hoof to the top.
- Fasten off the first 3 legs.
- On the 4th leg, do not cut the yarn. You will continue straight into the body.
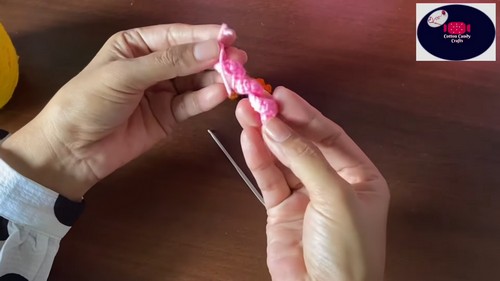
Part 2: Body
Joining Round
- You will crochet along only 10 stitches on the outside of each leg.
- Leave the inner 8 stitches of each leg unworked. These close the belly later.
- Round 1: From the 4th leg, ch 8 and attach to the 1st leg.
- Work 10 sc along the 1st leg.
- Ch 4 and attach to the 2nd leg.
- Work 10 sc along the 2nd leg.
- Ch 8 and attach to the 3rd leg.
- Work 10 sc along the 3rd leg.
- Ch 4 and attach back to the 4th leg.
- Work 10 sc along the 4th leg.
- You now have a large oval of 64 stitches around: 40 from the outer legs and 24 from both sides of the chains. Checkpoint: the four legs stand in a rectangle, two pairs linked by the longer chains and the shorter chains bridging front to back.
Still learning how amigurumi patterns work? That’s totally okay, follow the video tutorial below and check the written pattern as you go!
Body Rounds
- Rounds 2 to 9: 64 sc in each round, 8 rounds total. (64) Checkpoint: the legs now stand under a deep oval tub, and the unicorn can already balance on its own.
- Round 10: Make 4 evenly spaced decreases at the corners above the legs. (60)
- Round 11: Make 4 evenly spaced decreases. (56)
- Round 12: Make 4 evenly spaced decreases. (52)
- Round 13: Make 4 evenly spaced decreases. (48)
- Round 14: Make 8 evenly spaced decreases. (40)
- Round 15: Make 8 evenly spaced decreases. (32) Checkpoint: the shoulders and hips have rounded inward, and the top of the body is closing like a dome.
- Round 16: Make 2 evenly spaced decreases. (30)
- Round 17: [3 sc, dec] around. (24)
- Round 18: Make 8 evenly spaced decreases. (16)
- Round 19: 16 sc. (16) Checkpoint: a short neck opening on top of the body, ready for the head.
- Fasten off, leaving a long tail for sewing.
- Stuff the legs and body firmly.
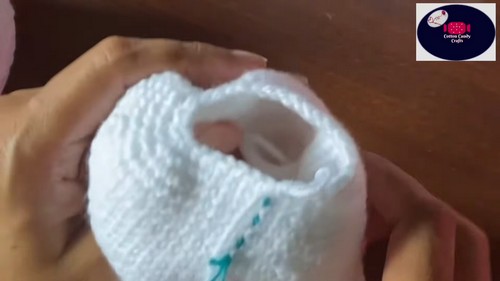
Closing the Belly
- Attach white yarn to the inner unworked stitches left from the legs and chains.
- Work in the round, making continuous decreases (sc 2 together) all the way around.
- Keep going until the hole closes completely.
- Fasten off and weave in the end.
Part 3: Head
Rounds
- Use white yarn.
- Round 1: Make a MR, 8 sc in the ring. (8)
- Round 2: Inc in each st around. (16)
- Round 3: [1 sc, inc] 8 times. (24)
- Round 4: [2 sc, inc] 8 times. (32) Checkpoint: a flat disc, which becomes the front of the snout.
- Rounds 5 to 9: 32 sc in each round, 5 rounds total. (32)
- Round 10: [3 sc, inc] 8 times. (40)
- Round 11: [4 sc, inc] 8 times. (48) Checkpoint: a narrow snout flaring out into a wider cup, the start of the forehead and cheeks.
- Rounds 12 to 21: 48 sc in each round, 10 rounds total. (48)
- Round 22: [4 sc, dec] 8 times. (40)
- Round 23: [3 sc, dec] 8 times. (32)
- Round 24: [2 sc, dec] 8 times. (24)
- Stuff the head firmly.
- Round 25: [1 sc, dec] 8 times. (16)
- Round 26: Dec in each st around. (8) Checkpoint: a long, rounded head with a slimmer snout end and a fuller back.
- Fasten off.
- Sew the remaining hole closed.
- Weave in the end.
Part 4: Ears (Make 2)
Rounds
- Use white yarn.
- Round 1: Make a MR, 4 sc in the ring. (4)
- Round 2: [1 sc, inc] 2 times. (6)
- Round 3: [2 sc, inc] 2 times. (8)
- Round 4: [3 sc, inc] 2 times. (10)
- Round 5: [4 sc, inc] 2 times. (12)
- Round 6: [5 sc, inc] 2 times. (14)
- Round 7: [6 sc, inc] 2 times. (16)
- Round 8: 16 sc. (16) Checkpoint: a small pointed cone that flattens easily when pressed.
- Fasten off, leaving a tail for sewing.
- Do not stuff.
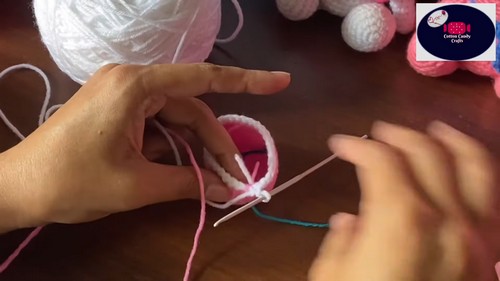
Part 5: Horn
Rounds
- Use yellow yarn.
- Round 1: Make a MR, 4 sc in the ring. (4)
- Round 2: [1 sc, inc] 2 times. (6)
- Round 3: 6 sc. (6)
- Round 4: [2 sc, inc] 2 times. (8)
- Round 5: 8 sc. (8)
- Round 6: [3 sc, inc] 2 times. (10)
- Rounds 7 to 8: 10 sc in each round. (10) Checkpoint: a slim cone with a sharp tip, widening in small steps.
- Fasten off, leaving a tail.
- Wrap a strand of pink yarn tightly around the horn in a spiral for texture, and secure it.
Part 6: Mane and Tail Curls
Curls
- Use any colours you like.
- Each curl is worked into a foundation chain, and the tension makes it spiral naturally.
- Make several curls in different lengths for the mane and tail.
- Short curls: Ch 31. Starting in the 2nd ch from the hook, work 1 sc in each chain across. (30 sc) Fasten off.
- Medium curls: Ch 41 or ch 51. Work 1 sc in each chain across.
- Long curls for the tail: Ch 71. Work 1 sc in each chain across. Checkpoint: each finished strip should twist into a springy corkscrew on its own.
Part 7: Final Assembly
Attach the Head
- Sew the head securely onto the 16 stitch opening on top of the body.
- Add extra stuffing into the neck before closing completely, so the head does not droop.
Facial Details
- Using black yarn, embroider sleepy, curved eyes with small eyelashes on the sides of the head.
- Using pink yarn, embroider a small nostril detail near the front tip of the snout.
Attach the Ears and Horn
- Flatten the bottom of each ear.
- Sew the ears symmetrically on either side of the top of the head.
- Sew the horn exactly in the centre of the forehead, just slightly in front of the ears.
Attach the Mane and Tail
- Group your coloured curls together.
- Sew the shorter curls down the back of the neck, starting just behind the horn, to form the mane.
- Sew the longest curls to the back of the body to form the tail.
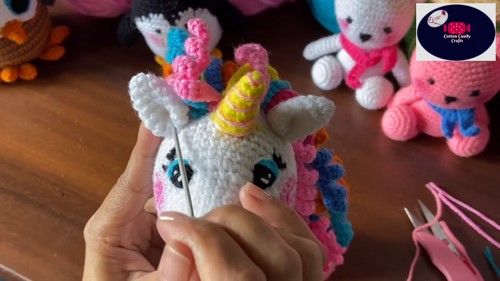
Assembly Guide
- Head first, since everything else is placed in relation to it. Pin it onto the neck opening and stand the unicorn up before you sew a stitch. The snout should point forward over the shorter chains, not over a leg. Push extra stuffing into the neck as you go round, and expect to stop twice to add more.
- Embroider the eyes next, while the head is plain and easy to judge. Mark both eye positions with pins first, then step back and look from the front. Uneven eyes are the most common reason a finished unicorn looks slightly off.
- Ears and horn follow. Pin all three together so you can see the triangle they form, with the horn just ahead of the ears on the centre line.
- Curls go on last. They spiral in the same direction every time, so a mane of them can look like it is blowing one way in a strong wind. Flip every other curl before sewing and the mane looks fuller. Pin the whole mane down the neck before stitching, then do the tail the same way.
Tips
- Put a marker in the first stitch of every leg section during the joining round. Losing count there is the one mistake that shows for the rest of the make.
- Make all four legs before starting the body and line them up side by side. If one is a round taller, the unicorn will rock, and it is much easier to fix now.
- Crochet the curls on a slightly tighter hook than the body if they come out limp. A firmer chain gives a springier spiral.
Stuffing Guide
- Firm all the way through the legs, especially down into the hooves. The legs carry the whole toy, and soft legs bend under the weight of the head. Stuff them through the belly opening before you close it, then fill the body firmly and keep going up into the neck.
- The head is also firm. Fill it before Round 25 and top it up before the last round so it keeps its long shape. The ears stay unstuffed. The pattern does not mention stuffing the horn, but a small pinch helps if yours bends.
- Overstuffing shows at the hooves first. The BLO ridge pushes outward and the legs start to splay, so the unicorn stands with its feet apart. On the belly it shows as gaps between the closing decreases. Pull a little filling out if the belly will not close without stretching.
Eyes and Toy Safety
This pattern uses embroidered eyes, which are already the safer choice for children under three. They are stitched after the head is attached, so there is no safety eye timing to worry about. If you would rather use safety eyes, they have to go in while the head is still open, before you stuff it and start the closing rounds. Do not use safety eyes at all for a toy going to a baby or toddler.
Sew every curl down firmly, since long loose strands can be pulled off by small hands. Tug the ears and horn once they are attached and add stitches anywhere that moves.
FAQ
- What yarn weight works best? Sport or DK cotton suits the suggested 2.5 mm to 3.0 mm hook. Thicker yarn will work, but expect a much bigger unicorn and use a larger hook to match.
- How many curls do I need for the mane? I usually make around ten to fourteen for the mane and four or five long ones for the tail. Make a few extra, because some always spiral better than others.
- Why does my unicorn lean to one side? Usually one leg is a round taller or stuffed more firmly than the others. Press on each leg to compare, and adjust the stuffing before the belly is closed.
- Can I make the legs shorter? You can skip some of the straight rounds, but every leg must have the same number of rounds. The joining round counts will still work since the leg tops stay at 18 stitches.