
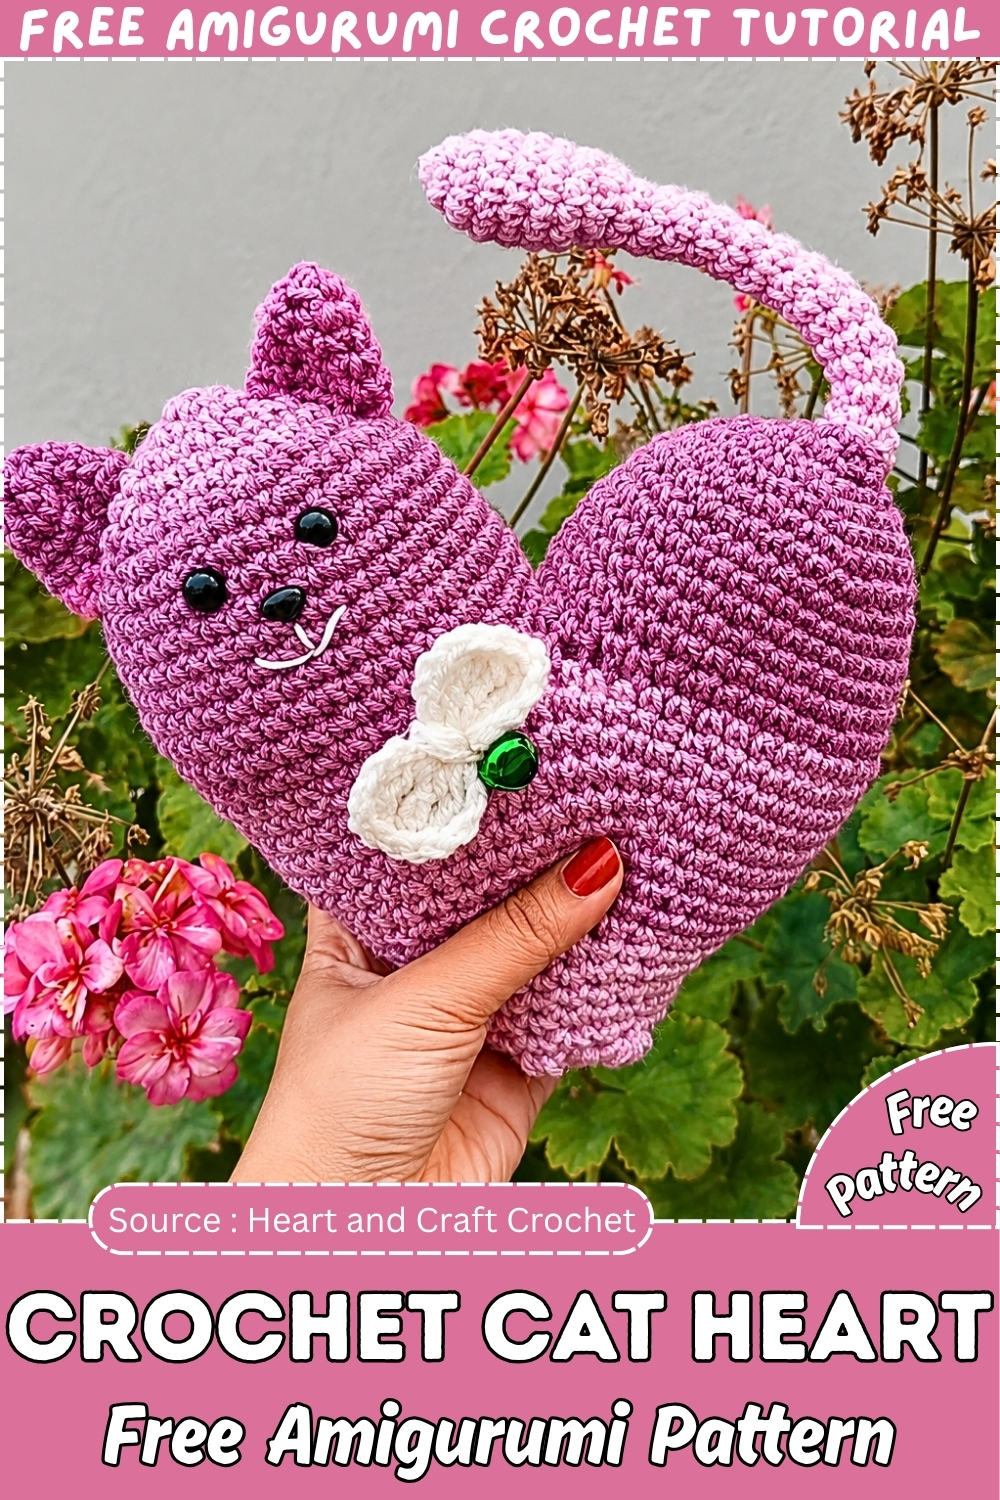
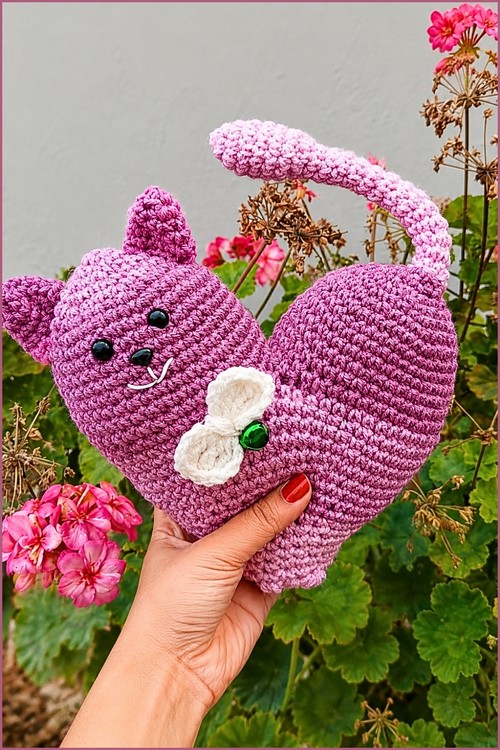
Two of the cutest things in amigurumi, combined this free crochet cat heart pattern gives you a sweet little kitty with a heart-shaped charm that’s impossible not to love. The compact size makes it quick to finish, so it’s ideal for a Valentine’s gift, a keyring for someone you love, or a shelf friend that stays cute all year. Simple rounds and clear shaping mean it’s approachable even if you’re newer to amigurumi. Ready to make one? Free pattern this way.
Combining a stuffed heart shape with a fully formed cat face and curled tail is one of those ideas that just works perfectly for a handmade gift. This purple crochet cat heart amigurumi is chunky enough to feel substantial and detailed enough to look truly special sitting on a shelf or gifted on Valentine’s Day.
Crochet Cat Heart Amigurumi
Materials & Tools
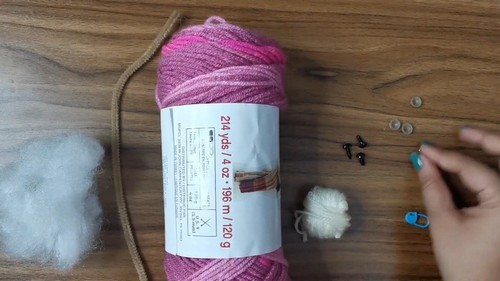
Yarn:
- Medium weight (worsted / weight 4) in Pink or your main color
- Medium weight in White for accent areas
- A contrasting color for the bow
Hook: 3.5 mm (size E-4)
Other supplies:
- Safety eyes
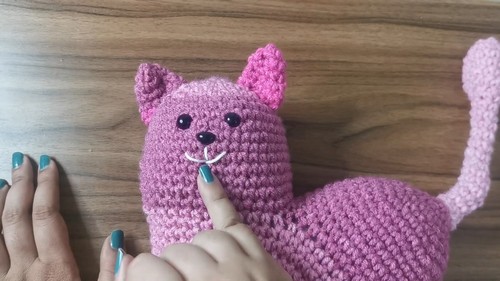
- Embroidery thread in black and/or pink for the nose and whiskers
- Polyester fiberfill stuffing
- Tapestry needle
- Pipe cleaner or craft wire (optional, for a posable tail)
Abbreviations
- ch — chain
- sc — single crochet
- inc — increase (2 sc in the same stitch)
- dec — decrease (2 stitches worked together into one)
- sts — stitches
- tr — treble/triple crochet
- sl st — slip stitch
Difficulty & Time
Easy and beginner-friendly. The body is almost entirely single crochet, and the shaping follows a clear repeating rhythm that becomes intuitive quickly. The only moments that introduce something new are joining the two halves, the puff stitch for the paws, and a few treble crochets for the bow — all explained in full below. A relaxed afternoon is the right amount of time; don’t rush the stuffing and assembly, since that’s where the personality of the finished cat comes together.
Beginner Technique Notes
- Magic ring: Every piece in this pattern starts with a magic ring — an adjustable starting loop that pulls tight to close the center hole so there’s no gap at the top of each piece. Wrap the yarn around your finger to form a loop, insert your hook through it, pull up a working strand, chain 1 to anchor it, then work your stitches into the ring before pulling the tail closed. Practice it once on scrap yarn first. Once it clicks, it clicks permanently — you’ll use it in every amigurumi you ever make.
- Working in a spiral: Amigurumi is worked in continuous rounds, not joined circles. The stitches climb in a natural spiral and there’s no slip stitch at the end of each round — you simply keep going. The most important habit you can build is placing a stitch marker (or a small loop of contrast yarn) in the first stitch of every new round and moving it up faithfully. Without it, counting goes wrong quickly on a piece with 42 stitches per round. With it, you always know exactly where you are.
- Single crochet: The entire body of this cat heart is built on single crochet. Insert your hook into the stitch, yarn over and pull up a loop, yarn over again and pull through both loops on the hook. That’s the complete stitch. By Round 10 of your first lobe it will feel completely automatic, and by the time you’re building the body you’ll barely need to think about it.
- Increase and decrease: An increase is simply two single crochets worked into the same stitch — this is how each piece grows outward. A decrease combines two stitches into one to bring the shape back in. For the cleanest result, use the invisible decrease: insert your hook through the front loops only of the next two stitches at once, yarn over and pull through both front loops, then yarn over and pull through the two loops on your hook. This closes two stitches into one without leaving the small gap that a standard decrease creates on the surface fabric.
- Joining the two halves: This is the one moment in the pattern that feels genuinely new if you haven’t done it before. You’ll hold both completed lobe pieces side by side and slip stitch or single crochet through the stitches of both layers across the inner seam, then continue crocheting around the full outer edge as one continuous piece. Go slowly here, line the pieces up evenly before you begin, and use a pin or a stitch marker to hold them together while your hook hand is occupied. The join becomes completely invisible inside the body once it’s stuffed.
- The puff stitch for paws: Several tall yarn loops are gathered into one raised bump to create a dimensional paw. You pull the final yarn-over through all the loops at once. It feels slightly fiddly the very first time and then immediately makes sense. Don’t worry if the first paw looks a little loose — a firm sl st back down to anchor it tidies everything up.
- Treble crochet for the bow: A taller stitch used only in the bow section. Yarn over twice before inserting your hook, then pull through two loops at a time until one loop remains. The bow needs only a few of these, so even if treble is new to you, there’s very little at stake.
- Safety eyes: These are permanent once the washer locks onto the back post. Place them where you think you want them, then step back and look at the whole piece from arm’s length. Check from the front, the side, and slightly above. Only push the washers down once you’re completely satisfied — they don’t come back off.
- Counting stitches: The number in parentheses at the end of every round is your stitch count. Check it before moving on. Catching a miscount at Round 6 takes thirty seconds to fix; catching it at Round 20 takes considerably longer.
The Pattern
The Heart Halves (Make 2)
- Round 1: Start with a magic ring. Work 6 sc into the ring and pull the tail tight to close. [6 sts]
- Round 2: Work 1 inc in every stitch around. [12 sts]
- Round 3: Work the combination of 1 sc and 1 inc a total of 6 times around. [18 sts]
- Round 4: Work the combination of 2 sc and 1 inc a total of 6 times around. [24 sts]
- Round 5: Work the combination of 3 sc and 1 inc a total of 6 times around. [30 sts]
- Round 6: Work the combination of 4 sc and 1 inc a total of 6 times around. [36 sts]
- Round 7: Work the combination of 5 sc and 1 inc a total of 6 times around. [42 sts]
- Rounds 8–15: Work 1 sc in each stitch around for 8 rounds. [42 sts]
- First piece: Fasten off and leave a tail.
- Second piece: Do not cut the yarn — keep it attached to connect the two halves.
Joining the Heart and Building the Body
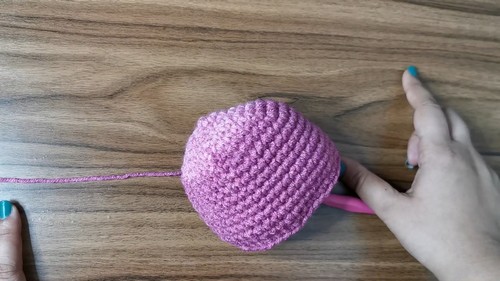
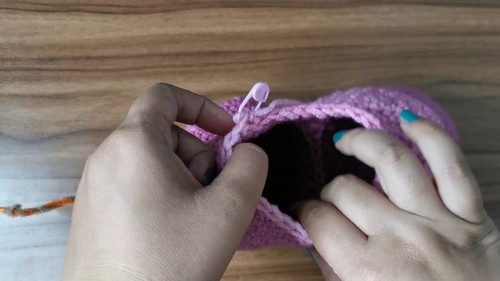
- Joining step: Hold both pieces side by side with the flat opening edges together. Working through the stitches of both pieces at once, slip stitch or single crochet them together across the inner 6 stitches to close the middle seam. [72 stitches remaining around the outer edge]
- Round 16: Crochet all the way around the outer edge of both joined halves. [72 sts]
- Rounds 17–23: Work 1 sc in each stitch around for 7 rounds. [72 sts]
- Round 24: Work the combination of 10 sc and 1 dec all the way around. [66 sts]
- Round 25: Work the combination of 9 sc and 1 dec all the way around. [60 sts]
- Round 26: Work the combination of 8 sc and 1 dec all the way around. [54 sts]
- Round 27: Work the combination of 7 sc and 1 dec all the way around. [48 sts]
- Round 28: Work the combination of 6 sc and 1 dec all the way around. [42 sts]
- Round 29: Work the combination of 5 sc and 1 dec all the way around. [36 sts]
- Eye and wire placement: Insert the safety eyes approximately 12 to 13 rows below the top center division. If you want a posable tail, twist a craft wire or pipe cleaner, pad it with a little yarn, and insert it from the inside out through the lower back of the body before stuffing. Begin stuffing firmly with fiberfill at this point.
- Round 30: Work the combination of 4 sc and 1 dec all the way around. [30 sts]
- Round 31: Work the combination of 3 sc and 1 dec all the way around. [24 sts]
- Round 32: Work the combination of 2 sc and 1 dec all the way around. [18 sts]
- Round 33: Work the combination of 1 sc and 1 dec all the way around. [12 sts]
- Round 34: Decrease all the way around to close the bottom point of the heart. Fasten off and weave in ends.
New to crochet and not sure how to read a pattern yet? The video tutorial below will guide you through it step by step, you’ve got this!
The Paws and Back Feet
Front paws:
- Attach yarn to the lower front surface of the cat body
- Work a 3-double-crochet bobble or puff stitch into a single space, pulling through all loops at once to form a dimensional paw
- Slip stitch back down to secure
Back legs and feet:
- Start with a magic ring and work a small circle, increasing up to 12 or 18 stitches
- Work 2 to 3 rows evenly to create a small cup shape
- Stuff lightly
- Sew them flat to the lower sides of the body
The Tail
- Round 1: Start with a magic ring. Work 6 sc into the ring.
- Round 2: Work 1 inc in every stitch around. [12 sts]
- Rounds 3–7: Work 1 sc in each stitch around for 5 rounds. [12 sts]
- Round 8: Decrease all the way around to bring the stitch count back down to 6 stitches.
- Remaining rounds: Continue working 1 sc in each of the 6 stitches for as many rounds as needed to reach your desired tail length.
- Slide the finished tail over the wire insert if using, then sew it securely to the body.
The Ears (Make 2)
- Round 1: Start with a magic ring. Work 4 sc into the ring.
- Round 2: Work 1 inc in every stitch around. [8 sts]
- Round 3: Work the combination of 3 sc and 1 inc all the way around. [10 sts]
- Round 4: Work the combination of 4 sc and 1 inc all the way around. [12 sts]
- Round 5: Work 1 sc in each stitch around. [12 sts]
- Fasten off, leaving a long tail for sewing
- Flatten each ear and sew them onto the upper curved lobes of the heart
Face Embroidery
- Thread your tapestry needle with black or pink embroidery thread
- Sew a small inverted triangle nose centered between the eyes, one round below the horizontal eye line
- Add simple straight stitch lines extending outward from each side of the nose for the whiskers
The Bow
- Start with a magic ring
- Chain 5, work 3 tr into the ring, chain 5, and sl st into the ring — this completes the first half of the bow
- Repeat the same sequence (chain 5, 3 tr, chain 5, sl st) to form the second half
- Pull the magic ring tight
- Wrap the yarn tail around the center several times to form the knot
- Sew the finished bow onto the cat
Assembly
- Use straight pins to position the ears, back feet, and tail on the body before sewing anything, checking the toy from all angles to confirm the layout is balanced
- Align the ears symmetrically on the peak of each top dome, following the natural curve rather than placing them too far forward or back
- Position the back feet near the lower sides of the heart body so they help the finished cat sit upright without tipping
Tips
- Stuff in layers, not all at once. Tear your fiberfill into small, airy pieces rather than pushing in one large clump. Large clumps create hard pockets that show through the fabric surface. Work the filling into the two top lobes first, packing them firmly enough to hold their rounded shape, before adding stuffing to the body below.
- Place safety eyes before Round 29. Once the body narrows below Round 29, reaching inside to position and lock the washer on a safety eye becomes genuinely awkward. The pattern’s direction to place them before stuffing is the right call — do it, check the spacing from the front and both sides, then lock the washers before you continue.
- Pin everything before you sew anything. With ears, back feet, a tail, a bow, and front paws all needing placement, the temptation is to just start attaching. Resist it. Pin every single element in place first, set the cat on a flat surface, and look at it from every angle. Small position adjustments before you sew are easy; unpicking amigurumi seams is not.
- Use the invisible decrease throughout. The standard sc2tog leaves a small visible gap on the surface of the fabric. On a plain single-crochet piece like this heart body, those gaps are noticeable. Switching to the invisible decrease (through the front loops only of the next two stitches) keeps the fabric surface clean and smooth from Round 24 all the way down to the tip.
- If using wire, prepare it carefully. Fold the end of the pipe cleaner that sits inside the body into a small loop and wrap it with a few rounds of tape or a scrap of yarn before inserting. This prevents the sharp cut end from ever working through the fabric with handling. Check the exterior end of the wire after it exits the tail piece and wrap that end the same way before sewing the tail to the body.
- Close the bottom point fully. Round 34 closes the tip of the heart, and it needs to be snug — any gap here undermines the whole heart silhouette. After fastening off, thread the tail onto your needle, weave through the remaining front loops, pull firmly closed, and knot close to the fabric before plunging the needle through the body and trimming.
Customization Ideas
Color palette: The pink and white combination is the classic, but this cat reads just as beautifully in an all-gray palette with white ears and whiskers, a black cat version with a yellow or orange bow, or a calico interpretation using small color-change sections across the body. The bow color is your quickest way to shift the overall feel — a deep jewel tone reads more sophisticated, a pastel reads softer.
Size: Worsted weight on a 3.5 mm hook produces a mid-sized cat heart that sits comfortably in one hand. Drop to a DK weight on a 3.0 mm hook for a smaller charm version. Go up to a bulky on a 5.0 mm hook for an oversized pillow cat that works as a nursery decoration.
Facial expression: The eyes are the whole expression. Placing them closer together reads as younger and sweeter; slightly wider apart gives a more alert, curious face. A larger safety eye gives innocence; a smaller one gives sophistication. A simple curved embroidered smile below the nose changes the character completely — the pattern as written is a calm, neutral face, but a single extra stitch turns it into something entirely warmer.
Tail options: The optional wire armature in the tail is worth doing at least once. A posable tail that can be curled or straightened is one of those small details that makes the toy feel genuinely interactive rather than static. If the cat is going to a young child, skip the wire entirely and work the tail in plain rounds — it will curl naturally due to the tension of the spiral.
The bow: The bow as written is a classic double-loop shape. For a simpler version, cut a short length of ribbon and sew it directly to the head. For something more elaborate, add a crocheted flower at the center instead of the gathered knot. Positioning the bow between the ears reads as more formal; moving it to one side of the neck reads as more playful.
FAQ
Q: Can I use safety eyes with a child under three in mind? Safety eyes with plastic locking washers are a choking hazard for young children, and the washers can work loose from rough handling over time even when properly installed. For a baby or toddler gift, embroider the eyes instead using black yarn in a tight satin stitch — a small oval of four to six stitches looks charming and is completely safe. You can add a white highlight stitch over the top for dimension. The nose can also be fully embroidered so no hardware is used at all.
Q: My two heart halves came out slightly different sizes. Will this affect the join? Small differences in tension between the two pieces are extremely common, especially if you worked them in separate sessions. When you hold them together for the joining round, gently ease the larger piece to match the smaller one — the join stitches will compress the difference and once the body is stuffed, the slight discrepancy becomes invisible. If one piece is dramatically larger than the other, check that your stitch counts match at the end of Round 7 before proceeding.
Q: Can I make the tail posable without wire? Yes — stuff the tail a little more firmly than you think necessary and it will hold a gentle curve on its own due to the tension of the spiral rounds. For a more dramatically curled tail without wire, leave the top two rounds of the tail section unstuffed entirely so the tip curls inward naturally. A twisted or braided length of sturdy yarn threaded through the center before the tail is sewn on also gives some shape-holding without any metal.
Q: My puff stitch paws are falling flat. What helps? The puff stitch needs to be worked loosely enough that the loops can stack on top of each other before you pull through. If your tension is tight, the loops compress before you’ve gathered enough height. Try going up one hook size just for the paw stitches — the slight size difference won’t show once the sl st anchors them down. Also make sure you’re pulling all the gathered loops through together in one clean motion rather than in two stages.
Q: How do I make the heart sit upright rather than tipping forward? Positioning is entirely about where the back feet land. Place them lower on the sides of the heart than you think they need to be — further toward the bottom point — and angle them very slightly outward. Set the cat on a flat surface before sewing and adjust until it balances on its own without your hand steadying it. The back feet are doing all the stabilizing work; the front paws are purely decorative and have no effect on balance.