
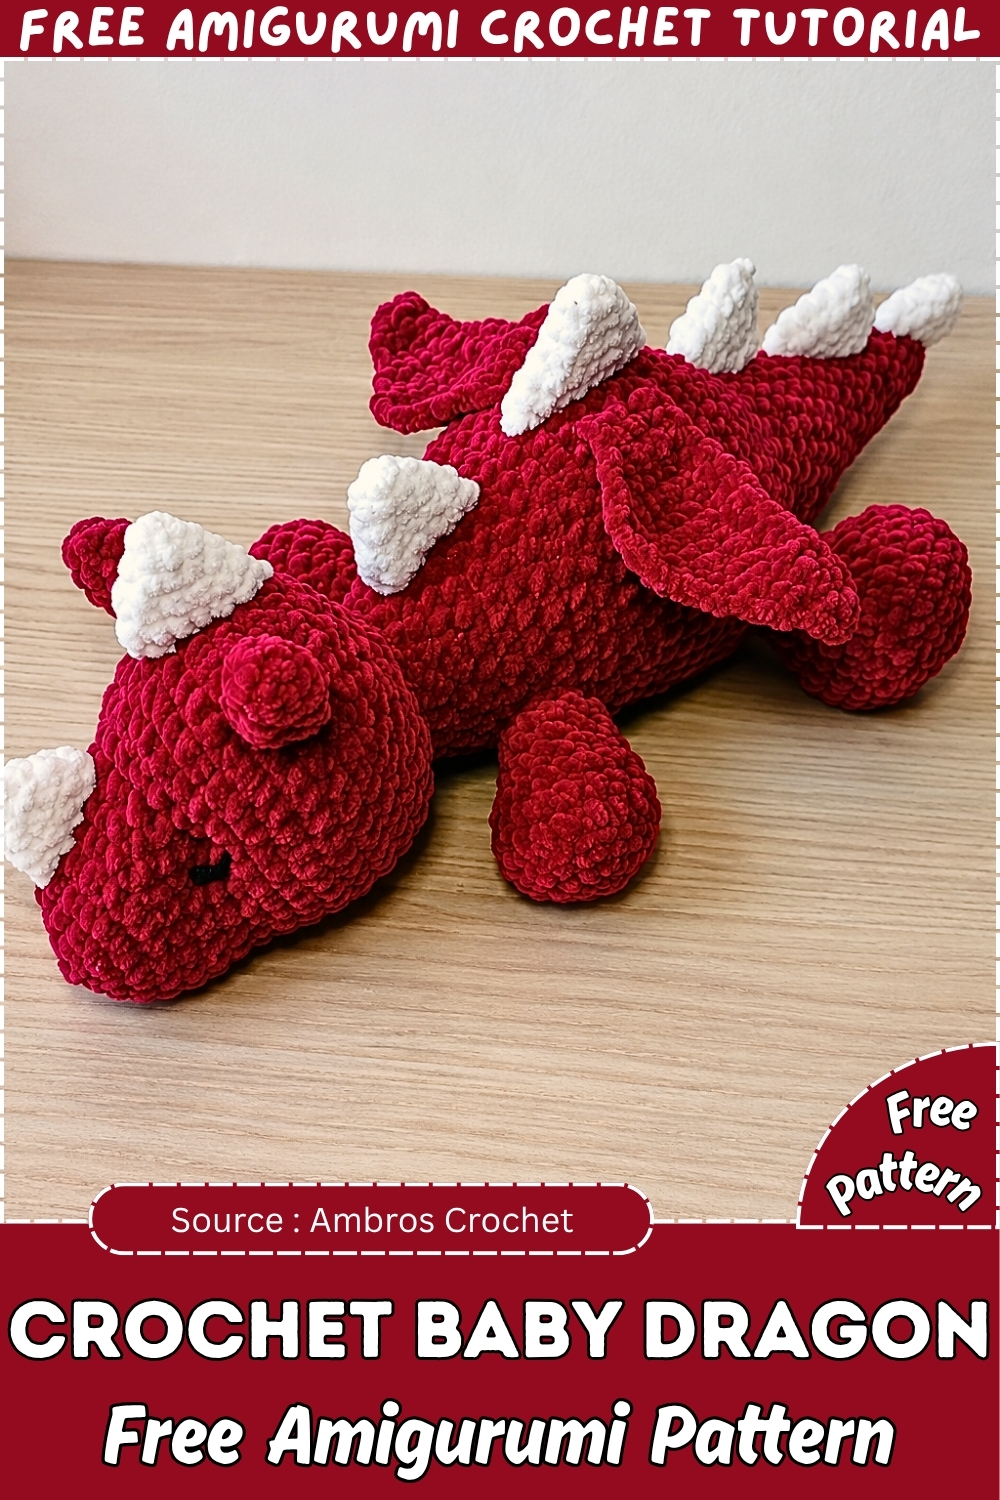
Bring a chunky crochet dragon to life with this free amigurumi pattern and thick yarn means faster progress and a satisfyingly squishy finished plush. The bold shaping gives your dragon real presence, from the wings down to the tail, and the step-by-step instructions keep every stage clear so the details come together without frustration. A brilliant make for kids who love dragons, or for yourself if fantasy plushies are your thing. Ready to raise your own? Free pattern this way.
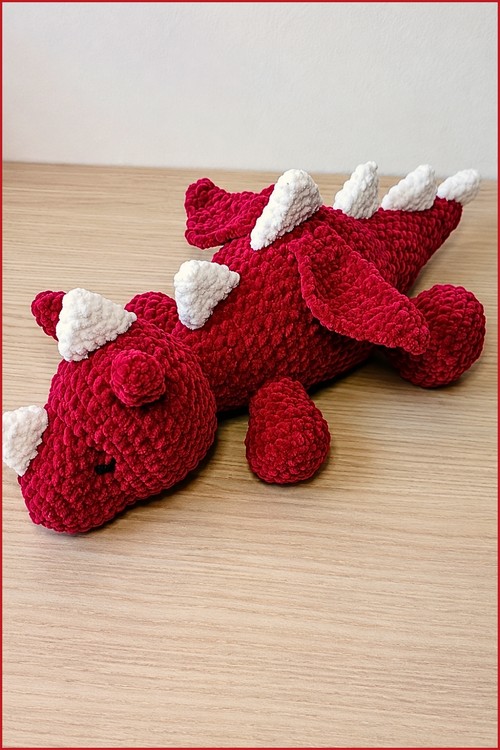
A crochet baby dragon that is this big and this squishy is exactly the kind of project that gets people stopping mid-scroll. Worked in chunky dark red chenille with white spines running down its back, this amigurumi dragon has a sleepy laid-back pose that gives it instant personality.
Crochet Chunky Dragon
Materials
Yarn:
- Velvet or acrylic yarn in your main color — for the head, body, ears, and limbs
- A secondary color for the wings
- A third color for the spikes (or use the secondary color for both)
- Black acrylic yarn for embroidered eyes
Hook: 5.0 mm
Other: Tapestry needle, scissors, pins, toy stuffing
Abbreviations
- MR — magic ring
- sc — single crochet
- inc — single crochet increase (2 sc in one stitch)
- dec — single crochet decrease
- FLO — front loops only
- BLO — back loops only
- ch — chain
- hdc — half double crochet
- dc — double crochet
- sl st — slip stitch
A Few Things Worth Knowing First
The FLO round on the head creates the natural brow ridge. The BLO rounds on the paws give a crisp foot edge. Work those rounds exactly as written and the shaping takes care of itself — they’re not decorative, they’re structural.
Pin every single piece in place before committing a stitch. With this many components — head, body, four paws, two ears, seven spikes, two wings — dry-fitting the whole dragon on a flat surface first saves a significant amount of unpicking. The limb placement and spike order in the assembly section are specific for a reason; follow them and the proportions land correctly.
The Pattern
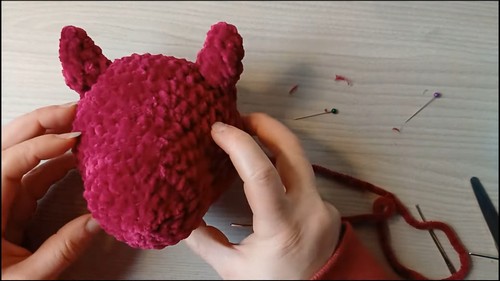
Head
- Round 1: Work 6 sc into a magic ring. [6 sts]
- Round 2: Work 6 inc around. [12 sts]
- Round 3: Work the combination of 1 sc and 1 inc a total of 6 times around. [18 sts]
- Round 4: Work the combination of 2 sc and 1 inc a total of 6 times around. [24 sts]
- Rounds 5–8: Work 1 sc in each stitch around for 4 rounds. [24 sts]
- Round 9: Work 1 sc in the next 6 stitches, then working in FLO for the remaining stitches, work the combination of 2 sc and 1 inc a total of 6 times. [30 sts]
- Round 10: Work 1 sc in the next 6 stitches, then work the combination of 3 sc and 1 inc a total of 6 times. [36 sts]
- Round 11: Work 1 sc in the next 6 stitches, then work the combination of 4 sc and 1 inc a total of 6 times. [42 sts]
- Rounds 12–15: Work 1 sc in each stitch around for 4 rounds. [42 sts]
- Round 16: Work 1 sc in the next 6 stitches, then work the combination of 4 sc and 1 dec a total of 6 times. [36 sts]
- Round 17: Work 1 sc in the next 6 stitches, then work the combination of 3 sc and 1 dec a total of 6 times. [30 sts]
- Round 18: Work 1 sc in the next 8 stitches, then work the combination of 2 sc and 1 dec a total of 6 times. [24 sts]
- Round 19: Work the combination of 2 sc and 1 dec a total of 6 times around. Begin stuffing the head at this point. [18 sts]
- Round 20: Work the combination of 1 sc and 1 dec a total of 6 times around. [12 sts]
- Round 21: Work 6 dec around. [6 sts]
- Slip stitch to finish. Cut yarn leaving a long tail.

Ears (Make 2)
- Round 1: Work 4 sc into a magic ring. [4 sts]
- Round 2: Work the combination of 1 sc and 1 inc a total of 2 times around. [6 sts]
- Round 3: Work the combination of 2 sc and 1 inc a total of 2 times around. [8 sts]
- Round 4: Work the combination of 3 sc and 1 inc a total of 2 times around. [10 sts]
- Round 5: Work 1 sc in each stitch around. [10 sts]
- Sl st to finish. Cut yarn leaving a long tail for sewing.
Reading crochet patterns can be tricky when you’re just starting out, feel free to follow the video tutorial below instead!
Body and Tail
- Round 1: Work 6 sc into a magic ring. [6 sts]
- Round 2: Work the combination of 2 sc and 1 inc a total of 2 times around. [8 sts]
- Round 3: Work 1 sc in each stitch around. [8 sts]
- Round 4: Work the combination of 3 sc and 1 inc a total of 2 times around. [10 sts]
- Round 5: Work the combination of 4 sc and 1 inc a total of 2 times around. [12 sts]
- Round 6: Work 1 sc in each stitch around. [12 sts]
- Round 7: Work the combination of 5 sc and 1 inc a total of 2 times around. [14 sts]
- Round 8: Work the combination of 6 sc and 1 inc a total of 2 times around. [16 sts]
- Round 9: Work 1 sc in each stitch around. [16 sts]
- Round 10: Work the combination of 7 sc and 1 inc a total of 2 times around. [18 sts]
- Round 11: Work the combination of 8 sc and 1 inc a total of 2 times around. [20 sts]
- Round 12: Work the combination of 9 sc and 1 inc a total of 2 times around. [22 sts]
- Round 13: Work the combination of 10 sc and 1 inc a total of 2 times around. [24 sts]
- Round 14: Work 1 sc in each stitch around. [24 sts]
- Round 15: Work the combination of 11 sc and 1 inc a total of 2 times around. [26 sts]
- Round 16: Work the combination of 12 sc and 1 inc a total of 2 times around. [28 sts]
- Round 17: Work 1 sc in each stitch around. [28 sts]
- Round 18: Work the combination of 13 sc and 1 inc a total of 2 times around. [30 sts]
- Round 19: Work 1 sc in the next 6 stitches, then work the combination of 3 sc and 1 inc a total of 6 times. [36 sts]
- Round 20: Work 1 sc in the next 6 stitches, then work the combination of 4 sc and 1 inc a total of 6 times. [42 sts]
- Round 21: Work 1 sc in the next 6 stitches, then work the combination of 5 sc and 1 inc a total of 6 times. [48 sts]
- Rounds 22–27: Work 1 sc in each stitch around for 6 rounds. [48 sts]
- Round 28: Work 1 sc in the next 6 stitches, then work the combination of 5 sc and 1 dec a total of 6 times. [42 sts]
- Rounds 29–30: Work 1 sc in each stitch around for 2 rounds. [42 sts]
- Round 31: Work 1 sc in the next 6 stitches, then work the combination of 4 sc and 1 dec a total of 6 times. [36 sts]
Stuff the tail firmly at this point.
- Round 32: Work 1 sc in each stitch around. [36 sts]
- Round 33: Work 1 sc in the next 8 stitches, then work the combination of 3 sc and 1 dec a total of 6 times. [30 sts]
- Rounds 34–35: Work 1 sc in each stitch around for 2 rounds. [30 sts]
Continue stuffing the body gradually as you work.
- Round 36: Work 1 sc in the next 6 stitches, then work the combination of 2 sc and 1 dec a total of 6 times. [24 sts]
- Round 37: Work 1 sc in each stitch around. [24 sts]
- Round 38: Work 1 sc in the next 6 stitches, then work the combination of 1 sc and 1 dec a total of 6 times. [18 sts]
- Round 39: Work 1 sc in each stitch around. [18 sts]
- Sl st to finish. Cut yarn leaving a long tail for sewing the neck to the head.
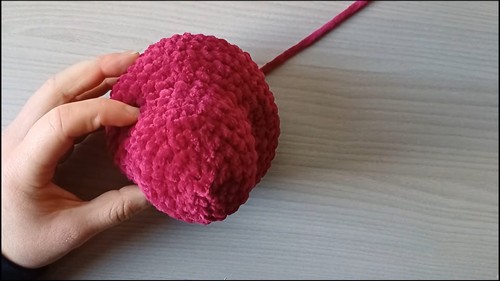
Front Paws (Make 2)
- Round 1: Work 6 sc into a magic ring. [6 sts]
- Round 2: Work 6 inc around. [12 sts]
- Round 3: Work the combination of 1 sc and 1 inc a total of 6 times around. [18 sts]
- Round 4: Work 1 sc in each stitch around in BLO. [18 sts]
- Rounds 5–6: Work 1 sc in each stitch around for 2 rounds. [18 sts]
- Round 7: Work 1 sc in the first 6 stitches, then work 6 dec. [12 sts]
- Rounds 8–9: Work 1 sc in each stitch around for 2 rounds. [12 sts]
- Sl st to finish. Leave a tail for sewing.
Back Paws (Make 2)
- Round 1: Work 6 sc into a magic ring. [6 sts]
- Round 2: Work 6 inc around. [12 sts]
- Round 3: Work the combination of 1 sc and 1 inc a total of 6 times around. [18 sts]
- Round 4: Work the combination of 2 sc and 1 inc a total of 6 times around. [24 sts]
- Round 5: Work 1 sc in each stitch around in BLO. [24 sts]
- Rounds 6–8: Work 1 sc in each stitch around for 3 rounds. [24 sts]
- Round 9: Work 1 sc in the first 6 stitches, then work the combination of 1 sc and 1 dec a total of 6 times. [18 sts]
- Round 10: Work 1 sc in the first 6 stitches, then work 6 dec. [12 sts]
- Rounds 11–12: Work 1 sc in each stitch around for 2 rounds. [12 sts]
- Sl st to finish. Stuff and leave a tail for sewing.
Small Spikes (Make 2)
- Round 1: Work 3 sc into a magic ring. [3 sts]
- Round 2: Work 3 inc around. [6 sts]
- Round 3: Work the combination of 1 sc and 1 inc a total of 3 times around. [9 sts]
- Round 4: Work 1 sc in each stitch around. [9 sts]
- Sl st to finish. Leave a tail.
Medium Spikes (Make 4)
- Round 1: Work 3 sc into a magic ring. [3 sts]
- Round 2: Work 3 inc around. [6 sts]
- Round 3: Work the combination of 1 sc and 1 inc a total of 3 times around. [9 sts]
- Round 4: Work the combination of 2 sc and 1 inc a total of 3 times around. [12 sts]
- Round 5: Work 1 sc in each stitch around. [12 sts]
- Sl st to finish. Leave a tail.
Large Spike (Make 1)
- Round 1: Work 3 sc into a magic ring. [3 sts]
- Round 2: Work 3 inc around. [6 sts]
- Round 3: Work the combination of 1 sc and 1 inc a total of 3 times around. [9 sts]
- Round 4: Work the combination of 2 sc and 1 inc a total of 3 times around. [12 sts]
- Round 5: Work the combination of 3 sc and 1 inc a total of 3 times around. [15 sts]
- Round 6: Work 1 sc in each stitch around. [15 sts]
- Sl st to finish. Leave a tail.
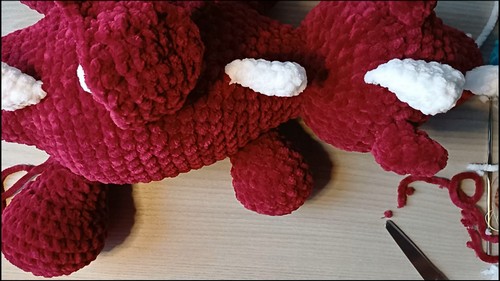
Wings (Make 2)
Worked flat in rows.
- Row 1: Chain 3. Starting in the 2nd chain from the hook, work 2 sc. Chain 1 and turn. [2 sts]
- Row 2: Work 1 inc in the first stitch, then 1 sc in the next. Chain 1 and turn. [3 sts]
- Row 3: Work 1 sc in the first 2 stitches, then 1 inc in the last. Chain 1 and turn. [4 sts]
- Row 4: Work 1 inc in the first stitch, then 1 sc in the next 3. Chain 1 and turn. [5 sts]
- Row 5: Work 1 sc in the first 4 stitches, then 1 inc in the last. Chain 1 and turn. [6 sts]
- Row 6: Work 1 inc in the first stitch, then 1 sc in the next 5. Chain 1 and turn. [7 sts]
- Row 7: Work 1 sc in each stitch across. Chain 1 and turn. [7 sts]
- Row 8: Work 1 dec over the first two stitches, then 1 sc in the next 5. Chain 1 and turn. [6 sts]
- Row 9: Work 1 sc in the first 4 stitches, then 1 dec over the last two. Chain 1 and turn. [5 sts]
- Row 10: Work 1 dec over the first two stitches, then 1 sc in the next 3. Chain 1 and turn. [4 sts]
- Row 11: Work 1 sc in the first 2 stitches, then 1 dec over the last two. Chain 1 and turn. [3 sts]
- Row 12: Work 1 dec over the first two stitches, then 1 sc in the last. Chain 1 and turn. [2 sts]
- Row 13: Work 1 dec. [1 st]
Wing border:
- Chain 2
- Work 1 dc into the same final decrease stitch
- In the next edge stitch, work 1 hdc
- Work 4 sc down the side edge
- In the peak row, work 1 hdc, 1 dc, and 1 hdc
- Work 3 sc down the next side edge
- In the final corner, work 1 hdc and 1 dc
- Cut yarn leaving a tail
Assembly
Head and face:
- Use the long yarn tail to sculpt the face by weaving through the eye placement area around Round 9 of the head
- Pull firmly between both eye positions and shape gradually until both sides match — this defines the muzzle and brow ridge
- Embroider the eyes with black acrylic yarn, set just below the sculpted brow, keeping both level and checking symmetry before securing
Ears:
- Fold each ear flat, then fold again vertically
- Pin to the head around Round 14, spaced approximately 6 stitches apart
- Check symmetry from the front before sewing permanently
Body to head:
- Identify the belly side using the flat sections created by the 6 sc areas in the body rounds
- Stuff the neck firmly, then sew the body to the head using the long tail
Spikes:
- Flatten each spike before sewing
- Place them evenly down the spine in this order: small, medium, medium, large, medium, medium, small
Wings:
- Attach between Rows 11 and 14 of the body, approximately one stitch away from the center spike line
- Check both wings from the front before sewing permanently
Limbs:
- Place the dragon on a flat surface to position the limbs
- Front paws sit approximately 3 rounds below the neck
- Back paws sit approximately 10 rounds below the front paws
- Make sure the boot-shaped decreases face forward on all four paws
Stuffing notes:
- Stuff the head firmly and the neck tightly for support
- Add stuffing to the tail gradually rather than all at once
- Avoid overstuffing the body — too much distorts the shaping
- Massage the fiberfill into corners for a smooth, even finish
FAQ
Q: Can I add wire to make the wings or tail poseable? Yes — a pipe cleaner inserted into each wing before the border round is worked, or threaded through the tail before closing, holds a pose well. Bend the ends back on themselves before inserting so there are no sharp points. This modification is not suitable for toys intended for children under three.
Q: My spike spine is flopping sideways rather than standing upright. What helps? Flattening each spike before sewing is the key step — a spike sewn as a tube stands differently than one that’s been pinched flat first. Also check that you’re sewing through the body fabric rather than just catching surface loops; a deeper anchor stitch holds the spike vertical under the weight of the piece.
Q: Can I substitute safety eyes instead of embroidering them? Absolutely. The sculpting technique described in the assembly section was designed for embroidered eyes, but 10 mm or 12 mm safety eyes placed just below the brow ridge work equally well. Position them before the head is fully closed and check symmetry from the front before locking the washers. For children under three, stick with embroidery — safety eye hardware is a choking hazard regardless of size.