
Two pieces, one payoff: a fluffy chick that lifts out of its cracked shell and drops back in. That reveal is what makes this crochet chick in egg pattern worth making over a plain chick — it turns a small amigurumi into something people actually play with. Sized as a keychain, so it clips to a bag or a set of keys. Both pieces use basic stitches and take an evening between them. Free pattern’s here.
Yarn scraps and a keyring are all it takes to end up with one of the most charming little keychains you will ever make. These crochet baby chick amigurumi come in two versions, one peeking out of a cracked blue egg and one standing free, and both are small enough to finish in a single sitting.
Crochet Baby Chick In Egg Amigurumi
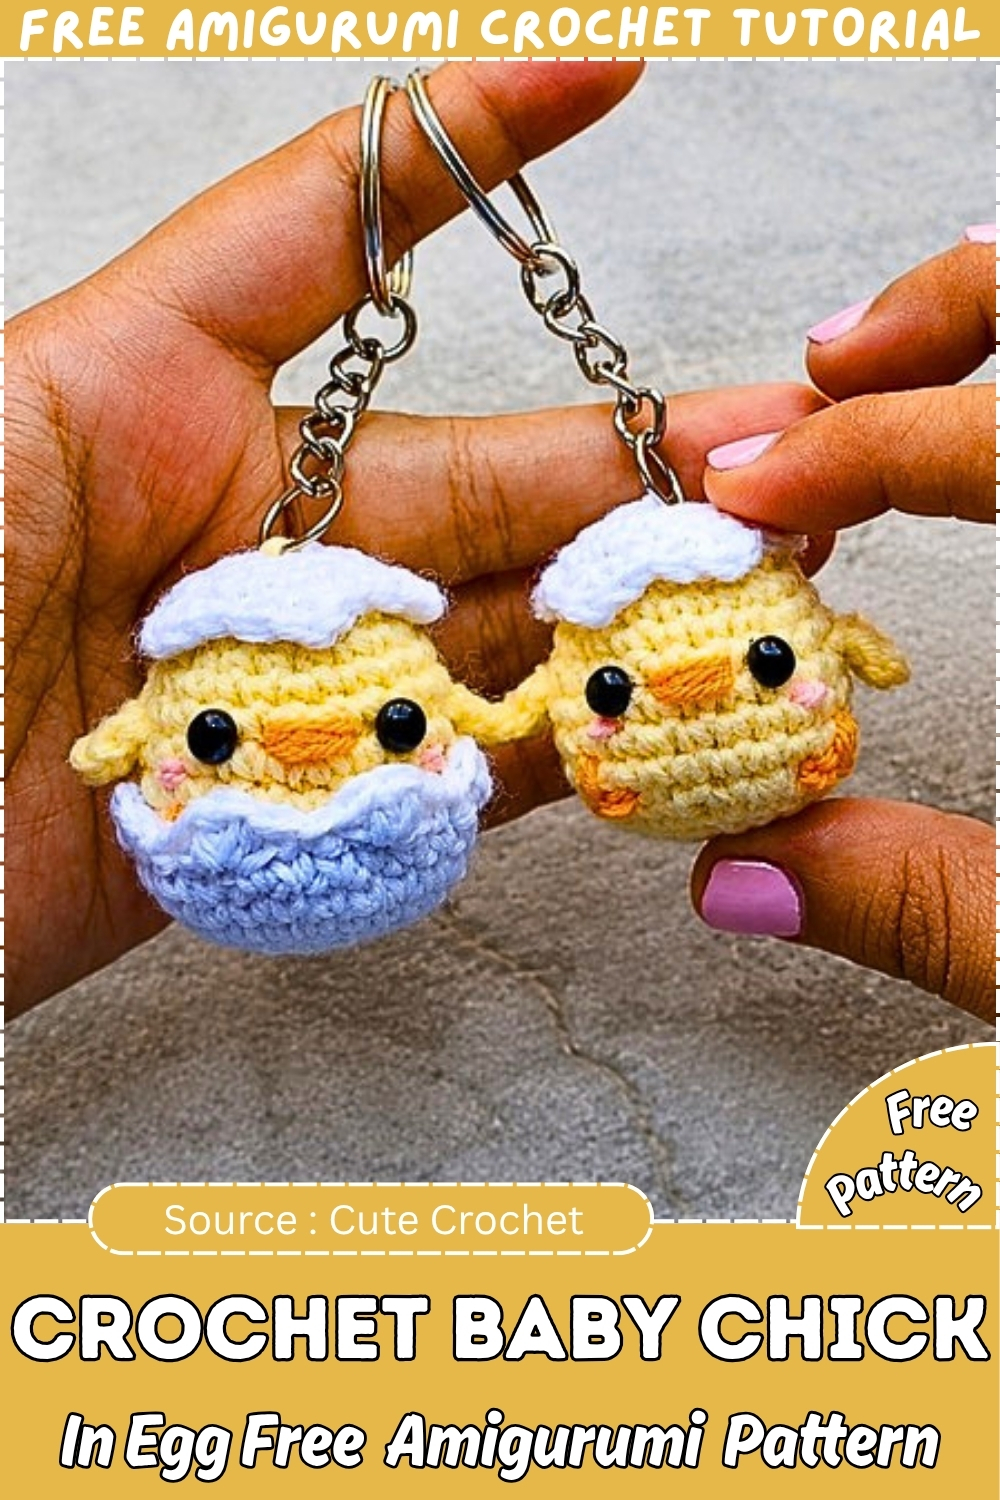
Free Crochet Baby Chick in Egg Pattern — Tiny Keychain Amigurumi with Jagged Eggshell and Embroidered Face
A baby chick that sits inside a cracked egg, small enough to hang from a keychain and detailed enough to make people stop and look twice. The construction is straightforward — single crochet throughout with a handful of embroidered details — and the jagged eggshell edge is built directly into the final round rather than cut or shaped afterward. This is a genuinely compact make that suits an afternoon or a quiet evening. Yarn substitution note at the bottom, but read it: the hook size choice here actually matters for how the piece holds together.
Materials
Yarn: 4-ply in light yellow (chick body), white (egg), orange (beak and feet), and pink (blush cheeks)
Hook: 3 mm — sized intentionally smaller than the yarn label recommends to keep the fabric tight enough that stuffing won’t show through
Other supplies:
- 4 mm safety eyes with locking washers
- Polyester fiberfill stuffing
- Tapestry needle
- Stitch marker
- Blank keychain ring with jump ring
Abbreviations
- sc — single crochet
- inc — increase (2 sc into the same stitch)
- dec — invisible decrease (through front loops only)
- hdc — half double crochet
- dc — double crochet
- sts — stitches
Yarn Note
The 3 mm hook paired with 4-ply yarn is the right combination for this piece — it keeps the fabric dense so no stuffing peeks through the stitches on a small keychain-scale amigurumi. Any smooth DK or light worsted yarn works in place of 4-ply as long as you size the hook down one step from whatever the label recommends. The egg, feet, beak, and blush all use very small amounts, so this is an ideal project for using up scraps.
The Pattern
Part 1 — The Chick’s Body
Use yellow yarn. Work in continuous rounds — do not join at the end of each round. Place a stitch marker in the first stitch of each new round and move it up as you go.
Round 1:
- Make a magic ring
- Chain 1 — this chain does not count as a stitch
- Work 6 sc into the center of the ring
- Pull the yarn tail to draw the ring completely closed with no hole at the center
New to crochet and not sure how to read a pattern yet? The video tutorial below will guide you through it step by step, you’ve got this!
Round 2:
- Work 1 inc into every stitch around — 2 sc into each of the 6 stitches from Round 1, working one after the other all the way around
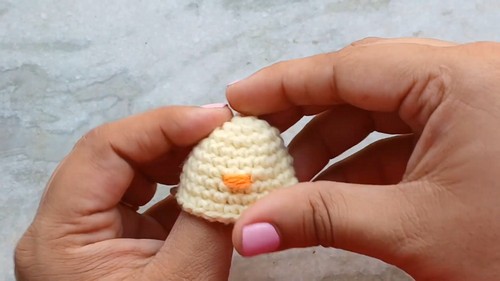
Round 3:
- Work 1 sc into the first stitch, then 1 inc into the next stitch
- Repeat this combination — 1 sc followed by 1 inc — a total of 6 times around the round
Round 4:
- Work 1 sc into every stitch around with no increases or decreases
- This even round adds a small amount of height and lets the rounded shape settle
Round 5:
- Work 1 sc into each of the next 5 stitches, then 1 inc into the following stitch
- Repeat this combination — 5 sc followed by 1 inc — a total of 3 times around the round
Round 6:
- Work 1 sc into every stitch around with no increases or decreases
Round 7:
- Work 1 sc into each of the next 6 stitches, then 1 inc into the following stitch
- Repeat this combination — 6 sc followed by 1 inc — a total of 3 times around the round
Rounds 8 and 9:
- Work 1 sc into every stitch around both rounds with no increases or decreases
- Repeat the same even round twice
Embellishing the face — do this now, between Rounds 8 and 9, while the body is still fully open:
Beak:
- Thread a length of orange yarn onto your tapestry needle
- Embroider a small horizontal beak between Rounds 6 and 7, positioning it at the center front of the chick’s face
- Work the embroidery with a relaxed, moderate tension so the stitches sit on top of the fabric rather than sinking into it
- Knot the yarn securely on the inside of the body and weave the tail in before moving on
Safety eyes:
- Insert one 4 mm safety eye directly to the left of the beak, exactly 1 stitch away from it, between Rounds 6 and 7
- Insert the second eye the same distance to the right of the beak, mirroring the first
- Working outward from the beak on each side — rather than measuring from the edges of the head — is what keeps the face symmetrical
- Before pressing the locking washers on, check the spacing from the front; once the washers click into place the eyes cannot be adjusted
- Press each washer firmly all the way down the post until it locks tightly against the inside fabric
- Do not add any stuffing yet — the body must remain empty while you secure the washers from the inside
Closing the body:
Round 10:
- Work 1 sc into each of the next 2 stitches, then work 1 invisible decrease over the following 2 stitches
- For the invisible decrease: insert your hook through the front loop only of the next stitch, then through the front loop only of the stitch after it — you now have 2 loops on the hook from two separate stitches — yarn over and pull through both of those loops, then yarn over and pull through the remaining 2 loops on the hook to complete the stitch
- Repeat this combination — 2 sc followed by 1 invisible dec — a total of 6 times around the round
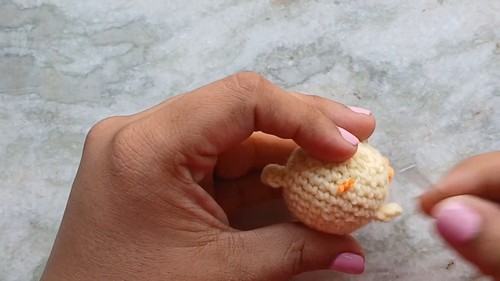
Round 11:
- Work 1 sc into the first stitch, then work 1 invisible decrease over the next 2 stitches
- Repeat this combination — 1 sc followed by 1 invisible dec — a total of 6 times around the round
Stuff the body firmly now — add fiberfill in small pinched pieces and distribute it evenly so the chick holds a smooth, rounded shape. Stop before the stitches begin to stretch or separate — overstuffing distorts the shape and can make the fiberfill show through.
Round 12:
- Work 1 invisible decrease over every pair of stitches around — 6 decreases worked sequentially, one after the other
Finishing:
- Cut the yarn, leaving a long tail of approximately 20 cm
- Pull the tail through the final stitch to secure it
- Thread the tail onto your tapestry needle and weave it through the front loop only of each of the 6 remaining stitches all the way around the opening
- Pull the tail steadily to draw the bottom of the body closed into a tight, flat circle
- Do not cut this tail — guide the needle upward straight through the center of the body and bring it out at the very top of the head
- Leave this long yellow tail hanging from the top of the head — it will be used in the final assembly step to attach the keychain ring through the eggshell
Part 2 — Wings, Feet, and Blush
Wings (Make 2) — use yellow yarn:
First wing:
- Attach yellow yarn with a slip stitch into the body between Rounds 6 and 7, skipping exactly 1 stitch outward from the eye on one side
- Chain 3
- Skip the first chain from the hook — the one sitting closest to your hook
- Work 1 hdc into the second chain from the hook
- Work 1 hdc into the third chain from the hook
- Skip 1 stitch along the body
- Slip stitch into the next body stitch to anchor the outer tip of the wing
- Fasten off and weave in both ends completely
Second wing:
- Turn the chick upside down — this keeps the stitch direction of the second wing matching the first, so both wings sit consistently
- Attach yellow yarn 4 stitches away from the other eye on the opposite side of the body, between Rounds 6 and 7
- Repeat the exact same steps as the first wing: chain 3, skip the first chain, 1 hdc in each of the next 2 chains, skip 1 body stitch, slip stitch into the next body stitch
- Fasten off and weave in all ends
Feet — use orange yarn:
- Thread a length of orange yarn onto your tapestry needle
- Embroider three-toed webbed feet onto the front bottom of the chick, between Rounds 9 and 10, aligned vertically below the eyes
- Work each toe as a short straight stitch radiating outward from a central point, fanning three stitches for each foot
- Knot the yarn securely on the inside and weave in the tail
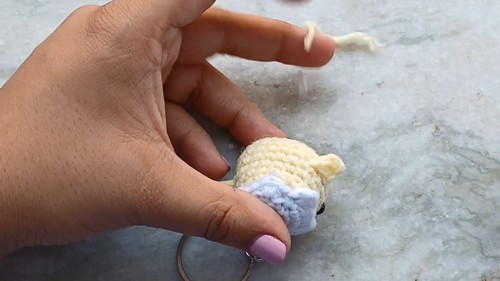
Blush — use pink yarn:
- Thread a short length of pink yarn onto your tapestry needle
- Embroider a small 1-stitch-wide horizontal line directly below each eye for the cheeks
- Work with a relaxed, light tension so the pink stitches rest softly on top of the fabric rather than pulling in
- Knot securely on the inside and weave in the tail
Part 3 — The Eggshells
Use white yarn for both shells.
Bottom Eggshell:
Rounds 1 through 3:
- Work the exact same sequence as the first 3 rounds of the chick body
- Make a magic ring, work 6 sc into the center, pull closed (Round 1)
- Work 1 inc into every stitch around (Round 2)
- Work the combination of 1 sc and 1 inc a total of 6 times around (Round 3)
Round 4:
- Work 1 sc into each of the next 2 stitches, then 1 inc into the following stitch
- Repeat this combination — 2 sc followed by 1 inc — a total of 6 times around the round
Rounds 5 and 6:
- Work 1 sc into every stitch around both rounds with no increases or decreases
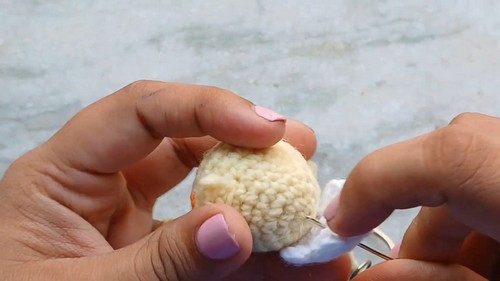
Round 7 — the jagged edge:
- Skip the next stitch entirely without working into it
- Into the following stitch, work 1 hdc, then 1 dc, then 1 hdc — all 3 stitches into the same single stitch to form one sharp point
- Skip the next stitch entirely
- Slip stitch into the following stitch
- Repeat this full sequence — skip, 3-stitch point, skip, sl st — all the way around the round to create 6 sharp jagged points
- Slip stitch to close the round
- Fasten off and weave in the tail completely
Top Eggshell:
Rounds 1 through 3:
- Work the exact same sequence as the first 3 rounds of the chick body — magic ring with 6 sc, increase round, then the 1 sc and 1 inc combination round
Round 4 — the jagged edge:
- Work the same jagged point sequence as the bottom eggshell — skip, 3-stitch point into one stitch, skip, sl st — repeating around the round
- Because this shell has fewer stitches than the bottom shell, you will make 4 standard points in the usual way
- For the 5th and final point, work the 3-stitch cluster into the stitch without skipping any stitches on either side of it — this slight adjustment fills the remaining space cleanly
- Fasten off and weave in the tail
Part 4 — Assembly and Keychain
- Thread the long yellow tail still hanging from the top of the chick’s head onto your tapestry needle
- Pass the needle straight up through the top center of the Top Eggshell, bringing the tail through to the outside
- Loop the yellow tail securely through the jump ring of your keychain ring — wrap it through the ring at least twice so the connection is firm
- Pass the needle back down through the top center of the eggshell and straight down through the center of the chick’s body
- Repeat this full pass — up through the shell, through the ring, back down through the shell and body — one more time to make the attachment double-secure
- Pull the tail taut, knot it firmly in a hidden position beneath the eggshell where the knot won’t be visible
- Snip the remaining tail close to the knot
- Sit the chick’s bottom into the Bottom Eggshell — it should fit snugly enough to stay in place from the shape alone
- If you prefer a permanent attachment, add a tiny dot of fabric glue between the chick’s base and the inside of the bottom shell, or work two or three hidden stitches of matching yarn through both layers

Notes on Face Placement and Stuffing
Place the beak at the center of the face first, then count exactly 1 stitch outward on each side for the eyes — working relative to the beak rather than measuring from the edges of the head is what keeps the expression symmetrical. All the face details sit between Rounds 6 and 7, which places the expression low on the body and gives the chick its characteristic wide-eyed, low-set look. Stuffing goes in after Round 11 but before Round 12 — that is the last moment the opening is wide enough to reach inside comfortably and distribute fiberfill evenly.
FAQ
Q: Can I skip the keychain ring and use this as a decorative ornament instead? Easily. Omit the keychain hardware entirely and instead, after drawing the long tail through the top of the eggshell, tie a short loop of yellow yarn to hang it from. A loop of about 8 to 10 cm of chain stitches threaded through the same point and knotted gives you a hanging ornament version that works for Easter decorations, garlands, or gift toppers. The chick and egg construction is identical either way.
Q: Are 4 mm safety eyes appropriate for a gift going to a child? Safety eyes with locking washers are not recommended for children under three. For a baby gift or a toy for a young toddler, embroider both eyes in black yarn using a tight satin stitch instead. The result reads clearly against the yellow face and eliminates any hardware risk entirely. For children over three, safety eyes with properly locked washers are generally considered secure — press the washers all the way down the post and check that they cannot be worked loose before giving.
Q: My jagged eggshell points aren’t staying pointed — they’re softening into scallops. What can I do? The points stay sharpest when the skip stitches on either side of each cluster are skipped cleanly — if you accidentally work into a skipped stitch, the point spreads out and reads as a scallop instead. Go slowly on the jagged round and count carefully before each cluster. Blocking the finished shell helps too — lightly mist the white shell with water, pin each point out to a sharp angle on a foam mat, and let it dry completely. The 4-ply yarn holds a blocked shape well.